Posted on
September 4, 2025
WebGPU has been blowing up recently. It’s finally available in most modern browsers, and it’s getting leveraged even on the native layer to supercharge 2D and 3D rendering on desktop and mobile. I’ve done a bit of work with WebGPU in Rust, but I put development on pause until compatibility got to a better place. Now that we’re here, I figured I’d reapproach my WebGPU renderer and take it more seriously.
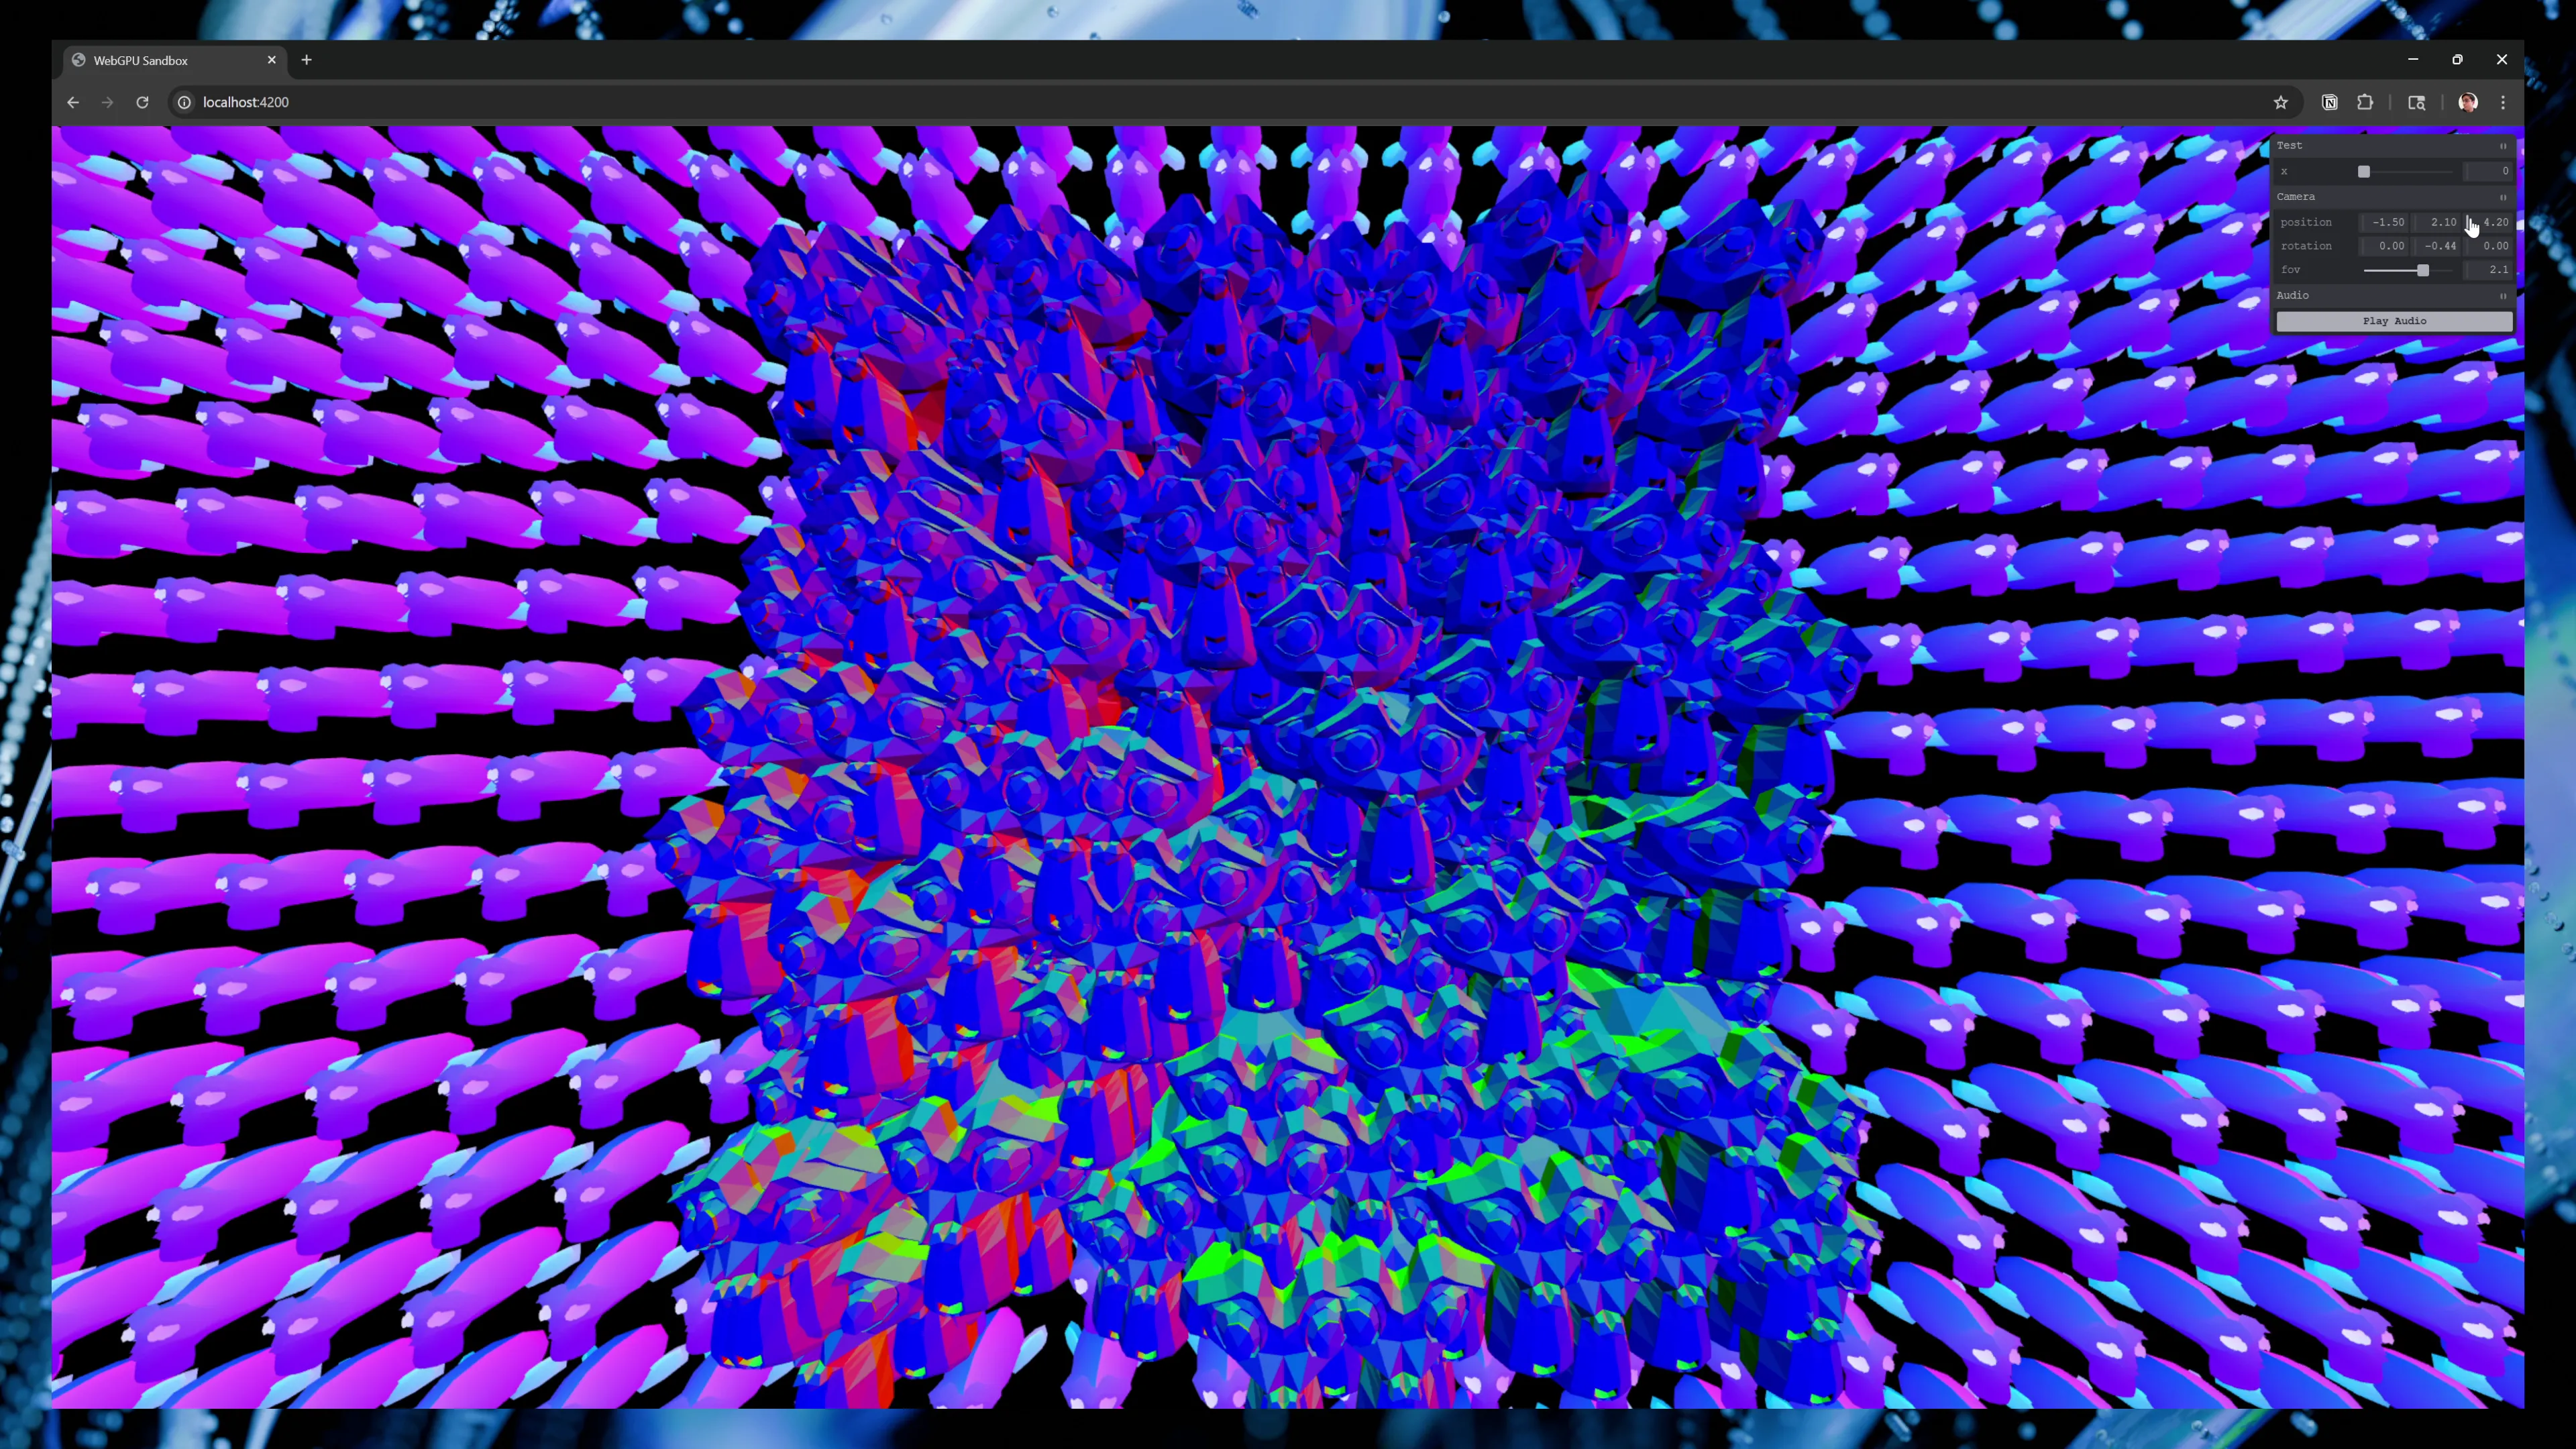
I personally use it as a sketchbook for creative projects, like mixing in audio playback and visualization with the 3D (great excuse to use the compute shaders). But I’m trying to polish it into a place where I could use it on my personal website to replace ThreeJS and react-three-fiber.
As I’ve been building the renderer, once you get past the fundamentals, I noticed it becomes harder to find guidance. There’s plenty of tutorials that talk about the initial steps setting up WebGPU to render some 3D — but few actually delve into the practicality of applying an API in a real scenario. Sure I can render a spinning cube with a texture — but how do I build a system that can support multiple models, materials, lights and whatnot?
This blog will be an example of a simple 3D renderer that you’d use in a web app or game. It’s flexible, where you can provide any scene to render, as well as shaders. And the API might look similar to other 3D rendering libraries like ThreeJS or BabylonJS.
ℹ️ This article assumes you’ve done some sort of WebGPU 101 tutorial course from start to…mostly finished. For a web specific version, check out WebGPU Fundamentals. Or if you’re feeling adventurous, try it in Rust using wgpu (I even have a few previous blogs that cover that flavor of renderer).
Why not use that old OpenGL tutorial?
If you’ve been doing graphics programming for a bit, you’ll probably have encountered a few more “advanced” OpenGL tutorials that do tackle things like “architecture” of a 2D or 3D application. These are actually great places to start to understand the core concepts that comprise the common structures you’ll see repeated across apps.
But as great of a reference as they can be, there’s one big issue — OpenGL (and subsequently WebGL) is a much different API than WebGPU. OpenGL is an older API, which has been replaced by more modern APIs like Vulkan, DirectX 12, or WebGPU. These new APIs use a immutable stateless system that requires the user to be much more explicit with their setup, and do a bit more management (and thus control) of memory and GPU procedures.
So why does that matter?
Here’s what a Shader class might look like in OpenGL. We load the shader code, then use a bunch of global OpenGL functions (like glCreateShader()) to send the shader to the renderer. Then when we can use() the shader to assign it to a current object rendering, or setBool() to handle updating the uniform buffer with new data.
void Shader::load(const char* vertexPath, const char* fragmentPath)
{
	// Load shader code from disk

  // Compile shaders in OpenGL
  unsigned int vertex, fragment;

  // Vertex shader
  vertex = glCreateShader(GL_VERTEX_SHADER);
  glShaderSource(vertex, 1, &vShaderCode, NULL);
  glCompileShader(vertex);
  checkCompileErrors(vertex, "VERTEX");


  // Delete the shaders as they're linked into our program now and no longer necessary
  glDeleteShader(vertex);
}

/// <summary>
/// Activate the shader
/// </summary>
void Shader::use()
{
    // std::cout << "Using shader..." << std::endl;
    // std::cout << ID << std::endl;
    glUseProgram(ID);
}

/// <summary>
/// Sets uniform on the `name` shader
/// </summary>
/// <param name="name"></param>
/// <param name="value"></param>
void Shader::setBool(const std::string& name, bool value) const
{
    // We convert the boolean into an integer (1 or 0)
    glUniform1i(glGetUniformLocation(ID, name.c_str()), (int)value);
}
Now let’s see what a shader looks like in WebGPU:
export async function createRenderPipeline() {
  // Setup adapter and device
  const adapter = await window.navigator.gpu.requestAdapter();
  if (!adapter) {
    console.error(
      "[DEVICE] Couldn't create an adapter. Please check if your browser supports WebGPU.",
    );
    return;
  }
  const device = await adapter.requestDevice();

  // Setup shader + Render pipeline
  const pipelineDescriptor: GPURenderPipelineDescriptor = {
    vertex: {
      module: vertexCode,
      entryPoint: "vertex_main",
      buffers: vertexBufferDescriptor,
    },
    fragment: {
      module: fragmentCode,
      entryPoint: "fragment_main",
      targets: [
        {
          format: "bgra8unorm",
        },
      ],
    },
    primitive: {
      topology: config.wireframe ? "line-list" : "triangle-list",
    },

    // Add depth testing
    depthStencil: {
      depthWriteEnabled: true,
      depthCompare: "less",
      format: "depth24plus",
    },

    multisample: {
      count: 4,
    },

    layout: "auto",
  };

  const pipeline = device.createRenderPipeline(pipelineDescriptor);

  return pipeline;
}
And that’s not even including the code to actually create and update uniforms, that’s a whole separate class.
So what’s so different about the two? With OpenGL, we can just create shaders and use them as needed. And applying a uniform? OpenGL has a special functions for each data type (so an integer would be updated using glUniform1i()).
But with WebGPU, when we want to use a shader, we need to create a new render pipeline for each set of shaders. Then with uniforms, we need to create a buffer (similar to OpenGL), but we also need to create a “bind group” that assigns the uniform to our shader — and gives the shader vital info about the uniforms (like which “slot” aka @group they can be assigned to).
And not only is the WebGPU code just more complicated — we also have to keep our own state around. For OpenGL, we only needed to keep track of the shader ID we created to use it — everything else was handled by the OpenGL backend.
For WebGPU, we need to keep track of the device (aka GPUDevice), as well as the GPURenderPipeline we created. This requires that we pass the device around (or keep it in a global store) and save any render pipelines in an app-based cache.
And this is just one part of the rendering pipeline, you can imagine how different things become between other processes. This radically alters the architecture and forces it to adapt to these new dependencies we need to manage and pass around.
ℹ️ Want more comparisons? Check out the WebGL Fundamentals course and compare each concept to the WebGPU alternative.
Why not just use “X” library as reference?
As I learn, I find that using libraries as a reference sucks. Libraries are built by many people, evolve over time, and are made to be as flexible as possible. This often leads to a lot of API abstraction that’s hard to wade through. Is this important for rendering — or vital for DX? Unless the code is documented well (and even if it is), it’s hard to understand the intent without deep intense research into it.
That’s why looking at libraries like ThreeJS or BabylonJS is difficult if you’re just trying to build a WebGPU renderer and you’re only interested in that. If you were interested in building a cross-platform/engine renderer (like one that supports WebGPU, but falls back to WebGL where needed) — then yeah these are probably good references. Otherwise? It might be difficult to make your way around the repo reasonably, especially when you’re just trying to learn a different topic (not become an expert in the library and it’s opinions).
That being said, I will try and reference other libraries when discussing the renderer architecture in this blog. We’re not exactly reinventing the wheel here, so many of these topics will be tread by other libraries in slightly different ways. And I’ll make your life easier by pointing you to the right place - instead of digging through 3+ different monorepos. That being said though, breaking down each one in detail would be the subject of it’s own blog, so I’ll try to keep things brief and concise.
The renderer structure
Before we dive deep into the code, let’s take a high level look at the architecture that we’ll be building.
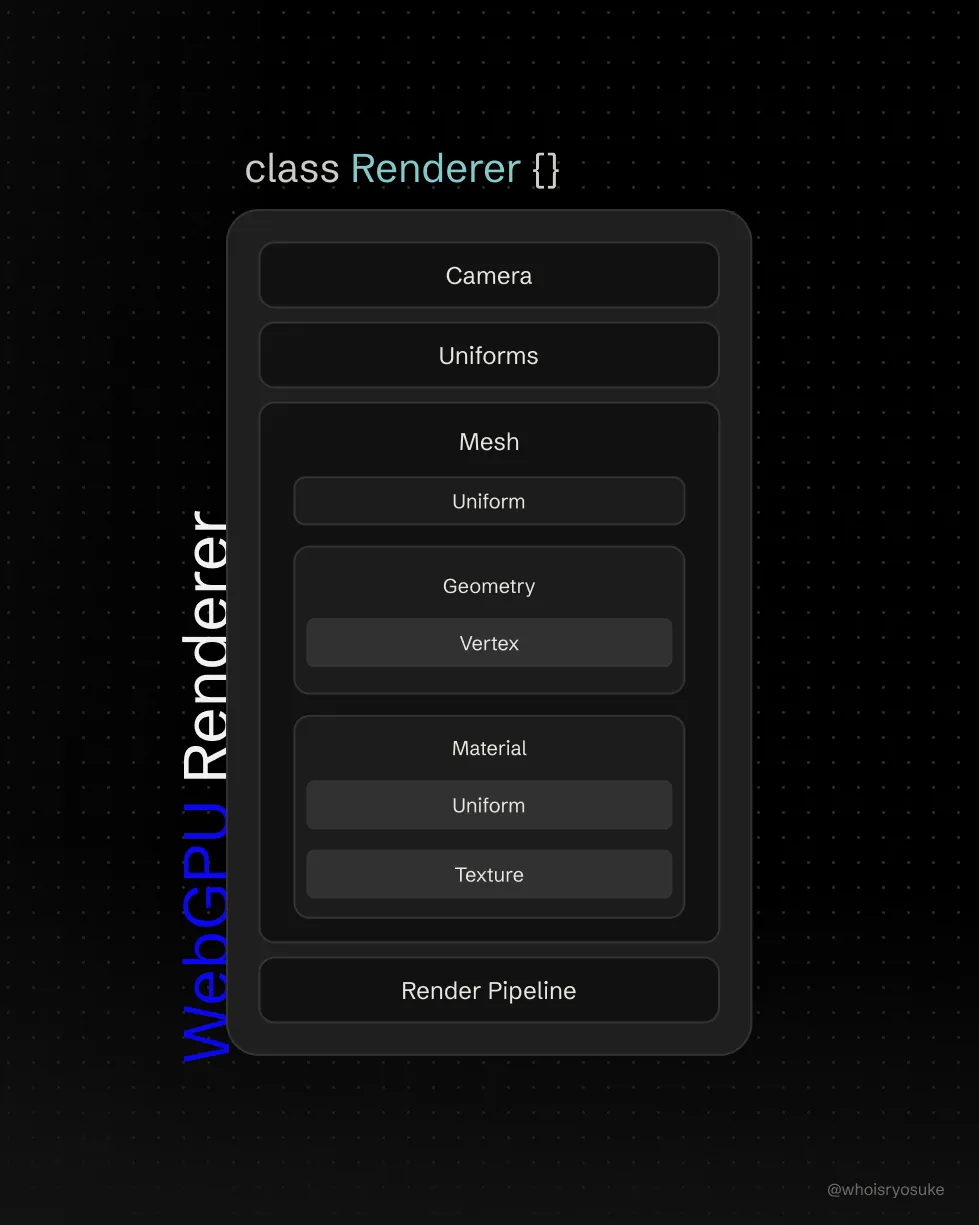
Let’s break down the structure a bit more and understand each module that will comprise our renderer:
- **
Camera** - Handles placing a “camera” in the scene and allows user to move it around using the mouse or keyboard (WASD). - **
Vertex** - Defines the structure of a vertex in the renderer. A “vertex” represents 1 point on the mesh, and it could contain 1 or more properties from the geometry (like the position, normal, and UV data — all packed into 1 “vertex”). 3 vertices make a triangle — which forms a “face”, which is one of many puzzle pieces that make up the entire 3D object. - **
Geometry** - The 3D object data - basically vertex and index data, as well as the GPU buffers that store them. Buffer / Uniform Manager- Handles allocating buffer data for “uniforms” or data that we send to shaders. For example we could have a uniform fortimethat passes the latest timestamp to the shader, allowing it to animate objects based off the ever-incrementingtimenumber.- **
Material** - The “styling” of the 3D object, represented as properties that get passed to the shader (like acolorwould change color of mesh). Also handles things like textures (tapping into the utility functions). - **
Texture** - Not a class, but more utility functions for handling texture data and generating the appropriate buffers and setup (like a “sampler”). - **
Mesh** - Wraps theGeometryandMaterialclasses. You can think of it like an Object in Blender. Render Pipeline- Handles creating a render pipeline, whether it’s the default PBR one, or custom ones that the user needs in order to define a custom shader.- **
Renderer Store** (Device, Render Pipelines, Materials) - *Optional* - but simplifies the API a bit for the dev and end user. Instead of having to do dependency injection to pass important objects around like theGPUDevice— we save them in a global store that anyone can tap into by running astore.getState()function (or even subscribe to changes if necessary). Perfect for sharing things like materials and to prevent duplicating data. Loaders(OBJ, GLTF, etc) - Utility functions to load 3D objects from industry standard file types. They parse the file data and convert it into theGeometryandMaterialclasses we created — and eventually theMeshclass together. We won’t cover this, but you can find a nice OBJ loader in my source code for reference.
Here’s what that kind of looks like with some condensed pseudo code:
// Run renderer (start here)
async function main() {
  const renderer = new WebGPURenderer();
  await renderer.init();

	// Pass an optional render callback to get latest time + control stuff
  renderer.render(renderCallback);
}

window.addEventListener("load", main);

// The "Renderer"
export default class WebGPURenderer {
	// The necessities
  canvas!: HTMLCanvasElement;
  device!: GPUDevice;
  context!: GPUCanvasContext;

  // The modules
  camera!: Camera;
  globalUniforms!: Uniforms<GlobalUniforms>;
  meshes: Mesh[] = [];
  materials: Record<string, Material> = {};

	async init() {
	  // Create default render pipeline
		createRenderPipeline();

		// Load meshes (could happen outside too)
		const mesh = new Mesh();
		this.meshes.push(mesh);

		// Update object position using Uniform class prop
	  mesh.uniforms.uniforms.position.y = 2;
	  mesh.uniforms.setUniforms();

	  const camera = new Camera()
	  const globalUniforms = new Uniforms();
	}

  render(callback: (props: RenderProps) => void) {
    const render = (timestamp: number) => {

      // Render
      const passEncoder = commandEncoder.beginRenderPass(renderPassDescriptor);
      // Loop over each mesh and render it
      this.meshes.forEach((mesh) => {
        const material = this.materials[mesh.material];

        // Set the pipeline to the match the material
        passEncoder.setPipeline(material.renderPipeline);
        passEncoder.setBindGroup(0, this.globalUniforms.uniformBindGroup);

        // Set bind groups (uniforms, texture, etc)
        passEncoder.setBindGroup(
          UNIFORM_BIND_GROUP_LAYOUT_IDS["locals"],
          mesh.uniforms.uniformBindGroup
        );
        passEncoder.setBindGroup(
          UNIFORM_BIND_GROUP_LAYOUT_IDS["material"],
          material.uniforms.uniformBindGroup
        );
        if (material && material.textureBindGroup) {
          passEncoder.setBindGroup(
            UNIFORM_BIND_GROUP_LAYOUT_IDS["texture"],
            material.textureBindGroup
          );
        }

        // Set geometry buffers (vertex + index)
        passEncoder.setVertexBuffer(0, mesh.geometry.vertexBuffer);
        passEncoder.setIndexBuffer(mesh.geometry.indexBuffer, "uint16");

        // Draw the mesh
        passEncoder.drawIndexed(mesh.geometry.indices.length, 1);
      });

      passEncoder.end();
    }
  }
Without these wrappers, the code would probably be 3-4x as long (and repetitive).
Starter pack
If you want to follow along, you can use my repo at this starting point. That will get you a basic WebGPU renderer in a single renderer.ts file, as well as a Camera module started. I won’t cover the camera in this blog because that is actually covered by every WebGPU tutorial out there (and some of my navigation math is wonky right now and I’m not interested in fixing it lol).
If you clone that project at that point, you should be able to roughly follow along. But I also recommend just browsing through my own commits and seeing the journey yourself.
The Architecture
Vertex
One of the core structures you’ll define in your renderer is vertex data. But what is vertex data?
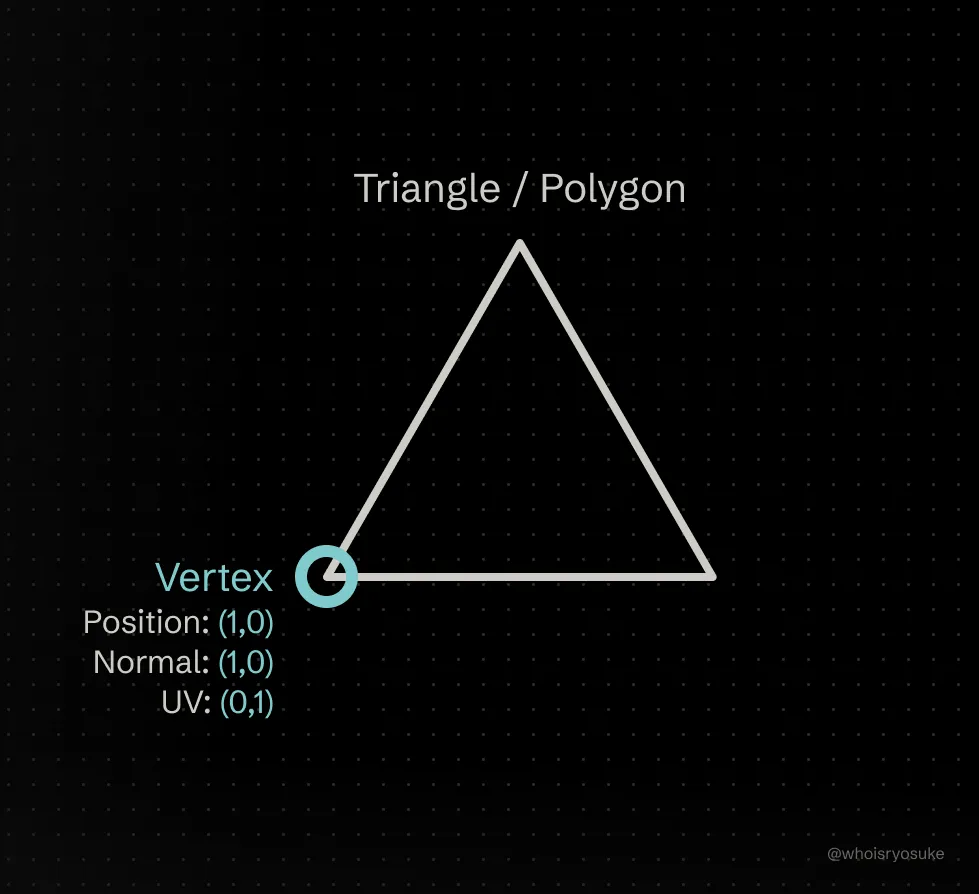
Vertex data represents a single point of our object, usually 1 of 3 points that make a single triangle “face” (or 1 of 4 or more in a polygon or n-gon), which are connected together to make up the object. When we talk about a “point” on a mesh, we’re usually referring to positional data (where is the point in 3D space).
But in 3D rendering, we might want to store more data alongside each points position. Like for instance, we might want to store “UV” data, which defines the coordinates for stretching an image texture across the entire mesh (usually 1 tri/polygon at a time)
When we render objects, we pass a vertex buffer to the command encoder, which then sends the vertex data to our vertex shader. The vertex shader then defines a structure (or struct) for that data, similar to a JS Object.
This takes our vertex buffer’s flat array of numbers (like [0, 1, 0.1]) and “aligns” it to data types in the shader. For example, for the position data we might use a 3D vector in our shader (aka vec3<f32>), which means for every point in our object, we’ll need at least 3 numbers per point in our array. So for an object with 6 points, we’d need 18 numbers in our array. The graphics backend does the work of taking our flat number array and the shader struct and converting it to a shader compatible object. That way we can access the position, UV, or any other data we attach to each vertex easily — without having to take our buffer array and grab values by index.
const objectPosition = [
  {
    x: 0,
    y: 1,
    z: 2,
  },
  // At least 2 other points to make a tri
];

// Loop over each object in array and flatten into buffer array
const flatPositions = objectPosition.reduce((merge, objPos) => {
  // Make a "vertex" - in this case, just position data
  // But could contain UV, normals, etc
  const vertex = [objPos.x, objPos.y, objPos.z];

  // Merge the arrays - make sure everything is "flat"
  return [...merge, ...vertex];
}, []);

// Create buffer-friendly array
const position = new Float32Array(flatPositions);

// `position` = [0, 1, 2, ...]
Then in the shader, we define our vertex structure in the vertex array - using the parameters of the vertex shader’s “main” function and the @location prefix to define the offset in the buffer.
@vertex
fn vertex_main(
	// We access the vertex "position" data here
  @location(0) position: vec3f
) -> VertexOut
{
	// Use position as needed (aka moving object)
	const new_position = position + vec3<f32>(0.0, 1.0, 0.0);
}
📁 If we wanted to add UV data after the position data, we’d use
@location(1)to let the shader know it comes after position data. So it’ll skip 3 array elements for us that represent the 3D position vector, then grab however many we need for the next property, then rinse repeat for each point in the object.
But how does the shader know how to access our vertex properties? That’s where the “vertex buffer descriptor” comes into play.
When we’re creating our render pipeline (aka GPURenderPipeline), we define a vertex property with a few properties - like module which contains our shader code. We also provide a buffers property, which contains our vertex buffer descriptors. These define the structure of our vertex data inside the buffer.
// Render pipeline
const pipelineDescriptor: GPURenderPipelineDescriptor = {
  vertex: {
    module: shaderModules.vertex,
    entryPoint: "vertex_main",
    buffers: vertexBufferDescriptor,
  },
  // ... Other properties ...
};
The vertex buffer descriptor is an array that contains objects that define our vertex structure. In our case, we need position data as a 3D vector (or float32x3 here, because a 3D vector is technically 3 pieces of Float32 data - aka 32-bit numbers with decimals).
// Setup "shape" of vertex (aka what data we're packing into each point of a mesh)
// Should match the structure of `Vertex` above
export const vertexBufferDescriptor: GPUVertexState["buffers"] = [
  {
    attributes: [
      // Position
      {
        shaderLocation: 0,
        offset: 0,
        format: "float32x3", // 4 * 3
      },
      // Normal
      {
        shaderLocation: 1,
        offset: 12,
        format: "float32x3", // 4 * 3
      },
      // UV
      {
        shaderLocation: 2,
        offset: 24,
        format: "float32x2", // 4 * 2
      },
    ],
    arrayStride: 32, // Add up all formats + padding to meet 16 multiple req.
    stepMode: "vertex",
  },
];
📁 This should all be familiar from any beginner WebGPU tutorial course. I won’t delve too deep into buffer requirements here (like padding properties that don’t meet the 16 bit size requirement).
All of this shouldn’t be new for you, but it’s important to understand how we can separate this from our core renderer and create a separate module for re-use.
For example, in a bigger 3D renderer, you often end up with multiple render pipelines (like one for rendering objects, and maybe another for particles). This means if you want to use the same 3D object in the main render pipeline and the particle one — you’ll need to share a vertex buffer description — that way the shape of the object doesn’t have to change dramatically.
ℹ️ Most 3D data is pretty uniform. When you download an OBJ or GLTF file and parse it, the data structure is pretty standardized (position will always be a 3D vector, UV will always be 2D, etc). Unless you’re working in a specific custom pipeline, like a video game that uses 4D position - but saves additional data into that 4th slot — or other wild techniques (like rendering VDBs or gaussian splats), you can safely assume that most 3D objects will follow this structure.
The actual vertex module
So how does this module actually look? Well, there’s not much to it. I’m trying to keep the renderer as simple as possible, so this module doesn’t need to be a class.
Instead, we’ll define a Typescript type that represents the structure of vertex data (on the “CPU-side” — aka in JS code not shader code). Then we’ll define a few functions that will use the Vertex data structure and handle any messy operations for us (like converting the Vertex data into a buffer-friendly Float32Array).
// Utility types for defining vectors as arrays
export type Number2DArray = [number, number]; // [0, 1]
export type Number3DArray = [...Number2DArray, number]; // [0, 1, 2]

// The actual vertex data
export type Vertex = {
  position: Number3DArray;
  normals: Number3DArray;
  uv: Number2DArray;
};

/**
 * Takes our vertex type and converts to an indexed array type for GPU buffers.
 * by merging all vertex data into a single contiguous array.
 */
export function createVertexBufferData(vertices: Vertex[]) {
  const data = vertices.reduce((merge, vertex) => {
    return [...merge, ...vertex.position, ...vertex.normals, ...vertex.uv];
  }, [] as number[]);

  return new Float32Array(data);
}
We’ll also export our vertexBufferDescriptor to use anywhere we want to render standard 3D objects.
Then in any vertex shader, we setup the function parameters appropriately to our Vertex structure:
@vertex
fn vertex_main(
  @location(0) position: vec3f,
  @location(1) normal: vec3f,
  @location(2) uv: vec2f
) -> VertexOut
{ }
And similar to above, we’ll make a quick utility function to take our Vertex data and flatten it into a buffer-friendly array:
export type Vector2D = {
  x: number;
  y: number;
};
export type Vector3D = Vector2D & {
  z: number;
};

export function generateVertexBufferData(
  positions: Vector3D[],
  normals: Vector3D[],
  uvs: Vector2D[],
) {
  let newVertices: number[] = [];
  positions.forEach((position, index) => {
    const normal = normals[index];
    const uv = uvs[index];
    const newVertex = [
      position.x,
      position.y,
      position.z,
      normal.x,
      normal.y,
      normal.z,
      uv.x,
      uv.y,
    ];
    newVertices.push(...newVertex);
  });
  return new Float32Array(newVertices);
}
📁 I ended up using
Vector3Dtypes here instead ofNumber3DArray. I started using arrays for data, but I found it harder to access and mutate specific properties when needed, so I switched to an Object withxyzorrgbproperties.
You can find the full vertex code here for reference, but there’s not much different.
And that’s it! We have Vertex data defined, let’s move on to creating Geometry to hold these vertices for each object.
Geometry
This is the first and easiest module you’ll often find yourself building. As you’re developing a renderer, you’ll find you need to store vertex - and usually index data - for each object you want to render. Want to render a cube? You’ll need a specific set of vertices. Want to render a sphere? Same deal, you’ll need to generate different vertices.
When you follow along with most tutorials you might find yourself creating functions like createCube() or createSphere(). This is a great starting point, and these will get used even later.
The Geometry class will encompass the final product of those functions — basically an object to contain the vertices and indices — and ideally — generating a GPU buffer for them and inserting the data into it.
Here’s what our Geometry class will look like:
export default class Geometry {
  name: string;

  /**
   * Represents the vertex data for vertex buffer
   * It contains all the mesh data, like position, normals, etc
   * Each vertex has: position (3), normal (3), UV (2) = 8 floats per vertex
   */
  vertices: Float32Array;
  indices: Uint16Array;

  // Buffers
  vertexBuffer!: GPUBuffer;
  indexBuffer!: GPUBuffer;

  constructor(
    device: GPUDevice,
    data: {
      vertices: Float32Array;
      indices: Uint16Array;
      name?: string;
    },
  ) {}

  createBuffers(device: GPUDevice) {}
}
We have a few properties:
vertices- This is a “buffer-friendly array” (akaTypedArraylikeFloat32Array) that contains our vertex data (akaVertexwe defined earlier).indices- Another buffer-friendly array, this timeUint16Array- since we’re storing numbers without decimals (akaintvsfloat), because each index is literally like an index in an array - it should increment by1for each subsequent value. Eachindicesnumber maps to aVertexin ourverticesarray.vertexBuffer- The actualGPUBufferthat stores ourverticesdata. This is where we update to see changes in renderer / shader.indexBuffer- Same as vertex buffer - but containsindices.createBuffers()- Utility function for generating both thevertexBufferandindexBuffer. Get’s run duringconstructor()so the buffers get created on class initialization.
Now when we make a new “object”, like a cube, we’ll use the Geometry class.
import Geometry, { generateVertexBufferData } from "../core/geometry";
import { Vector2D, Vector3D } from "../core/vertex";

export function generateCube(device: GPUDevice, size: number = 1) {
  // 24 vertices total (4 vertices per face * 6 faces)
  const positions: Vector3D[] = [
    { x: -size, y: -size, z: size },
    { x: size, y: -size, z: size },
    { x: size, y: size, z: size },
    { x: -size, y: size, z: size },

    // ...other faces...
  ];

  const normals: Vector3D[] = [
    // Front face (z = +size)
    { x: 0, y: 0, z: 1 },
    { x: 0, y: 0, z: 1 },
    { x: 0, y: 0, z: 1 },
    { x: 0, y: 0, z: 1 },

    // ...other faces...
  ];

  const uvs: Vector2D[] = [
    // Front face (z = +size)
    { x: 0, y: 0 },
    { x: 1, y: 0 },
    { x: 1, y: 1 },
    { x: 0, y: 1 },

    // ...other faces...
  ];

  // Indices for 12 triangles (2 per face * 6 faces)
  const indices = new Uint16Array([
    // Front face
    0, 1, 2, 2, 3, 0,

    // ...other faces...
  ]);

  const geometry = new Geometry(device, {
    name: "Cube",
    vertices: generateVertexBufferData(positions, normals, uvs),
    indices: indices,
  });

  return geometry;
}
And with that, we have a Geometry we can use it to render multiple objects easily now:
const cube = createCube();
const sphere = createSphere();
const objects = [cube, sphere];
objects.forEach((obj) => {
// Set geometry buffers (vertex + index)
passEncoder.setVertexBuffer(0, obj.vertexBuffer);
passEncoder.setIndexBuffer(obj.indexBuffer, "uint16");
// Draw the mesh
passEncoder.drawIndexed(obj.indices.length, 1);
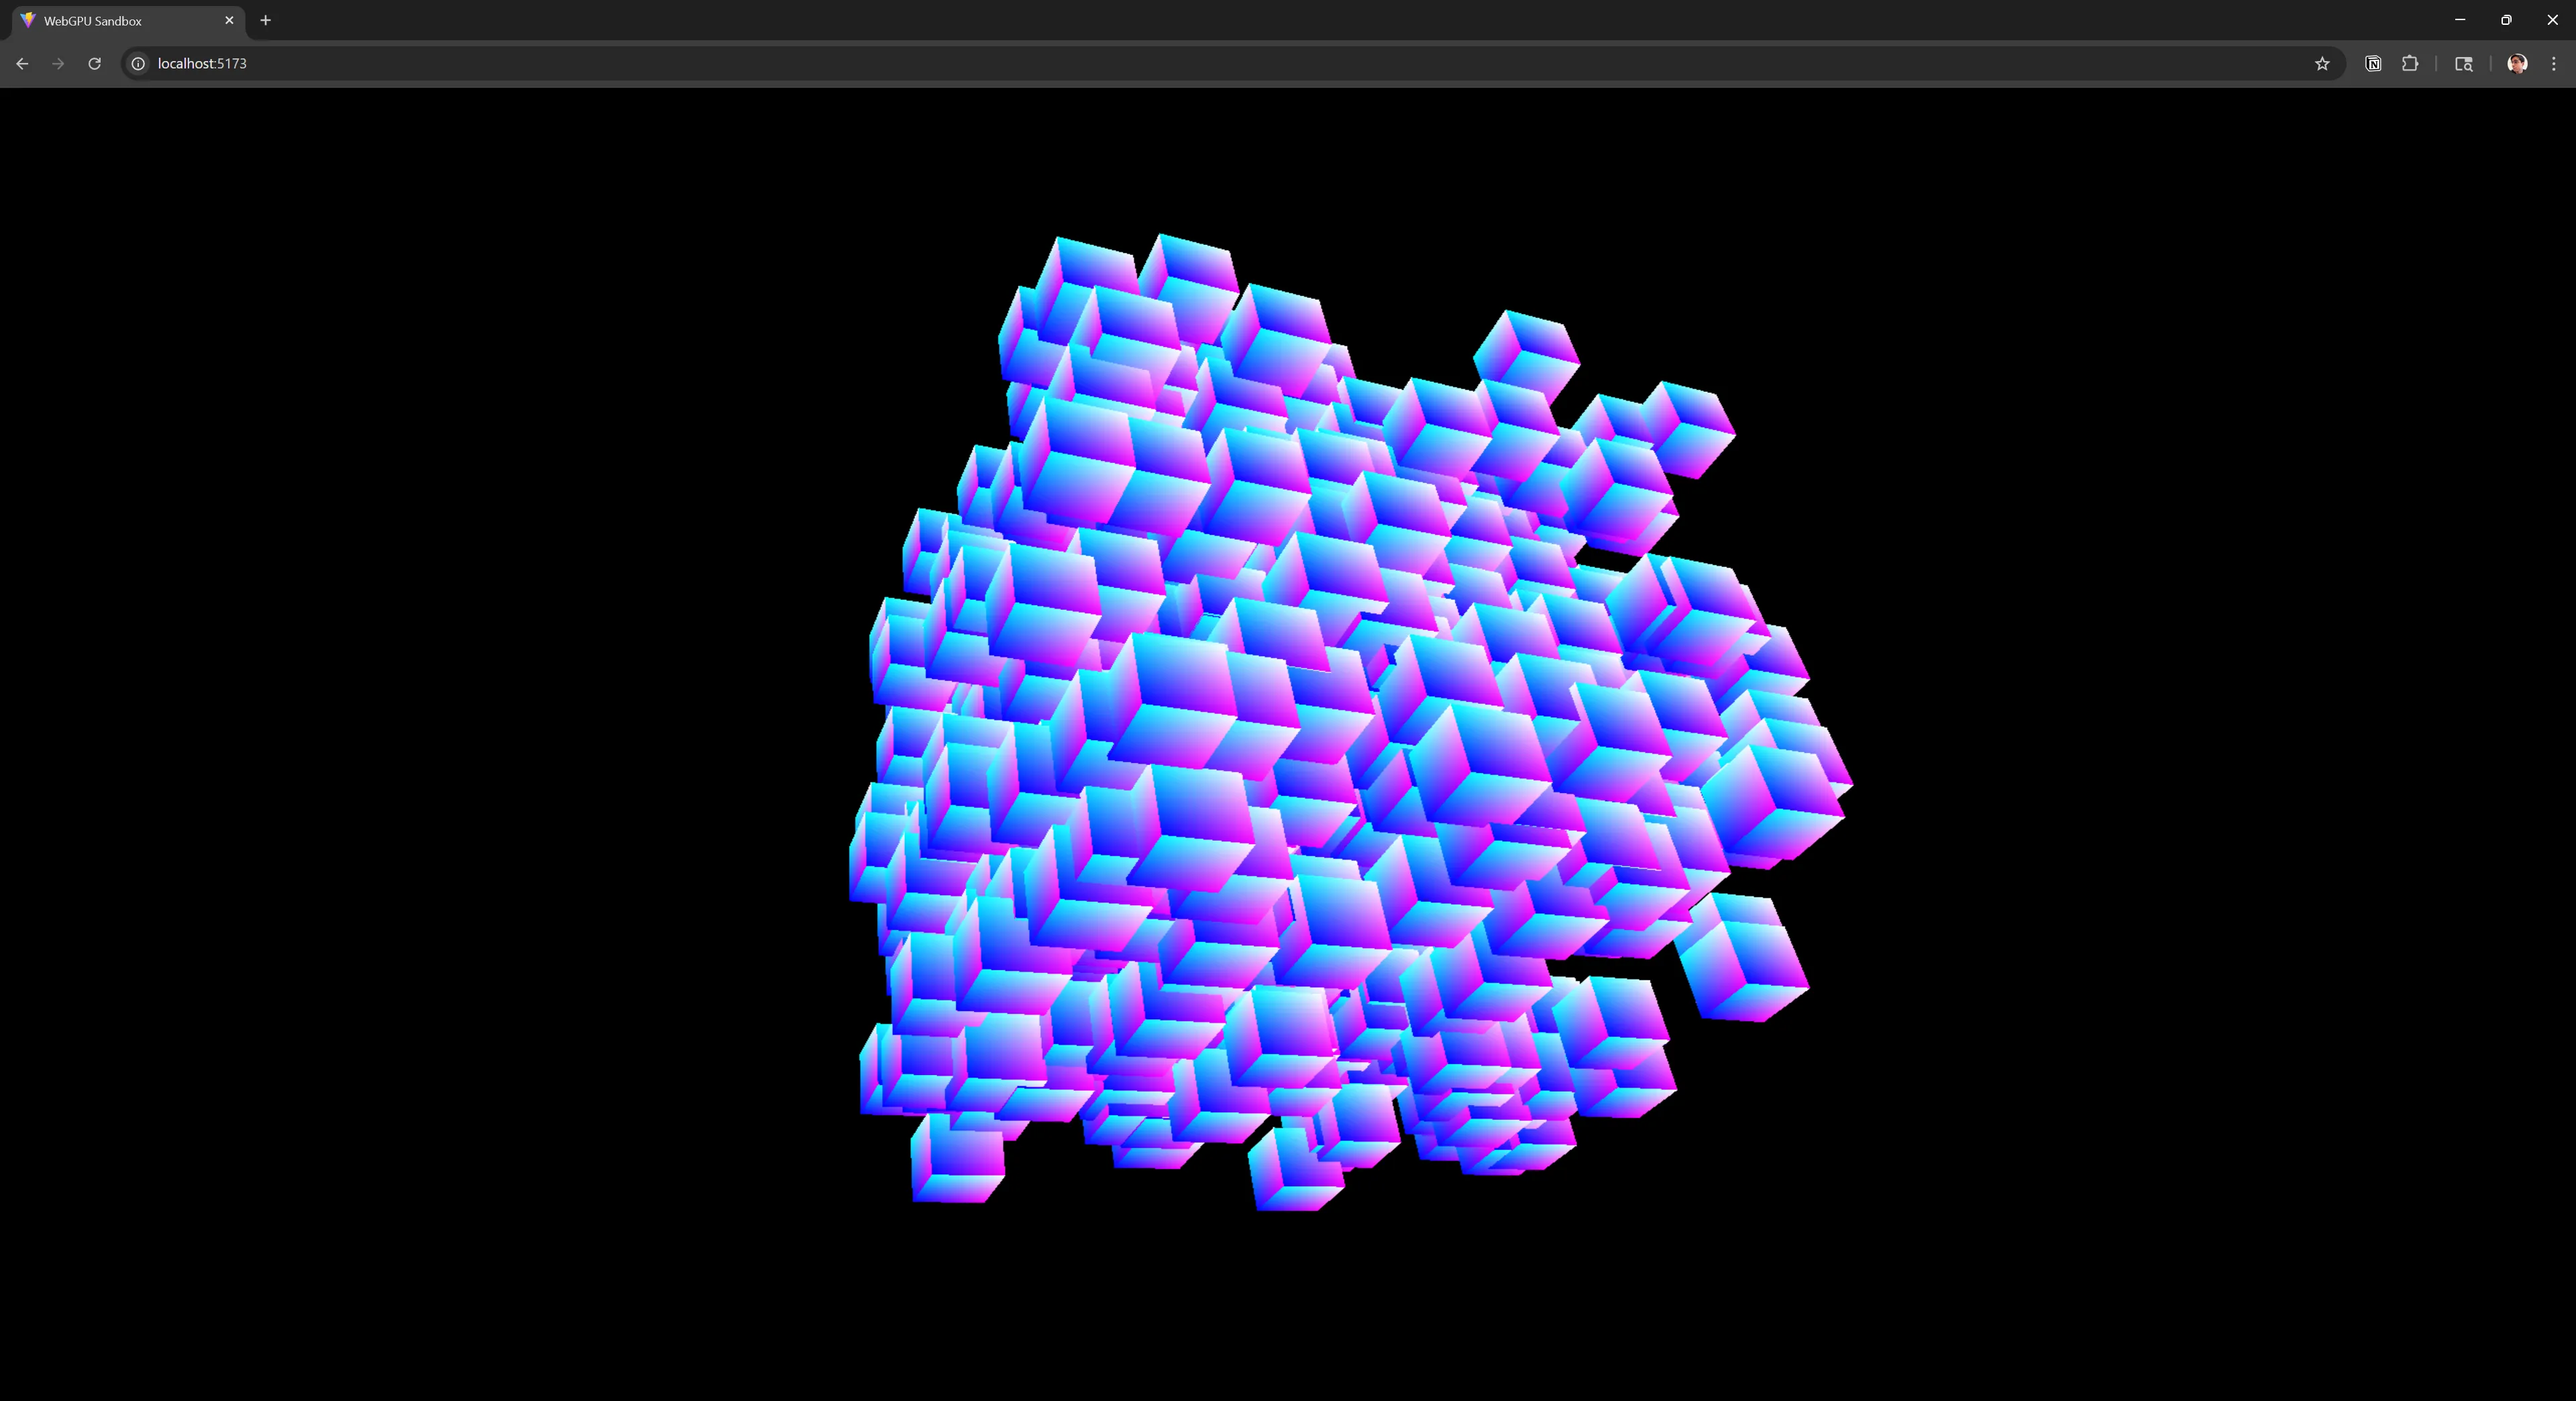
});This loops over each geometry we define then renders them. Ideally you make the geometry in the renderer’s initialization phase (or loaded on demand as needed) — then in the render loop you draw them.
ℹ️ We could take this one step further and keep our geometry in a cache somewhere, so if we need to render 2 cubes, we can use the same geometry — but alter it using Mesh “local” uniforms (which we’ll setup later). But I’m keeping things simple for the current time.
Comparison to Other Libraries
- Geometry / BabylonJS — This is similar to our class with a few small differences to accommodate for dynamic structures. Instead of a single vertex buffer they support as many as you need. And the
positiondata is stored as a niceVectorstyle object instead of flat array. There’s also a lot of helper functions, like serializing data for saving into backup files, or lifecycle management like clearing arrays to free memory. - BufferGeometry / ThreeJS — Their version of geometry is basically an object that stores any amount of properties and their values (like say,
positionfor position data). It doesn’t handle creating any actual buffers (since they use multiple backends and each requires unique buffers), but it does store the data in buffer-friendly arrays so it can get used later by each backend. - GeometryBase / Orillusion — Probably the most similar to this tutorial’s setup. Contains the vertex and index buffer directly in the class, as well as helper functions (like getting the object’s bounds).
- Geometry + IndexedGeometry / GPU Curtains — Also similar to our setup. Contains the vertex buffer in
Geometry, andIndexedGeometryextends it and adds the index buffer.
Now that we have a nice wrapper for our geometry, let’s tackle the next module that works in tandem to provide the object’s styling: the Material. But before that, let’s tackle some dirty business with a necessary evil - the Uniform class.
Uniform
You might be asking, why are we making a Uniform class so early? And why do we need it?
After coding the renderer up from scratch and expanding on it with different features, like say a particle system, I started to notice a lot of duplicate code for defining uniforms. Creating the buffers and bind groups was just chunks of boilerplate code each time. Not to mention the process of measuring the size of the uniforms to create a proper buffer — as well as padding each property as necessary to meet the WebGPU buffer size requirements.
Here’s what some of that code looks like, it’s a mess, and it’s hard to parse through:
// Create a uniform buffer
// The buffer size is equivalent to all the data we put into our shader struct
const uniformBufferSize =
  4 * 4 + // color is 4 32bit floats (4bytes each)
  2 * 4 + // scale is 2 32bit floats (4bytes each)
  2 * 4 + // offset is 2 32bit floats (4bytes each)
  1 * 4 + // time is 1 32bit floats (4bytes each)
  3 * 4; // we need some padding to meet 48 requirement;
const uniformBuffer = device.createBuffer({
  label: "Local Uniform buffer",
  size: uniformBufferSize,
  usage: GPUBufferUsage.UNIFORM | GPUBufferUsage.COPY_DST,
});
console.log("uniformBufferSize", uniformBufferSize);

// Create an buffer-friendly array (aka `TypedArray`) and use the buffer size
const uniformValues = new Float32Array(uniformBufferSize / 4);
// offsets to the various uniform values in float32 indices
const kColorOffset = 0;
const kScaleOffset = 4;
const kOffsetOffset = 6;
const kTimeOffset = 7;

// Create the uniforms
// Because we initialize the array with a length, but not a real array,
// we need to explicitly set each "slot" in the array
uniformValues.set([0, 0, 1, 1], kColorOffset); // set the color
uniformValues.set([0.5, 0.5], kScaleOffset); // set the scale
uniformValues.set([0, 0], kOffsetOffset); // set the offset
uniformValues.set([0], kTimeOffset); // set the time

// Create a bind group to hold the uniforms
const uniformBindGroup = device.createBindGroup({
  label: "Local Uniforms",
  layout: renderPipeline.getBindGroupLayout(0),
  entries: [
    {
      binding: 0,
      resource: {
        buffer: uniformBuffer,
      },
    },
  ],
});

// in render loop
// Update uniform buffer with new data
device.queue.writeBuffer(uniformBuffer, 0, uniformValues);

// Set the uniform bind group (to send GPU/shader the data)
passEncoder.setBindGroup(0, uniformBindGroup);-
We measure a buffer size and pad it appropriately for the 16bit buffer requirement for each property.
-
We create a buffer, specifically for uniforms.
-
We create buffer-friendly array at the size we expected.
-
We set each property of the array based on the correct “offset” (basically it’s index in the flat array, offset by the size of other properties - including their padding). For example, a 3D vector would be padded by 1 float, so if a 2D property came after it, it’d look like:
const bufferArray = [
  0,
  0,
  0,
  0, // The 3D vector (+ padding)
  1,
  1,
  0,
  0, // The 2D vector that comes after (with 2 spots of padding)
];
We use the
.set()method on theTypedArrayclass to update specific pieces of the array based on an index we pass (aka the “offset”). -
Then we create a bind group for the buffer.
-
Then we update the buffer with the uniform data. This could happen anytime (ideally as a side effect - not something that runs constantly during render).
-
Then finally, we add the bind group to our pass encoder, which sends the buffer data over to our shader.
As you can see, it’s a lot of code, and messy to manage things like setting properties and offsets. If you wanted to add or remove a property it’d alter code in 2-3 places. And this setup has to happen multiple times for all different kinds of uniforms. Our object will have uniforms for position, rotation, and scale data. And our material will have uniforms like color. And there’s plenty of other systems that use it (maybe globally we want to save a time variable to animate objects).
Dynamic uniforms
Before we dive into the implementation, let’s think about how we expect the user to use this API. Ideally the user should be able to pass any shape of uniforms they want that would work in a shader. So ideally something like this should work:
const uniformStructure = {
  color: { r: 0, g: 0, b: 0, a: 0 },
  time: 0,
};

const uniforms = new Uniform(uniformStructure);
Then our class could handle all the heavy lifting of:
- Taking the data and measuring each property’s size and add padding where necessary
- Save the offset mapping to simplify setting properties
- Create the uniform buffer and bind group, then save it inside the class as a property to use later
- Provide helper functions for quickly setting uniform properties (and syncing updates with the underlying buffer)
The structure
Here’s what the class ended up looking like:
export class Uniforms<UniformsObject extends UniformsDataStructure> {
  name: string;

  /**
   * The uniforms
   */
  uniforms: UniformsObject;
  /**
   * Maps uniforms to their buffer alignment offset
   * Automatically generated when buffer size is calculated.
   */
  uniformsMapping: Record<keyof UniformsObject, number>;

  // GPU Specific
  uniformBuffer!: GPUBuffer;
  uniformBindGroup!: GPUBindGroup;
  /**
   * The uniform data we submit to buffer.
   * You should use `uniforms` property to update values, then use `setUniforms()` to update this property.
   */
  uniformValues!: Float32Array;

  device: GPUDevice;
}
Let’s break down each property a bit:
uniforms- This is the object the user passes in with properties to send to shader.uniformsMapping- A “hash map” that maps properties of ouruniformsto the correct array “offset” (aka a number representing an array index)uniformBuffer- The actual buffer for the uniforms. When we updateuniformsdata, we sync it to this buffer.uniformBindGroup- The bind group for the uniforms. We use this while rendering to attach uniforms to current draw cycle.device- We keep a reference to the current device around for convenience since it’s used by most major functions (like when we sync uniforms to buffer).
I’ll go over each part of the class in more detail, but I highly recommend looking at the full source code for complete context since I’ll be going piece by piece.
Generic type
Immediately, the first thing you might notice is a generic type UniformsObject that we use to store the actual uniforms the user provides. It extends the UniformsDataStructure interface, which defines some basic rules the uniforms should follow to ensure the class can parse them correctly. Basically it requires an object with top-level properties (nothing nested — like a material.subtype.color would break, while material.color works).
type UniformPrimitiveDataTypes = number | string | boolean;
/**
 * Acceptable data types for a uniform.
 * Basically array (`[0,0,1,1]`), object (`{x, y, z}`), or single value
 */
type UniformDataTypes =
  | UniformPrimitiveDataTypes[]
  | Record<string, UniformPrimitiveDataTypes>
  | UniformPrimitiveDataTypes;
export type UniformsDataStructure = Record<string, UniformDataTypes>;
🎨 This one really took me back to my design system tooling code work having to parse design tokens that differ in shape.
This basically ensures we can do an object that looks like this and we handle all the edge cases, from 4D vectors to 4D colors to numbers and even objects of booleans.
const uniforms = {
  position: {
    x: 0,
    y: 0,
    z: 0,
  },
  color: {
    r: 0,
    g: 0,
    b: 1,
    a: 1,
  },
  time: "0",
  flags: {
    material: false,
  },
};
When the user needs to create a new uniform, they can extend the UniformsDataStructure to ensure their uniforms can be parsed correctly.
export interface CustomUniforms extends UniformsDataStructure {
  time: number;
  offset: {
    x: number;
    y: number;
  };
}
Handling the boilerplate
In the Uniform class constructor() most of the magic happens. We do all the setup work I mentioned earlier, like creating the buffer and bind group.
export class Uniforms<UniformsObject extends UniformsDataStructure> {
  constructor(
    device: GPUDevice,
    renderPipeline: GPURenderPipeline,
    name: string,
    uniforms: UniformsObject,
    bindGroupLayoutId: number,
    additionalBindings?: GPUBindGroupEntry[],
  ) {
    this.name = name;
    this.uniforms = uniforms;
    this.uniformsMapping = {} as Record<keyof UniformsObject, number>;
    this.device = device;

    // Calculate buffer size and generate buffer offset mapping
    const uniformBufferSize = this.calculateUniformBufferSize();
    this.createUniformBuffer(uniformBufferSize);
    this.createUniformsBindGroup(
      renderPipeline,
      bindGroupLayoutId,
      additionalBindings,
    );
    this.setUniforms();
  }
}
The most interesting part is probably the calculateUniformBufferSize() method that handles measuring the buffer (and padding) based on the dynamic data we pass in.
calculateUniformBufferSize() {
  // Number of bytes required for a buffer
  const requirement = 16;
  let byteOffset = 0;
  for (const key in this.uniforms) {
    const uniform = this.uniforms[key];

    // Check the data type
    const checkObj = isObject(uniform);
    const checkArray = isArray(uniform);

    // Assume it's a shallow object with only keys + values
    // Check how many keys we have
    let size = 0;
    if (checkObj) {
      const objKeys = Object.keys(uniform);
      size = objKeys.length * 4;
    } else if (checkArray) {
      size = (uniform as Array<any>).length * 4;
    } else {
      // Assume if it's a single value, it gets converted to number anyway
      size = 4;
    }

    // Check if property meets WebGPU requirement
    // Basically gets the remainder of current byte offset vs alignment
    // Then subtracts by alignment to get padding
    // Then final remainder to handle the `0` edge case (or first loop will add empty padding)
    const padding = (requirement - (byteOffset % requirement)) % requirement;

    // Did we need padding between the last prop?
    byteOffset += padding;

    // Add to uniform mapping
    this.uniformsMapping[key] = byteOffset / 4;

    // Add current property size
    byteOffset += size;
  }

  const padding = (requirement - (byteOffset % requirement)) % requirement;

  const finalBufferSize = byteOffset + padding;

  return finalBufferSize;
}
We loop over all the keys in the user’s uniform object and measure the “length” the property (whether it’s an object with “keys” or an array of elements). Then if we don’t meet the padding requirement, we add the necessary amount of padding. With the padded size, we save it as an “offset” to save the uniform property more easily later inside a simple object mapping uniformsMapping.
To assist with this process I created some helper functions called isObject() or isArray() to quickly determine what the object’s property was.
export const isObject = (value: any) =>
  typeof value === "object" && !Array.isArray(value) && value !== null;
export const isArray = (value: any) =>
  typeof value != "object" && Array.isArray(value) && value !== null;
ℹ️ In JavaScript, both arrays and objects are considered objects using the
typeofoperator. To check for anArrayyou need to use theArray.isArray()global class method. My helper functions basically check for both, making sure theObjectdoesn’t pass theArraycheck.
Once it loops over each property in the uniform it returns the total buffer size, which we use to create the buffer in the constructor.
Handling setters
So how does the user set and update uniforms values and make sure they’re synced to the underlying uniform buffer?
Ideally, the API should look like this:
const uniformStructure = {
  position: {
    x: 0,
    y: 0,
    z: 0,
  },
};
const uniformClass = new Uniforms(uniformStructure);

// Update the property directly in the `uniforms` property
uniformClass.uniforms.position.x = 2;
uniformClass.setUniforms();
The user should just update the uniforms directly, then update them using the setUniforms() method.
The setUniforms method handles syncing the uniforms with the buffer and setting the values using the “offset” mapping we saved earlier while measuring the uniforms.
/**
 * Loops through each uniform and stores it in buffer friendly array.
 * Uses the uniform mapping to align properties in buffer array.
 */
setUniforms() {
  for (const key in this.uniforms) {
    const uniform = this.uniforms[key];
    // console.log(
    //   "[UNIFORMS] Setting uniform - loop",
    //   this.name,
    //   key,
    //   this.uniformsMapping[key]
    // );

    // Check the data type
    const checkObj = isObject(uniform);
    const checkArray = isArray(uniform);

    // The final buffer data
    let data: number[] = [];

    // Depending on the data type, loop through the array elements / obj props
    // and convert the underlying values to shader-friendly floats/number.
    if (checkObj) {
      // Handle objects
      const values = Object.values(uniform);
      const parsedValues = values.map(this.convertUniformValuesToNum);
      data = [...parsedValues];
    } else if (checkArray) {
      // Handle arrays
      const parsedValues = (uniform as UniformPrimitiveDataTypes[]).map(
        this.convertUniformValuesToNum
      );
      data = [...parsedValues];
    } else if (!checkArray) {
      // Handle single values
      data = [
        this.convertUniformValuesToNum(uniform as UniformPrimitiveDataTypes),
      ];
    }

    // console.log(
    //   "[UNIFORMS] .set()",
    //   this.uniformValues,
    //   this.uniformsMapping[key]
    // );
    this.uniformValues.set(data, this.uniformsMapping[key]);
  }

  this.updateUniforms();
}
Nothing too fancy here. Similar to measuring the uniforms, we loop over the uniforms object and it’s keys to grab each property. Then we check how to handle the data types. If we have an object, we basically just use values() to grab all the properties in order. With an array we just use the array. And for single values we convert them to an array (with a single value inside). Then finally we set the buffer-friendly array with the new uniform data.
Then the updateUniforms() method handles writing the uniform values (as a buffer-friendly array) to the uniform buffer. Same code as the example I shared earlier.
ℹ️ You could also create a method that handles setting 1 property at a time so the user doesn’t have to handle the
setUniformsstep. ThreeJS does something similar with asetPosition()method. It’d look just like this, without the loop, and requiring the user to pass a uniform property name as a “key”. If you’re super fancy you can even leverage JavaScript’ssetclass property prefix to define a true “setter” function when someone updates the property and hijack it to add the update uniforms method call.
Sanitizing values
One of the values I wanted to support in uniforms was the boolean. Having a nice true / false felt way cleaner than having to remember if 0 was true or false from a quick glance. And what if the user passes in a string of a number accidentally?
convertUniformValuesToNum = (value: UniformPrimitiveDataTypes) => {
  // Check data types
  const dataType = typeof value;
  switch (dataType) {
    // Convert boolean to 0 or 1
    case "boolean":
      return Number(value);

    // No change needed
    case "number":
      return value as number;

    // Convert strings to float numbers
    // @TODO: Maybe add an error if we detect a weird type (like function)
    case "string":
    default:
      return parseFloat(value as string);
  }
};
When we loop over values to save them, we also run them through this function to “sanitize” any incorrect values. So every object and array property gets passed to this function so it can ensure we return a number type (the only type the buffer supports).
Rendering with uniforms
Nothing really changes about the rendering process. We grab the bind group from the Uniform class (wherever we’re keeping it, whether it’s a property on our Material or Mesh) and apply it as needed.
const uniforms = new Uniforms({});

// During render
passEncoder.setBindGroup(0, uniforms.uniformBindGroup);
Bind group IDs
When we create bind groups, we assign them to a specific “ID” (like 0 above). This should match the shader and the @group prefix we apply to our uniform variable.
@group(0) @binding(0) var<uniform> globals: GlobalUniforms;To keep things simple initially, we’ll assume that our bind groups will be fairly constant. Any shader we pass to the primary render pipeline will receive uniforms whether they use them or not. This is similar to ThreeJS, where you can define a custom shader, but you can also tap into any “default” uniforms like the camera position or the material’s texture.
We’ll have global uniforms (like time, or camera data), and uniforms for materials, meshes, and textures. We’ll create a group for each one, and assign it a unique index (incrementing from 0).
export const UNIFORM_BIND_GROUP_LAYOUT_IDS = {
  globals: 0,
  locals: 1,
  material: 2,
  texture: 3,
};
Now when we set our uniforms bind groups, we can assign it to the correct ID. And this allows us to more easily change it later (minus the manual shader changes it’d require).
// Set bind groups (uniforms, texture, etc)
passEncoder.setBindGroup(
  UNIFORM_BIND_GROUP_LAYOUT_IDS["locals"],
  mesh.uniforms.uniformBindGroup,
);
passEncoder.setBindGroup(
  UNIFORM_BIND_GROUP_LAYOUT_IDS["material"],
  material.uniforms.uniformBindGroup,
);
if (material && material.textureBindGroup) {
  passEncoder.setBindGroup(
    UNIFORM_BIND_GROUP_LAYOUT_IDS["texture"],
    material.textureBindGroup,
  );
}
Now in any shader code (or at least, in our main render pipeline) we can always assume this structure:
@group(0) @binding(0) var<uniform> globals: GlobalUniforms;
@group(0) @binding(1) var<uniform> camera: CameraUniforms;
@group(1) @binding(0) var<uniform> locals: LocalUniforms;
@group(2) @binding(0) var<uniform> material: MaterialUniforms;
// @group(0) @binding(2) var<storage, read> instances : array<mat4x4<f32>>;
@group(3) @binding(0) var mySampler: sampler;
@group(3) @binding(1) var myTexture: texture_2d<f32>;
You can see a full example of this Uniform class here.
I’ll show an example of using the uniforms in the next few steps as we create a Material that requires it’s own set of uniforms, and the Mesh with it’s another set.
ℹ️ If you truly wanted to be dynamic, you could build a system that tracks the amount of groups created and assign IDs based on that. Then for the shader code, you could generate the appropriate properties as needed — dynamically (instead of manually/statically like we’re doing now). If you’re interested in this hyper dynamic structure, check out TypeGPU, they have a few examples of this kind of setup.
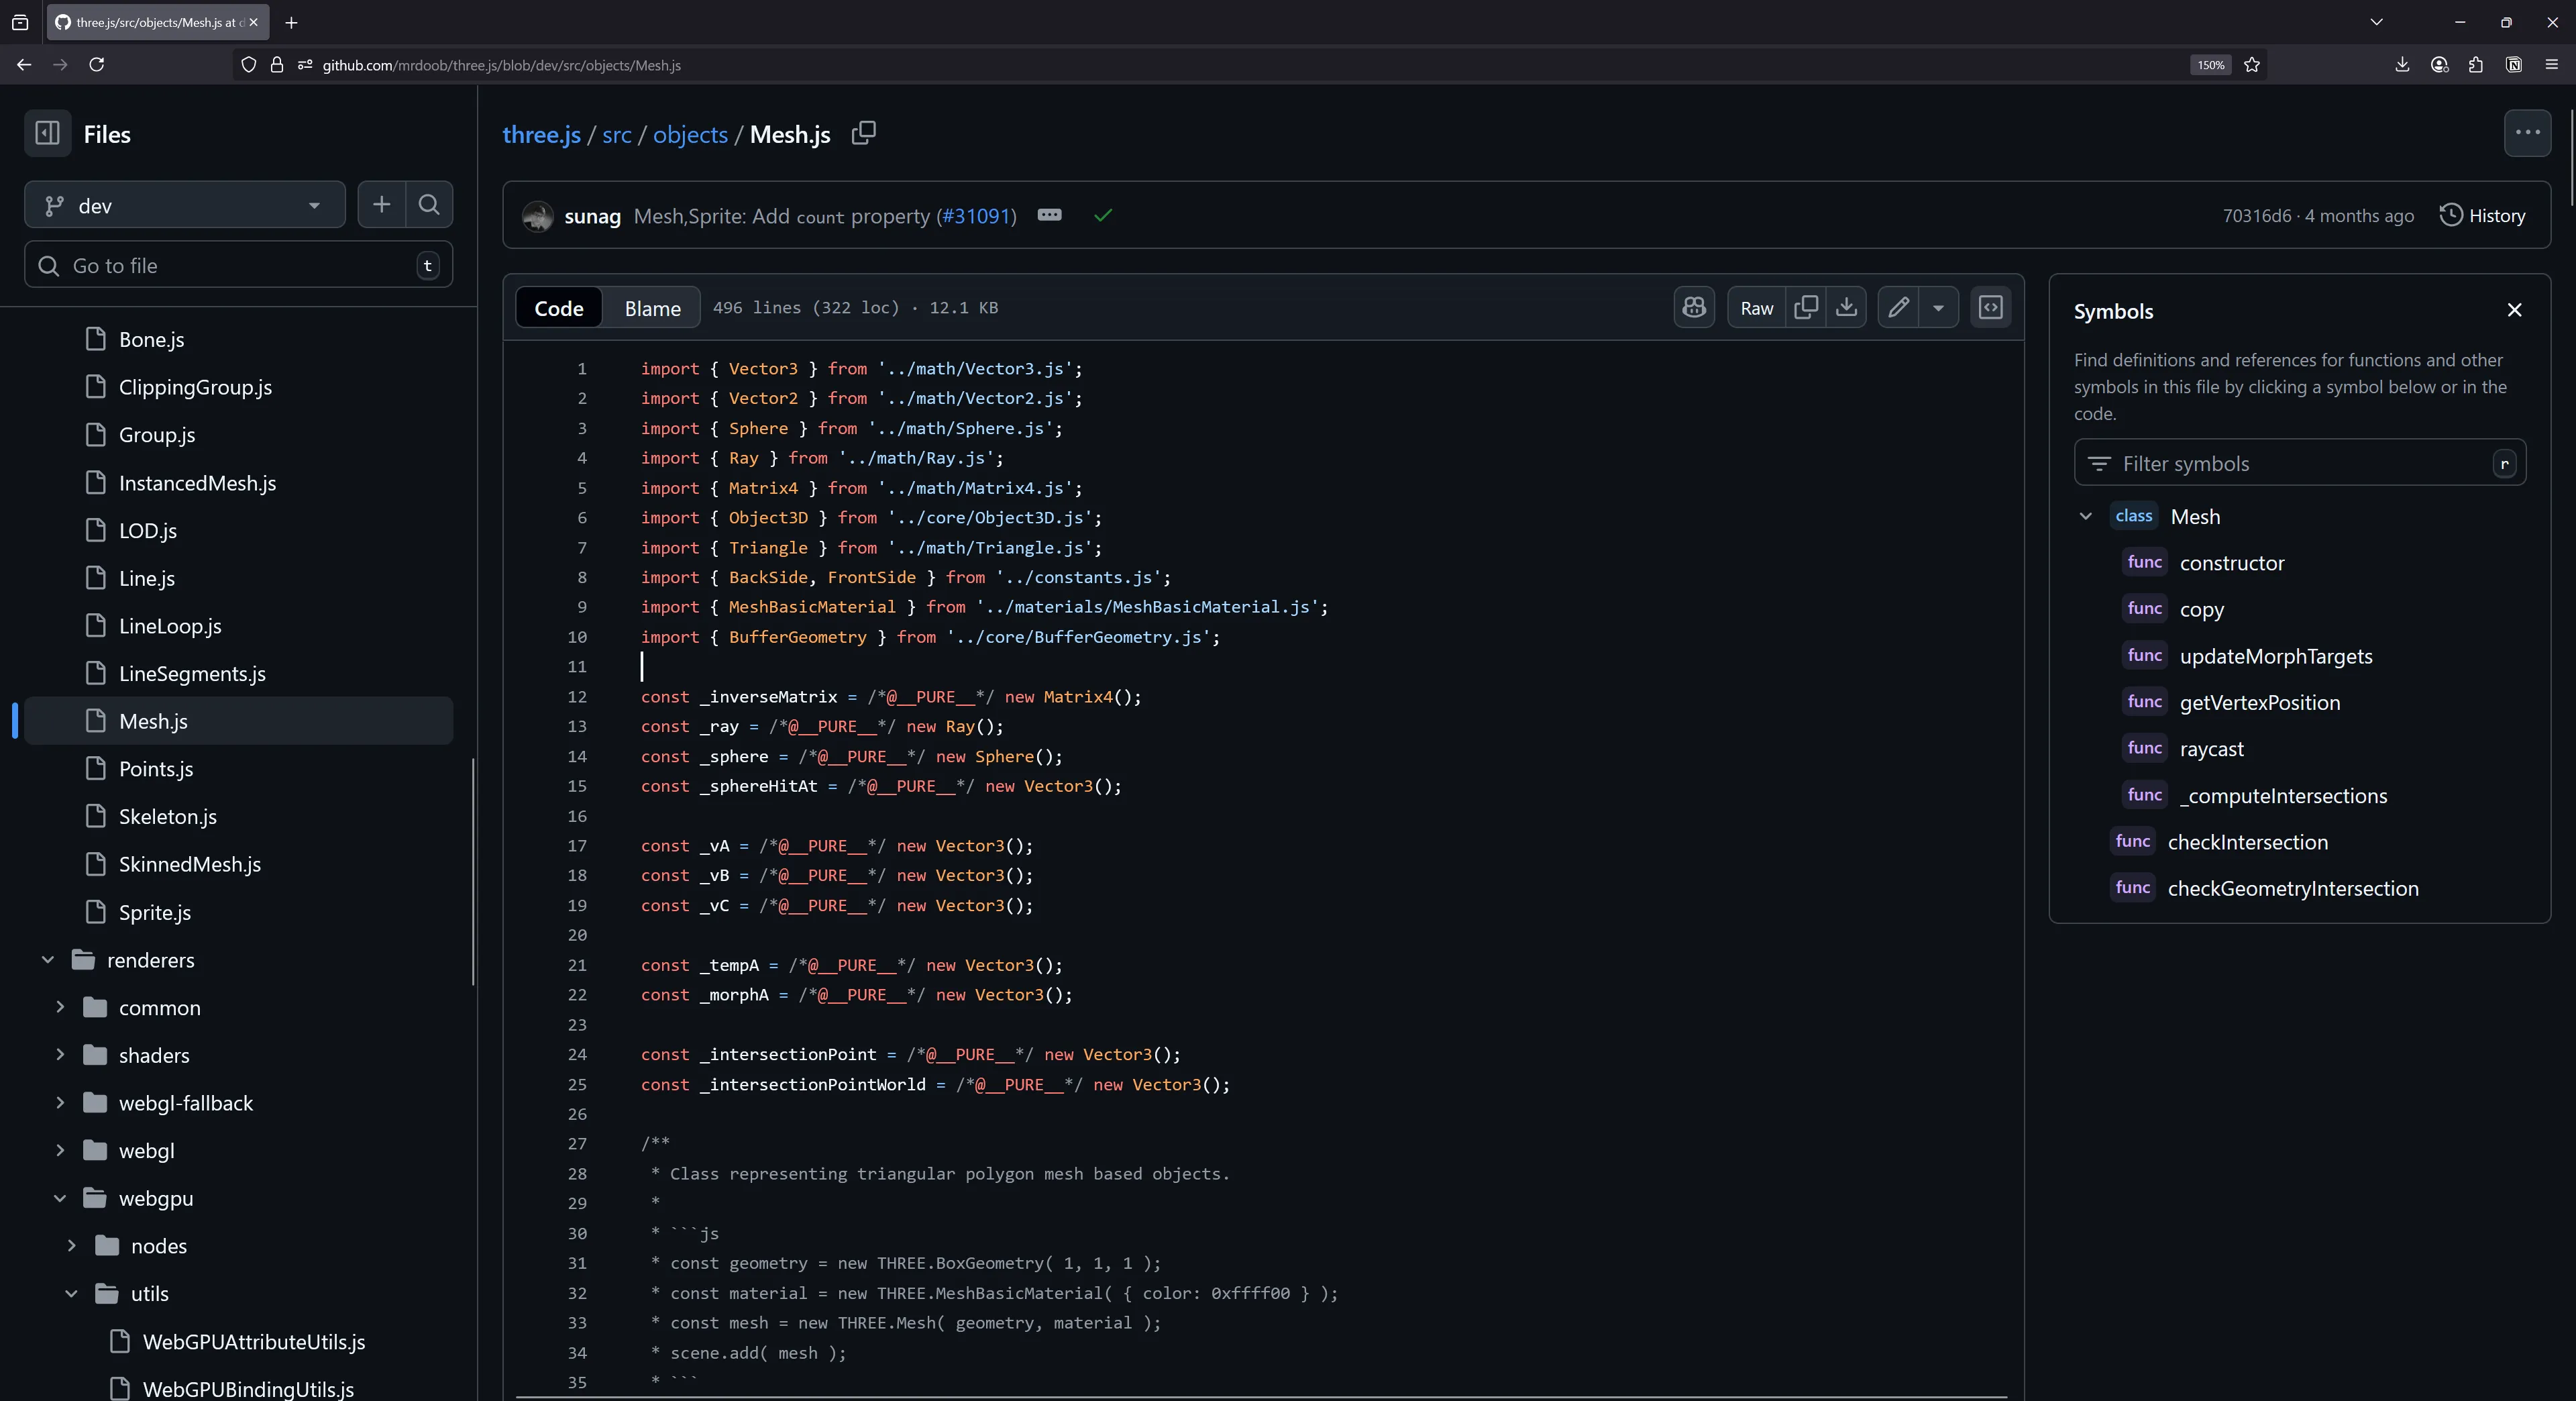
Comparison to other libraries
- WebGPUAttributeUtils / ThreeJS — The ThreeJS code is changing often, but currently they use an WebGPUAttributeUtils class to handle creating all types of “attributes” (like uniforms vs storage data) and the buffers associated with them. You can see a lot of similar padding logic code here.
- Buffer / GPU Curtains — A more generic buffer class for all types of WebGPU buffers (uniform, storage, etc). Very generic if you want something more versatile.
Material
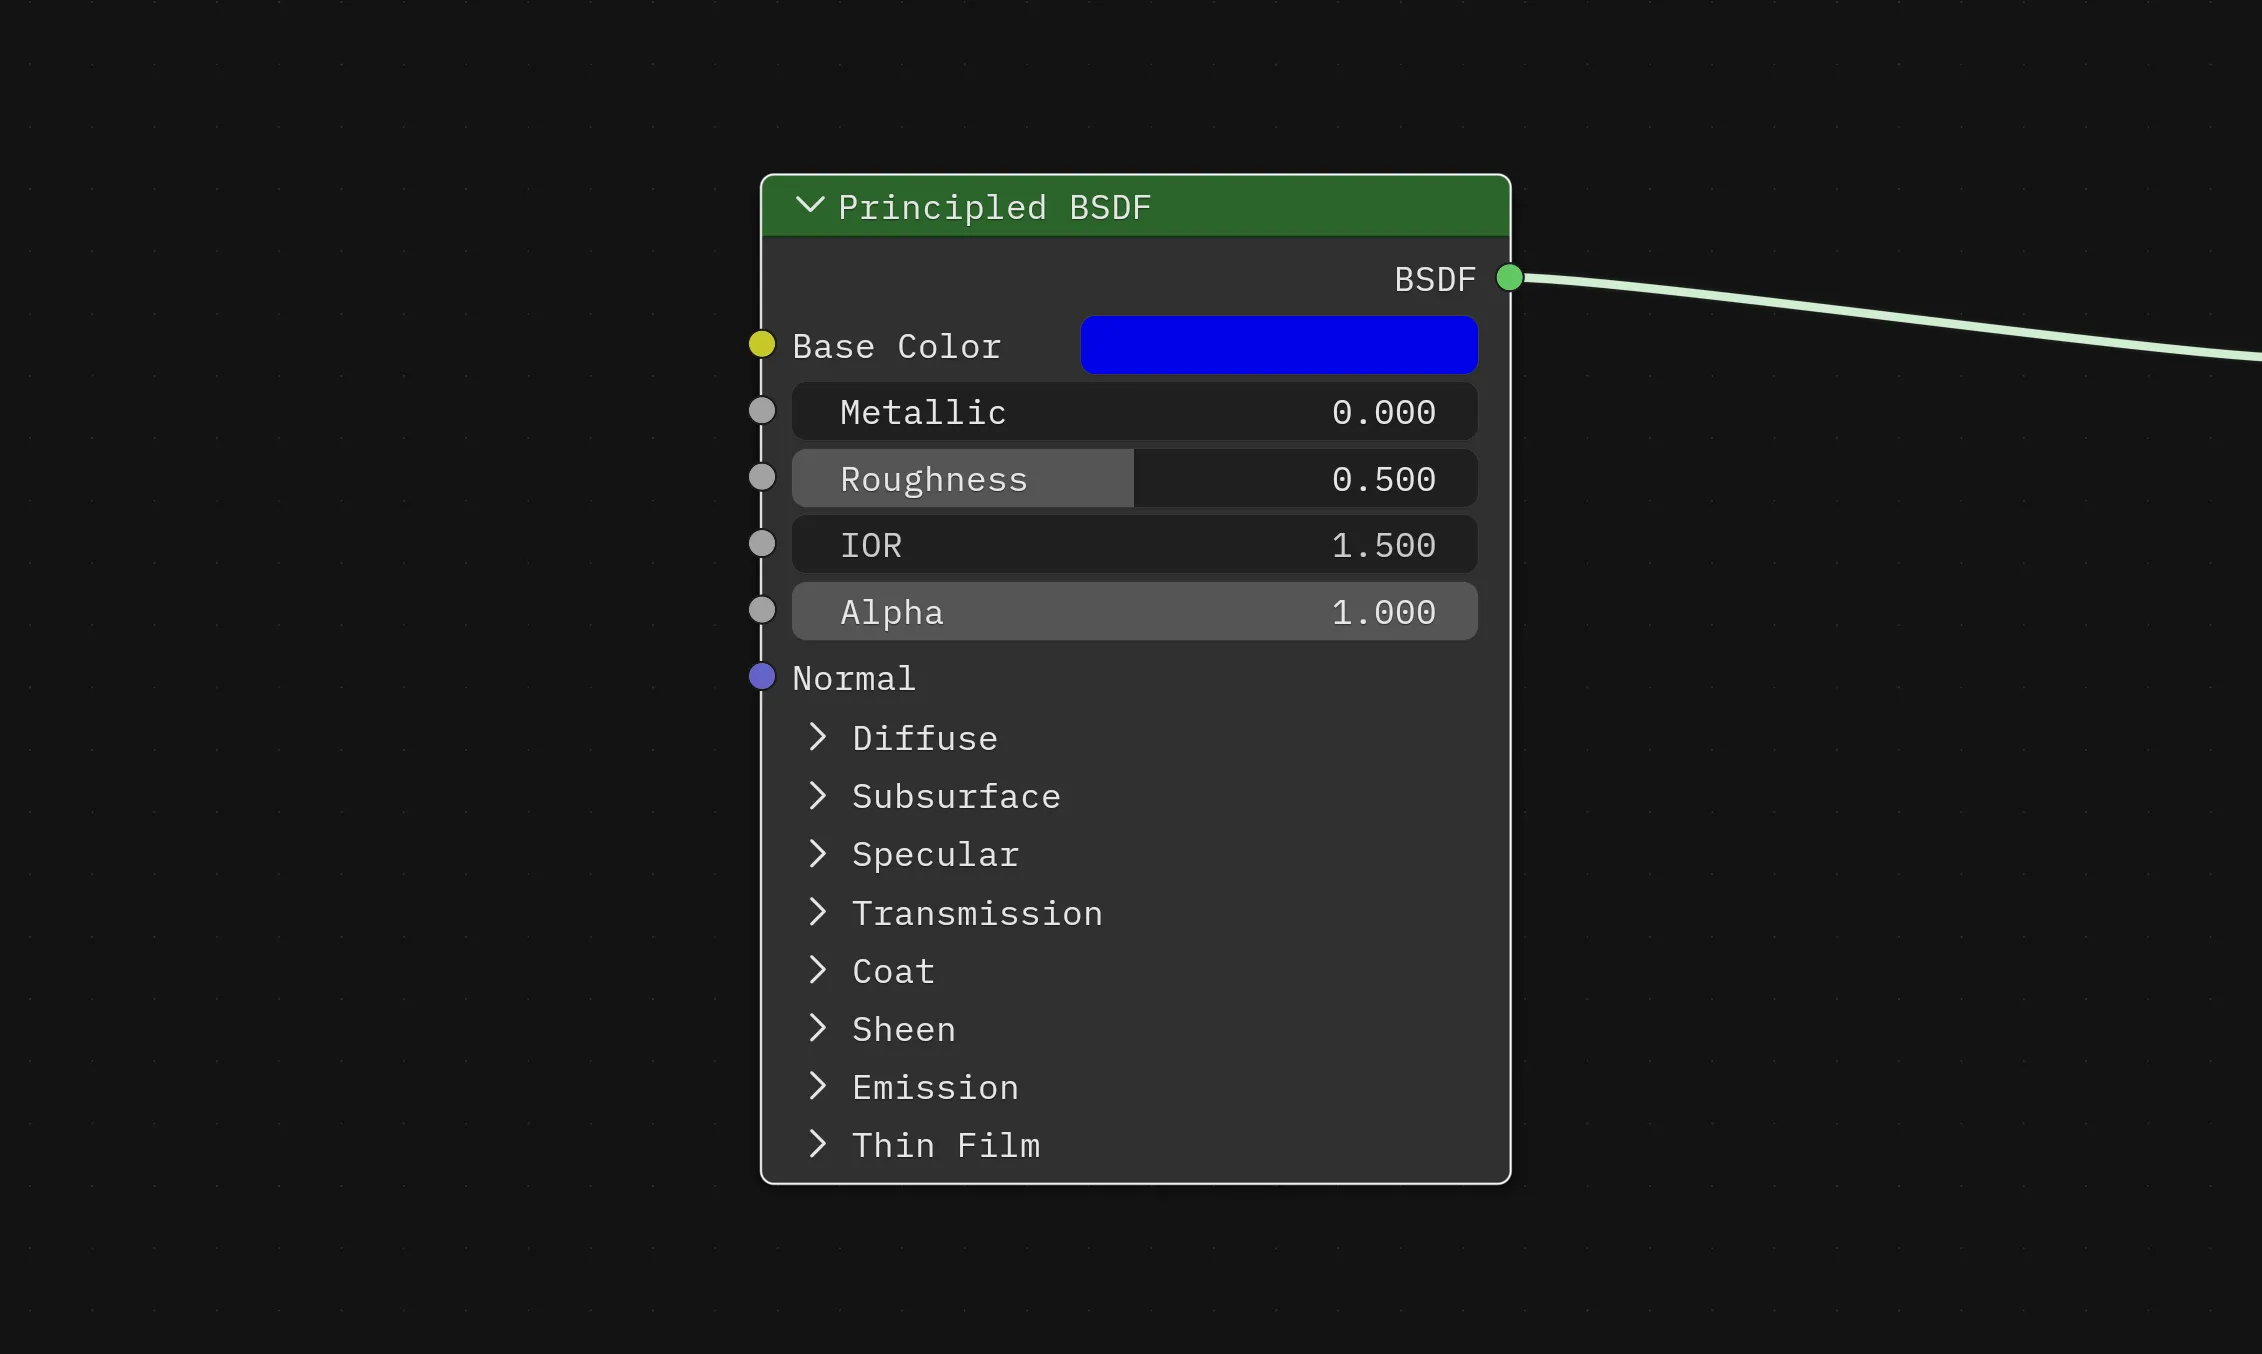
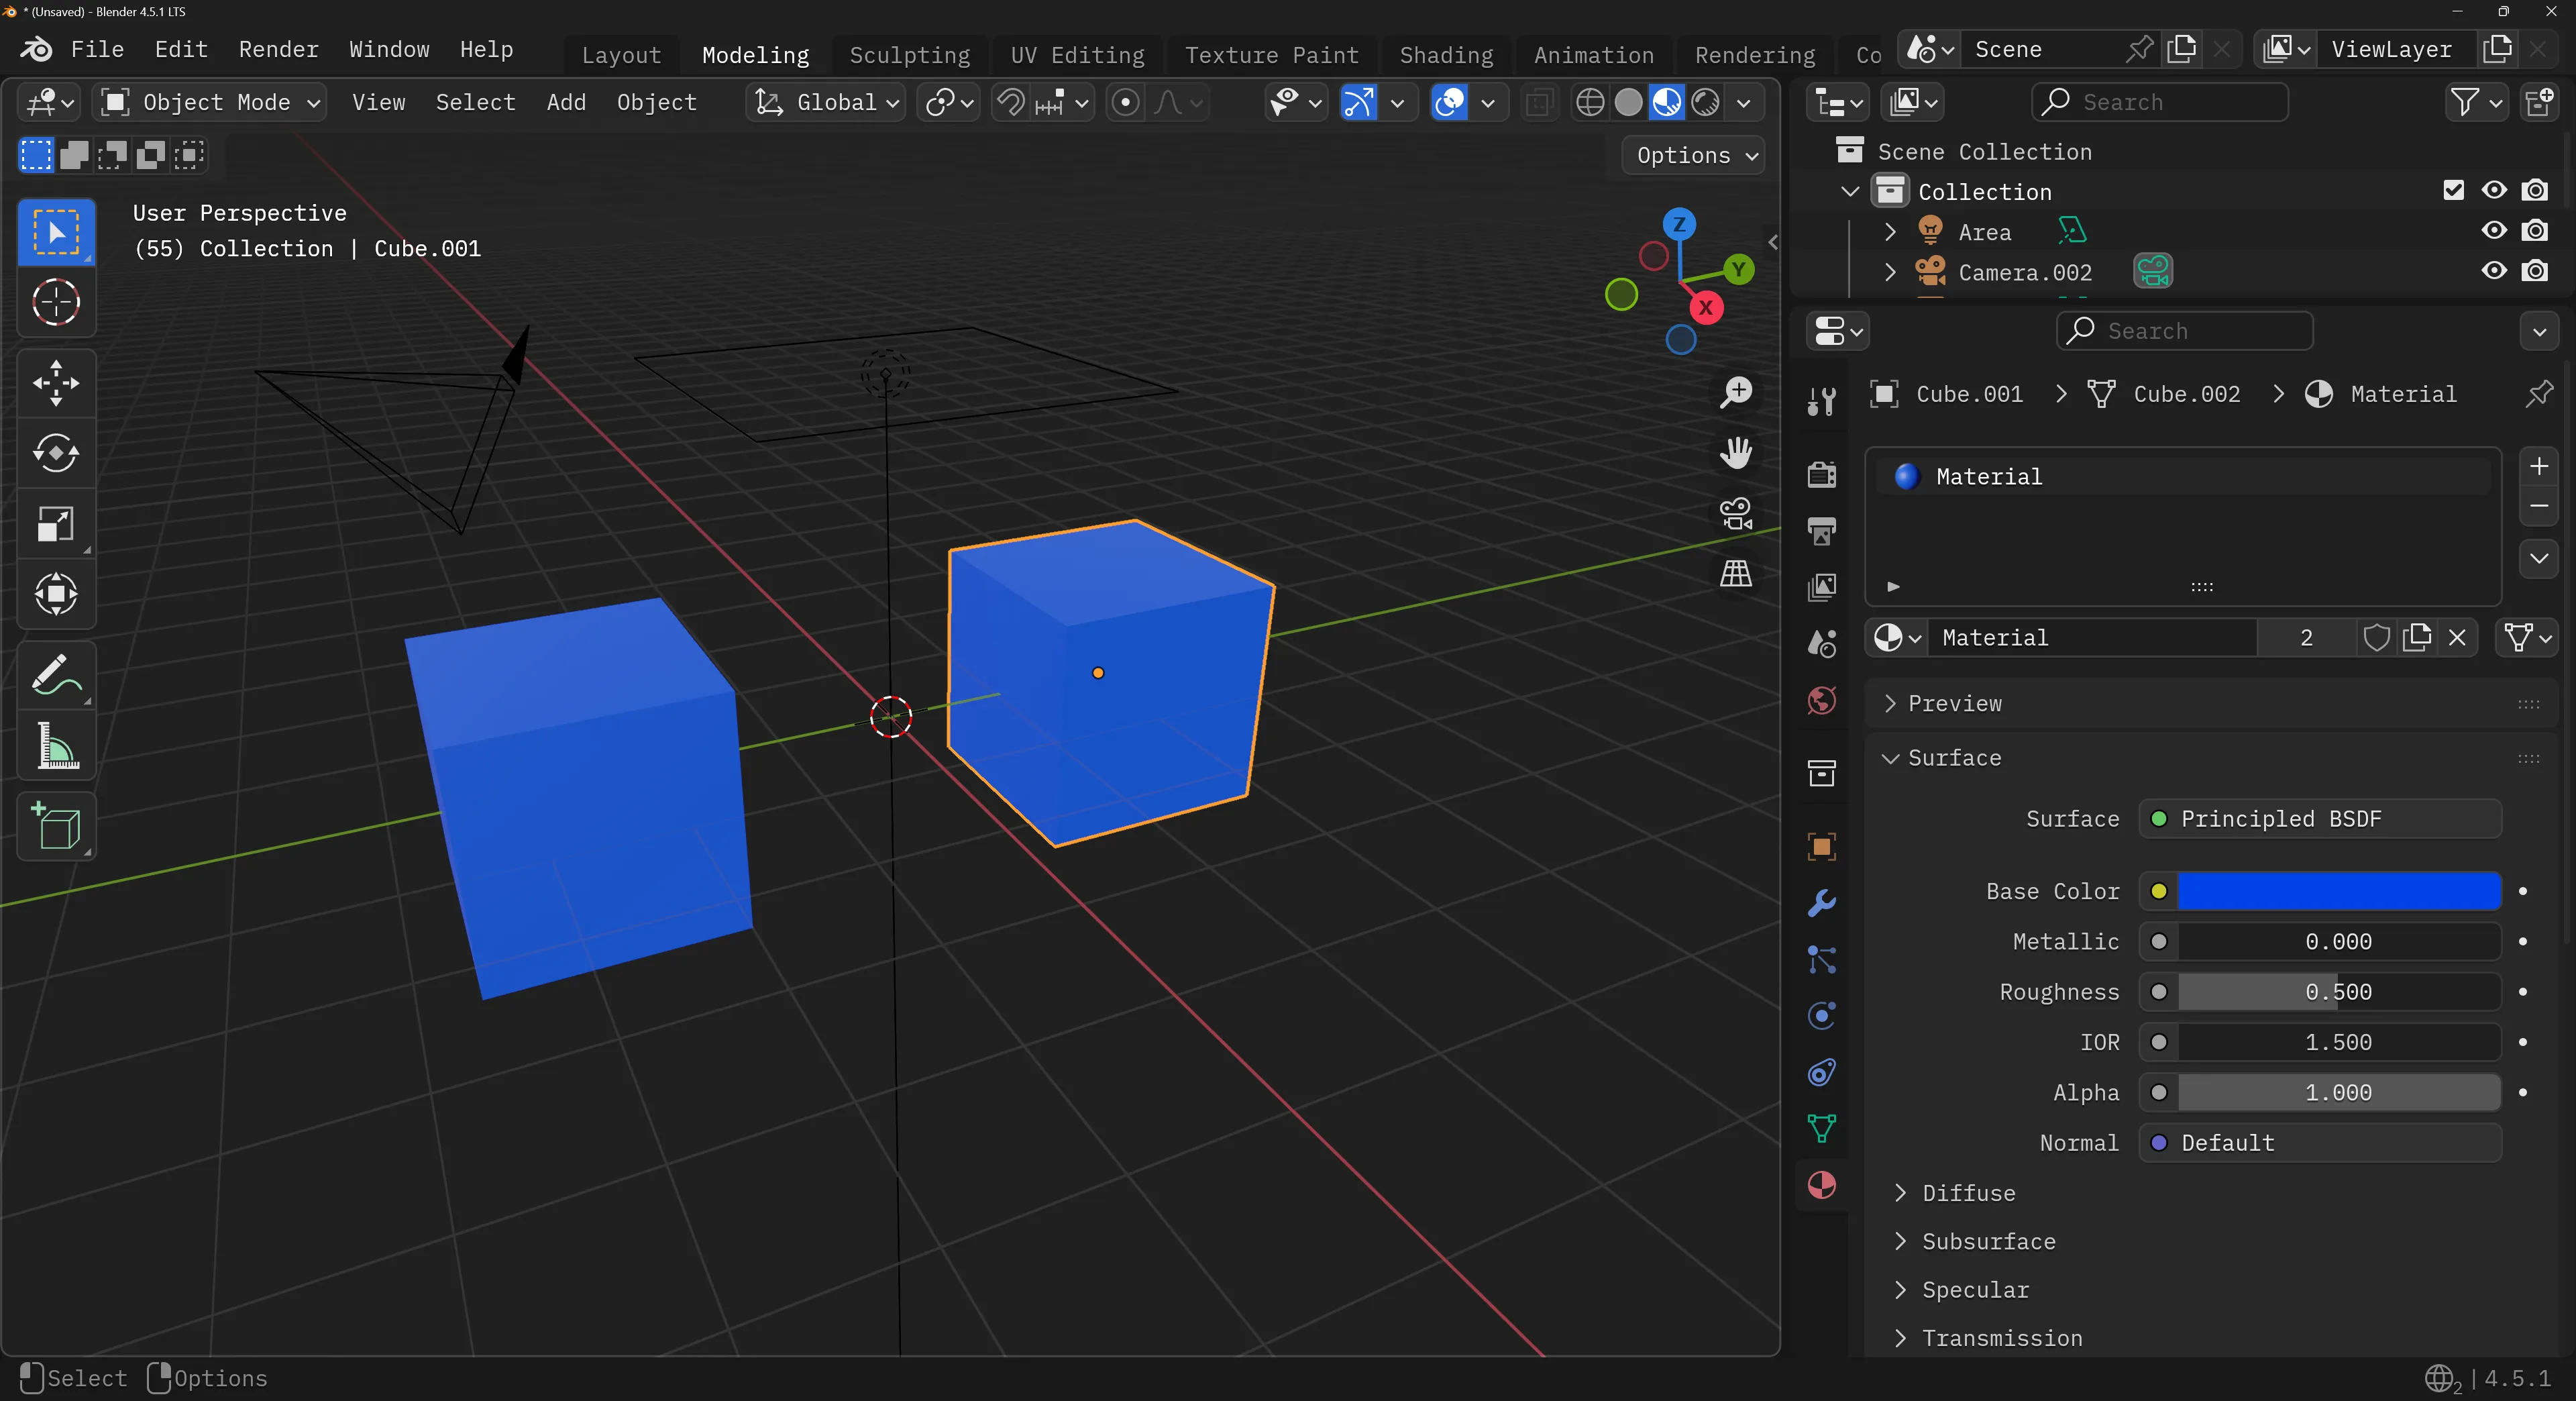
You might be familiar with the term “material” if you’ve used 3D applications like Blender, Maya, or ZBrush. It’s a common terminology used to describe the “styling” of an object, depending on the renderer and shader code you use. You could change the color property in the material to alter the color of the object in the 3D scene.
The most common “material” you’ll find is a PBR (or physically-based rendering) material. This is the default material in Blender, also referred to as the Principled BSDF node. You’ll find there’s a lot of properties that make up how a physical object is perceived visually — like a transmission property that makes something look glassy versus opaque.
Why do we need materials?
The second we need to render multiple objects in the same scene, we’re often looking for ways to optimize our data. What if we want two objects to look the same - like sharing the same color or image texture?
Instead of copying the data to each object (and duplicating often very large buffers of data), we’ll create the concept of “materials” that we’ll store at in a global cache. Then each object in the scene will be associated to one of these materials.
At a high level, it looks like this:
// Create a "global" cache of all possible materials needed
const materials = {};

// Create a new material
const newMaterial = new Material();
// Add the material to the cache under the `default` key
materials.default = newMaterial;

// Add another material if needed
const stylizedMaterial = new StylizedMaterial();
materials.stylized = stylizedMaterial;

// Create your 3D object and assign the material key
const objects = [];
const cube = createCube();
cube.material = "stylized";
objects.push(cube);

// Then in the render loop later...
objects.forEach((obj) => {
  // Get object's material
  const material = materials[obj.material];

  // Set the pipeline to the match the material
  passEncoder.setPipeline(material.renderPipeline);
}
What is a “material” in terms of our renderer?
But what is a “material” in terms of our WebGPU renderer? We’ll need 3 things: uniform buffers, texture buffers, and a reference to a render pipeline.
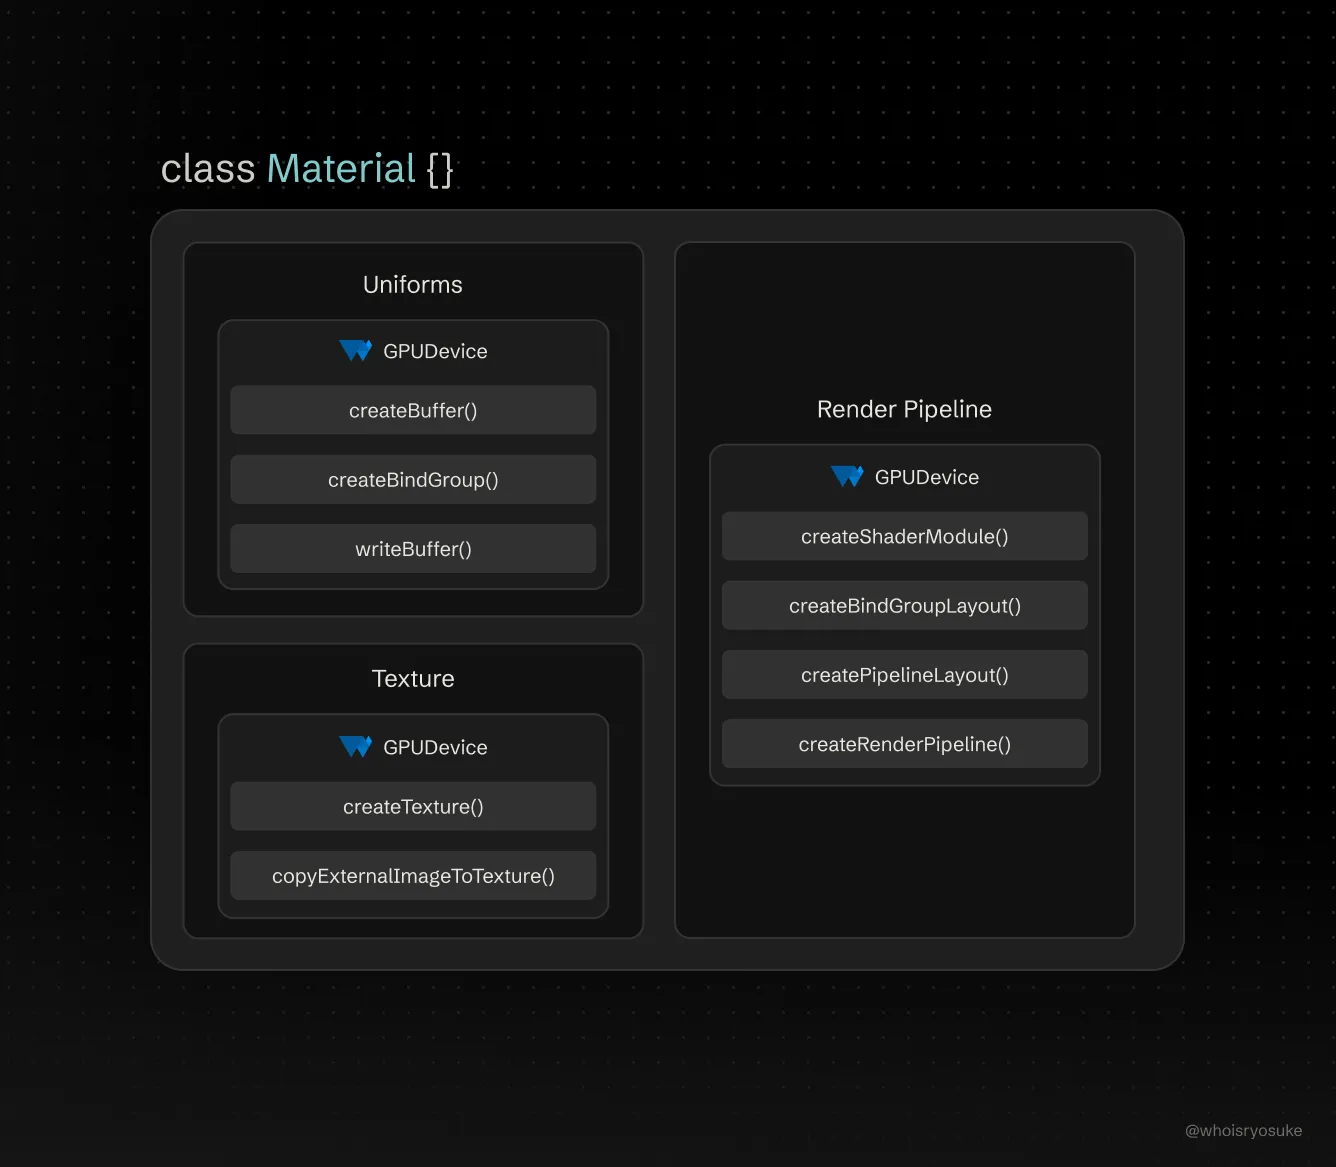
In our beginner renderer, you might have come across the concept of “uniforms” in your learnings, where properties are passed to the GPU and shader code from the CPU. We’ll use these uniforms to create “material” properties, like color.
You might also have tried loading an image as a “texture” and applied it to the 3D object using buffers and bind groups. Each material should be able to have the ability to apply at least 1 texture, so we’ll need a dedicated buffer and bind group for it.
We’ll also associate our material with a specific render pipeline. Why? The render pipeline is used when creating the bind groups to get the appropriate layout ID. Just a requirement to keep around, like the GPUDevice.
📁 The render pipeline could be stored somewhere else in a global store (like the
Meshlater). I store an actual reference to theGPURenderPipelinefor convenience, but you could also save a “key” (like the name of pipeline) and store the pipeline references in a global store to access using the key. I have an example of that in the repo.
So each material will contain minimally these 3 properties to provide objects with styling.
The structure
We’ll create a class called Material that will store the properties I mentioned above, as well as a name for convenience and debugging.
/**
 * The "styling" behind a Mesh.
 * Provides properties like color or opacity,
 * or helpers for managing underlying textures
 */
export default class Material {
  name: string;

  // GPU Specific
  uniforms: Uniforms<MaterialUniform>;
  /**
   * Mapping textures to material properties
   */
  textures: MaterialTextureMap = {};
  textureBindGroup?: GPUBindGroup;

  renderPipeline: GPURenderPipeline;

  constructor(
    device: GPUDevice,
    name: string,
    renderPipelineName: string = "Default",
  ) {}

  addTexture(
    device: GPUDevice,
    image: ImageBitmap,
    sampler: GPUSampler,
    type: MaterialTextureTypes,
  ) {}

  createTextureBindGroup(
    device: GPUDevice,
    sampler: GPUSampler,
    texture: GPUTexture,
  ) {}

  createDefaultTexture(device: GPUDevice, sampler: GPUSampler) {}
}name— This is the unique ID of the material. We’ll use this as the “key” in our material cache.uniforms— A reference to theUniformsclass that uses ourMaterialUniformtype. This does all the heavy lifting of changing material properties and updating the buffer.textures— A “hash map” for different texture types and the actual texture buffer. My renderer will be primarily PBR based, so the keys reference PBR properties likediffuse.textureBindGroup— The bind group that contains the textures and a sampler. We’ll use this during the render cycle to setup our texture uniforms for the shader. This is similar to what we do in theUniformsclass under the hood - but texture specific.
You’ll also notice a few helper functions that handle the dirty work with textures - like creating the appropriate bind group and buffer. We’ll also have a function for generating a default texture, just in case the user doesn’t provide an image.
Let’s break it down a bit. For reference, here’s the full source code so you understand things in complete context.
Material Uniforms
I mentioned earlier that we’ll use uniforms to store our “styling” properties, like the object’s color, or various PBR properties. We’ll leverage the Uniforms class we created earlier, so we can use the UniformsDataStructure to define our uniform type. Here’s what that material looks like:
export type MaterialFlags = {
  texture: boolean;
  debugUv: boolean;
  debugNormals: boolean;
  debugColor: boolean;
};

export interface MaterialUniform extends UniformsDataStructure {
  /**
   * RGBA color. Alpha represents opacity of object.
   */
  color: RGBAColor;
  /**
   * Shininess of object. 0-1000 range, 1000 less shiny.
   */
  specular: number;
  /**
   * Flags to enable/disable features
   * 0 = No, 1 = Yes
   */
  flags: MaterialFlags;
}
Then in our Material constructor we can create the Uniforms using an object with this structure:
export default class Material {
  constructor(
    device: GPUDevice,
    name: string,
    renderPipelineName: string = "Default",
  ) {
    // ...Get render pipeline...

    // Create uniforms for material (aka properties shared to shader)
    this.uniforms = new Uniforms(
      device,
      this.renderPipeline,
      "Material",
      createMaterialUniform(),
      UNIFORM_BIND_GROUP_LAYOUT_IDS["material"],
    );
  }
}
And with that, we have uniforms! We can change the color by doing:
const material = new Material();

// Change the blue value of the color to 1
material.uniforms.color.b = 1.0;

// Update uniform buffer
material.uniforms.setUniforms();
Handling textures
We assume the user will want to attach multiple images for PBR properties. The default one for the “color” of the mesh is called diffuse. They might also want to pass another image for the “roughness”, which the shader could use to make the object look “bumpy”. Because of this we’ll define a type called MaterialTextureMap. This defines an explicit mapping of all possible properties to textures. For now we’ll just use diffuse, but this allows us to expand as needed.
export type MaterialTextureMap = Partial<{
  diffuse: GPUTexture;
}>;

export type MaterialTextureTypes = keyof MaterialTextureMap;
Then when they make the material, they can add the texture using addTexture():
// Helper function to fetch an image and convert to bitmap for texture use
export async function loadImage(url: string) {
  const response = await fetch(url);
  const imageBitmap = await createImageBitmap(await response.blob());
  return imageBitmap;
}

// Load image as "bitmap"
const diffuseTexture = loadImage(imagePath);

// Do we have textures? Create them using material
if (diffuseTexture) {
  material.addTexture(device, diffuseTexture, sampler, "diffuse");
} else {
  material.createDefaultTexture(device, sampler);
}
You can see a more complex example of this in the OBJ loader function.
Texture helpers
For handling textures I didn’t make a dedicated class for it and I opted to create “helper” functions that take care of the specific procedures in isolation (like creating a texture-compatible buffer).
You can see the texture functions here, there’s only 2: createTexture() and createTextureBindGroup(). Nothing fancy, just separating basic logic you might already have in your 101 renderer into separate functions.
Material cache
Once we have our Material class, we need to create a “global” (or relative) cache for them. For instance, when we load a few 3D models from OBJ files, if they share materials, they should only create 1 material and use the same 1 across all 3D objects.
To keep it simple, we’ll store the materials as a property in our Renderer class:
class Renderer {
  // Scene
  materials: Record<string, Material> = {};
}
ℹ️ Usually 3D libraries and apps have a concept of a “Scene”. This encompasses things like the meshes, materials, and other scene specific properties. You’d want to use this kind of setup if you expect the user to switch between whole “levels” (like a video game). It’d make things easier like transitions - like removing and then adding objects to scene (possibly with a fade in/out animation). To keep things simpler, we’re only focused on the critical core components right now.
Our materials will be stored in an object as a “hash map” style storage (or “dictionary” for you C# and Swift freaks out there). Each material should have a unique name that we’ll use as the key for the materials cache object.
In practice it’d look like this:
// Create a mesh to attach material to
const cubeMesh = generateCube(this.device, this.renderPipeline, 0.1);

// Create a material
const materialKey = "Default";
const defaultMaterial = new Material(
  this.device,
  this.renderPipeline,
  materialKey,
);

// Assign the material to the mesh (we'll cover this later)
cubeMesh.material = materialKey;

// Add material to "global" cache
this.materials[materialKey] = defaultMaterial;
Then we’re rendering we just grab the material based off the mesh’s material property (which just contains the material name) and grab any necessary properties from it (like the uniform bind group).
objects.forEach((obj) => {
  // Get object's material
  const material = materials[obj.material];

  // Set the pipeline to the match the material
  passEncoder.setPipeline(material.renderPipeline);

  // Set bind groups (uniforms, texture, etc)
  passEncoder.setBindGroup(
    UNIFORM_BIND_GROUP_LAYOUT_IDS["locals"],
    mesh.uniforms.uniformBindGroup
  );
}
Comparing to other libraries
-
Material + ShaderMaterial / Babylon.js — The
Materialclass handles creating the uniform buffer, which they have a dedicatedUniformBufferclass for. Based on the backend, WebGL or WebGPU, they change the way they create the buffer (makes sense — gotta use different APIs to create buffers in the each backend). TheShaderMaterialhandles creating the render pipeline any custom shaders the user provides, and takes anuniformsproperty to define custom uniforms.const customShader = new BABYLON.ShaderMaterial( "customShader", scene, { vertex: vertexShader, // Text with shader (loaded from file usually) fragment: fragShader, }, { attributes: ["position"], // Attributes declared in shader uniforms: ["worldViewProjection", "time", "customColor"], // Uniforms declared in shader }, ); // Set a vector uniform (like a color) customShader.setVector3("customColor", new BABYLON.Vector3(0.5, 0.2, 0.8));The API reflects a common pattern used in OpenGL (and subsequently WebGL) where you have setters for specific data types (like a 3D vector in this case for a color). You can see a similar API in my old OpenGL renderer.
-
Material + ShaderMaterial / ThreeJS — The
Materialclass is just a core class that all other materials extend from. I couldn’t find any buffer logic in there. It seems theShaderMaterialhandles holding the uniform values, but that’s it. The uniform buffer logic is handled by each specific backend. Their WebGPU backend code seems to be changing a lot these past couple months, so it might even be different by the time you check it out. -
Material + Shader / Orillusion — The
Materialclass is a wrapper around theShaderclass. TheShaderclass handles updating uniforms, but technically the uniform setters are located in theUniformGPUBuffer- lower down inside theRenderShaderPass. -
Material / GPU Curtains — The
Materialclass is kinda similar to the one we created here. It’s got uniforms, bind groups, textures (and their buffers and bind groups), and even the associated render pipeline.
Mesh
When you render an object, you basically: assign bind groups, assign buffers (like vertex), then…draw it. The mesh encompasses all the properties we need during the render loop (the geometry with our buffers, and the material with our bind group).
The Mesh is basically a wrapper around the Geometry and Material classes. Nothing too fancy here.
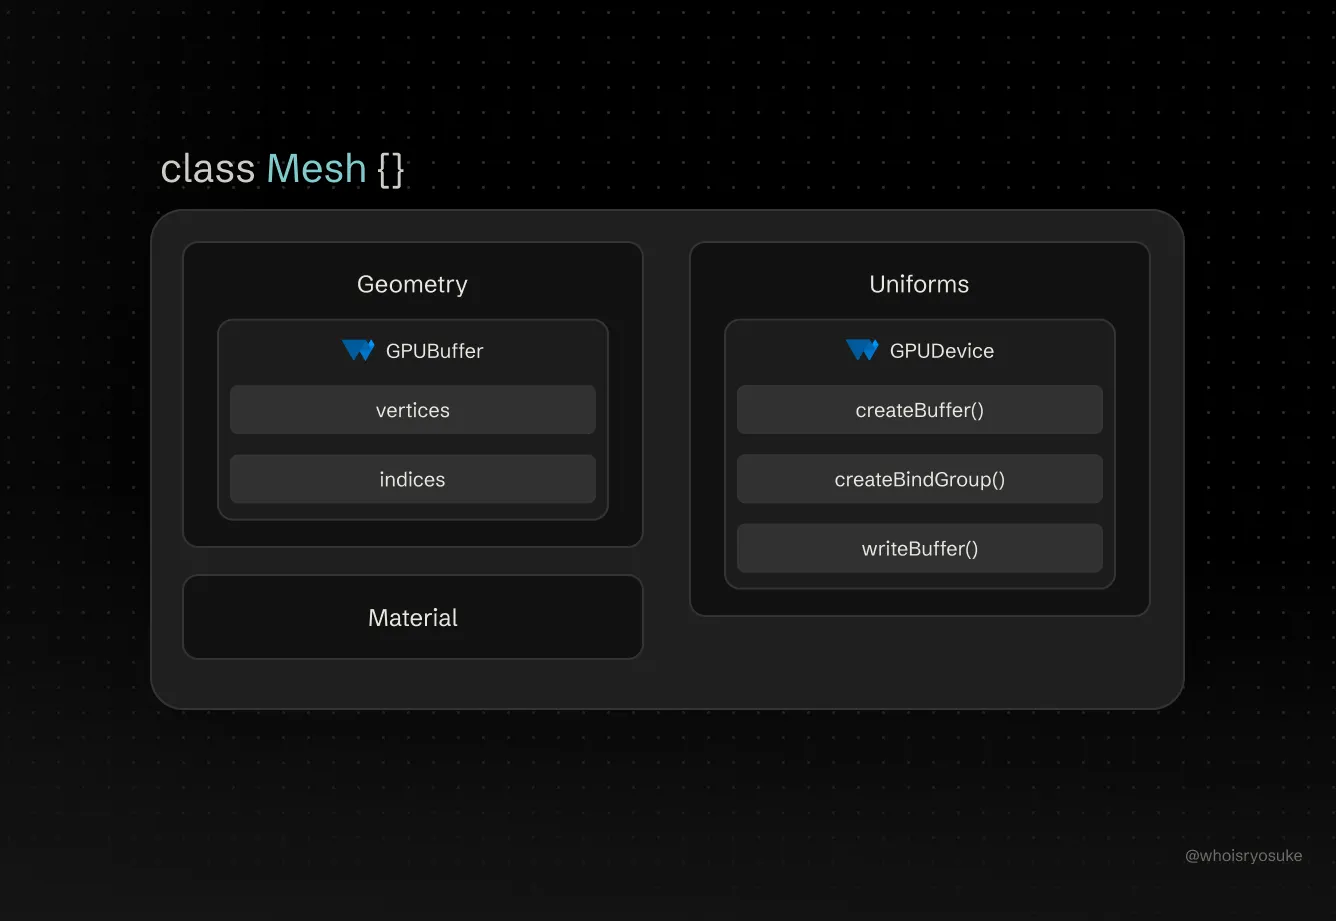
The geometry is a reference to the actual Geometry instance. And the material is stored as a string - which is a “key” that maps to the correct shader in the cache.
The big key is that we also leverage our Uniforms class to create “local” uniforms for mesh-specific properties (like say, having unique positions for each one).
Why use a Mesh?
Like with our geometry, if we wanted to render multiple cubes, we could use the createCube() function to generate 2 separate vertex buffers, and then offset one cube’s position using the vertex buffer data. But that’s super inefficient. We’re duplicating our points just to do basic math — and we’re doing things on the CPU that could be done using shaders on the GPU. This is literally what the vertex shader part of the pipeline is for — to alter the position of the mesh.
// This is bad
const cubeOne = createCube();
const cubeTwo = createCube();

// ...render both...
So how do we render 2 cubes, use the same vertex data, but provide 2 different positions? We could use the material and create a offset property on it, but that’s messy. What if we want to have different types of materials, like a stylized shader versus the realistic one? Then we’d need to make sure both extend from the same base material that has the base offset property. And the real deal breaker — what if we want to use the same material for 2 objects? They shouldn’t also share the same position if we only want them to be the same color/texture.
Instead, we can store the offset in a “local” uniform that we define in the Mesh. This allows each mesh to be “unique” and have it’s own position in 3D space that it owns and doesn’t share.
The Structure
/**
 * Handles position, scale, rotation of geometry.
 * Creates a localized uniform buffer to contain properties.
 */
export class Mesh {
  geometry: Geometry;
  /**
   * A key that maps to a global cache with all loaded mats
   */
  material: string;
  uniforms: Uniforms<MeshUniforms>;

  constructor(
    device: GPUDevice,
    renderPipeline: GPURenderPipeline,
    geometry: Geometry,
    material?: string,
  ) {
    this.geometry = geometry;
    this.uniforms = new Uniforms(
      device,
      renderPipeline,
      "Mesh",
      createMeshUniforms(),
      UNIFORM_BIND_GROUP_LAYOUT_IDS["locals"],
    );
    this.material = material ?? "Default";
  }
}
Believe it or not, that’s it! It’s really just a wrapper around 3 classes we’ve already created: Geometry, Material (kinda), and the Uniform classes.
Mesh uniforms
We want each mesh to be able to have a unique position, rotation, and scale. It should work like Blender. If I make a cube, I can scale it up and move it. Then I can also create another cube and move it to another spot.
We can accomplish this by adding “local” uniforms to our Mesh class. It’s a common terminology used in rendering. Often “globals” will be uniform values shared across all objects — and “locals” are object specific properties.
The process is similar to making uniforms in our Material - we define a type (for developer experience) and a default uniform object to provide the uniform to measure and store.
interface MeshUniforms extends UniformsDataStructure {
  position: Vector3D;
  rotation: Vector3D;
  scale: Vector3D;
}

const createMeshUniforms = (): MeshUniforms => ({
  position: {
    x: 0,
    y: 0,
    z: 0,
  },
  rotation: {
    x: 0,
    y: 0,
    z: 0,
  },
  scale: {
    x: 1,
    y: 1,
    z: 1,
  },
});

// In the `Mesh` constructor
this.uniforms = new Uniforms(
  device,
  renderPipeline,
  "Mesh",
  createMeshUniforms(),
  UNIFORM_BIND_GROUP_LAYOUT_IDS["locals"],
);
Now when we want to move an object, we can just update it’s position in it’s uniforms property:
// Update position and scale
cubeMesh.uniforms.uniforms.position.x = 4;
cubeMesh.uniforms.uniforms.scale.x = 4;
cubeMesh.uniforms.uniforms.scale.y = 4;
cubeMesh.uniforms.uniforms.scale.z = 4;
cubeMesh.uniforms.setUniforms();
Cool, now each of our objects has a unique position and whatnot. With this, we have a pretty half decent renderer. We could almost stop here depending on how simple your renderer’s use case is. If you only need multiple objects with different materials, you’re good to go.
Comparison to other libraries
- Mesh / ThreeJS — Similar to our setup, the Mesh contains a reference to the
GeometryandMaterial. They keep direct references, no key name for materials. The uniform logic is separated and handled by a different system. - Entity + Object3D / Orillusion — The
Object3Dextends theEntity- which defines basic properties like the object’sTransform(aka position, rotation, scale). As you can imagine this “entity” is a foundational piece of an “ECS” (entity - component - systems) architecture, so a lot of logic is deferred (like handling buffers). - Mesh + MeshBaseMixin + Object3D / GPU Curtains — The
Meshclass extends theMeshBaseMixinwhich is essentially a wrapper around geometry and material. ThenObject3Dwraps theMeshand adds the transformation logic (position, etc).
But what if you wanted to add a custom shader to our object? You might want to make a vertex shader that handles animating an object efficiently on the GPU (instead of CPU), or do some interesting tricks in the fragment shader to color the mesh (like using the geometry’s “normal” data as color instead of the material color).
This is where the render pipeline comes into play.
Render Pipeline
Our renderer is working great, but we’re currently hard-coded to a single render pipeline using a single set of vertex and fragment shaders. That means we have multiple objects rendering, but all of them use the same shader code. This is fine for simple objects, but there’s a plethora of reasons you could want to use a different shader for a specific mesh/object in your scene.
So how do we do let the user define a new shader? In WebGPU the shaders are defined in the render pipeline. When we create the render pipeline (or GPURenderPipeline) — part of it’s initial configuration is the vertex and fragment properties that contain our shader code.
And since WebGPU state is immutable, meaning we can’t change it once it’s created, if we want to use different shader code we need to create a new render pipeline. That means for every set of shader we want to use, we’ll need a render pipeline.
ℹ️ Do you kinda see why modern video games have a shader compilation step now? Combined with the need to optimize data (like textures) and configurations for specific GPU hardware, it’s also integral to statically analyze the content and optimally create render pipelines for each shader.
The Structure
Similar to other parts of the system, this felt like it didn’t need it’s own class. Since render pipelines are immutable already, there’s no reason to create a wrapper around it (unless you want to handle deleting the pipeline or something).
We essentially only need 1 function to create the pipeline as needed.
export interface RenderPipelineConfig {
  name?: string;
  vertex?: string;
  fragment?: string;
  shader?: string;
  wireframe?: boolean;
}

export function createRenderPipeline(config: RenderPipelineConfig) {}
You can see the full source code here. It’s nothing too dissimilar than the code from a 101 tutorial renderer, we just have a couple of toggles (like enabling “wireframe” mode by changing one of the render pipeline properties).
Hard-coded bind groups layouts
One of the biggest issues I discovered with WebGPU render pipelines was the layout property. You’ll find that some tutorials recommend using the auto setting. This has WebGPU check your shader code for the the structure and use that to generate the appropriate “bind group layout” boilerplate code.
This works fine in smaller cases, but as you expand your app and start adding more and more uniforms, you’ll quickly find the renderer crashes often with an error about the bind groups “mismatching” the layout provided by the shader code.
Why does this happen? Let me give you a simple example. Let’s say you add a new property to an existing uniform, or even a new bind group with a new uniform. In our case, we’ll add a time uniform.
// Pseudo code
// Create uniform
const uniforms = new Uniform({ time: 0 });

// Assign during render
passEncoder.setBindGroup(0, uniforms.uniformBindGroup);
Now in our shader code, don’t add the uniform. If you run the renderer, the it will error. Now add the uniform to the top of the file — but don’t use it inside your vertex shader’s main function. It still errors. Now finally, use the uniform value inside the shader. For simplicity, you could even just assign it to a temporary variable (like var time_test = globals.time). This works.
As you can imagine, this is incredibly frustrating for a developer to have to use every single uniform you provide in the shader code in order to generate and validate the render pipeline. Especially since we want to support custom shaders, we can’t expect the user to use all of them. The other option would be reading the custom shader code to see what uniforms get used, then enabling/disabling the setBindGroup() method calls during our render cycle — but that’s tricky (and messy).
To keep things simple like I mentioned earlier, we’ll assume we’re always applying all of our uniforms (from global to local to material and texture).
In the render pipeline, we “hard-code” the bind group layouts in for the uniform groups we’ll be creating. You might have encountered this boilerplate code in one of the tutorials if they manually setup uniforms completely. Here’s an example of one for the “globals” uniform:
const globalUniformLayout = device.createBindGroupLayout({
  entries: [
    // Global uniforms
    {
      binding: 0,
      visibility: GPUShaderStage.VERTEX,
      buffer: {
        type: "uniform",
      },
    },
    // Camera uniforms
    {
      binding: 1,
      visibility: GPUShaderStage.VERTEX,
      buffer: {
        type: "uniform",
      },
    },
  ],
});
You can see the all the layouts here in the full source code.
ℹ️ In the future I might make this optional or something depending on what kind of pipelines I create. For example, a particle system might use different properties requiring a different uniform structure.
Vertex and fragment or two-in-one?
The vertex and fragment shader code can exist in separate files (like vertex.wgsl and frag.wgsl files) or in a single file (like shader.wgsl).
When we’re setting up the render pipeline, we need to define the shader code for both vertex and fragment shaders. For the “single file” situation, we just use the same code for both — but we provide the name of the “main” function each shader should start at (like vertex_main and fragment_main).
And then - what if the user only provides 1 shader (like fragment) - but doesn’t provide the other? We should provide a default fallback solution.
To handle all this, I have a few properties in the RenderPipelineConfig. I allow the user to pass either a single shader - which would contain both vertex and fragment, or they can use the vertex and fragment properties to set one or the other or both.
Using custom shaders
How does it look for the end user to create a custom shader and use it? It’s actually fairly short and concise.
First, we need a shader. We’ll use our default shader as the basis for now, but we’ll use the time global uniform to animate the color by passing it down from the vertex shader to fragment:
// Condensed for clarity -- see full shader code in GitHub
struct VertexOut {
  @builtin(position) position : vec4f,
  @location(0) world_position: vec3<f32>,
  @location(1) color : vec4f,
  @location(2) normal : vec3f,
  @location(3) uv : vec2f,
  // Add time to the vertex ouput
  // Optionally we could also expose globals to fragment shader in bind group layout
  @location(4) time : f32,
}

struct GlobalUniforms {
  time: f32,
  light_position: vec3<f32>,
}

@group(0) @binding(0) var<uniform> globals: GlobalUniforms;

@vertex
fn vertex_main(
  @builtin(vertex_index) vertexIndex: u32,
  @builtin(instance_index) instanceIndex: u32,
  @location(0) position: vec3f,
  @location(1) normal: vec3f,
  @location(2) uv: vec2f
) -> VertexOut
{
  var output : VertexOut;

	// Add time to vertex output to send to fragment
  output.time = globals.time;

  return output;
}

@fragment
fn fragment_main(fragData: VertexOut) -> @location(0) vec4f
{
  let animated_color = vec2f(sin(fragData.time / 420), cos(fragData.time / 420));

  return vec4f(fragData.uv * fragData.normal.xy + animated_color, 1.0, 1.0);
}
We’ll save this as custom.wgsl inside of our shaders folder - but you could name it whatever (or even use a shader from say - user input).
Then we can import this file using import thanks to our bundler Vite, and create our custom shader:
import customShader from "../shaders/examples/custom.wgsl?raw";

// Example: Custom shader
const customShaderConfig: RenderPipelineConfig = {
  fragment: customShader,
  name: "Custom",
};
const customRenderPipeline = createRenderPipeline(customShaderConfig);
const customMaterial = new Material(
  this.device,
  "Custom",
  customRenderPipeline.name,
);

// Assign the material to a mesh
const cubeMesh = generateCube(this.device, customRenderPipeline.pipeline, 0.1);
cubeMesh.material = "Custom";
We define a config that contains our shader code, then we create a new render pipeline with it. Then we create a material and pass it the render pipeline to use (technically the name - which we’ll use to grab the pipeline from a global cache).
Finally. We have a WebGPU renderer that can handle multiple objects and materials, and even supports custom shaders.
Render Callback
The last thing we can do to make this API work more like ThreeJS or Babylon is by adding a render callback function. Currently we require the user to edit the Renderer class and run that, but what if they used it externally? Like say, creating an input system that accepts keyboard input, then using that to power some changes to the 3D scene.
We only need to add one simple change to enable it. But before we do, let’s break down the current renderer process.
The current process
- We run the
init()method on theRendererto spin up our 3D scene. This involves creating the canvas, getting the WebGPU “device”, and creating any necessary buffers and whatnot (like the depth texture or loading meshes). - Then in that same function, we create an infinite loop using
requestAnimationFrame()and we pass it arender()function. This handles drawing our 3D every “frame per second” (or really, whenever RAF allows it to draw).
Now we have a choice here. Do we want our renderer to manage the loop? Or do we want the user to create it — then call the render() function themselves?
With ThreeJS, they require the user to do it:
import * as THREE from "three";

const scene = new THREE.Scene();
const camera = new THREE.PerspectiveCamera(
  75,
  window.innerWidth / window.innerHeight,
  0.1,
  1000,
);
camera.position.z = 5;
const renderer = new THREE.WebGLRenderer({ antialias: true });
renderer.setSize(window.innerWidth, window.innerHeight);
document.body.appendChild(renderer.domElement);

const geometry = new THREE.BoxGeometry(1, 1, 1);
const material = new THREE.MeshBasicMaterial({ color: 0x00ff00 }); // Green color
const cube = new THREE.Mesh(geometry, material);
scene.add(cube);

// ⭐ The render loop
function animate() {
  requestAnimationFrame(animate);

  cube.rotation.x += 0.01;
  cube.rotation.y += 0.01;

  renderer.render(scene, camera);
}

// Start the animation
animate();
I’d prefer to keep things simple for now and just run it in the renderer. But in the future I’d probably consider this API, since it gives the user the option to render on demand (like throttling the FPS themselves — or just rendering only once per change for better performance).
The callback
Currently we have the requestAnimationFrame running in the init() method. The first step is just moving the render() function into it’s own dedicated class method. This required making a few variables into class properties.
Then the render() function itself gets a new argument — the render callback:
render(callback: (props: RenderProps) => void) {We expect the user to pass a function, and that function will receive “props” from our renderer — like the current time, or the meshes and materials in the scene.
export type RenderProps = {
  timestamp: number;
  meshes: Mesh[];
  materials: Record<string, Material>;
};
Some of these are direct references to class properties on the Renderer. This allows the user to mutate these values and see updates during render. We call the callback before we render, so the user’s changes can be seen immediately.
// Let's user mutate scene before render
const renderProps: RenderProps = {
  timestamp,
  meshes: this.meshes,
  materials: this.materials,
};
callback(renderProps);
So now in our main.ts file, we can now tap into the render loop and alter things. Here’s an example of using an input system to update mesh positions:
import WebGPURenderer, { RenderProps } from "./core/renderer";
import DebugUIInstance from "./core/debug-ui";
import InputManager from "./core/input/input-manager";
import { KeyboardInputMap, KeyboardMusicInputMap } from "./core/input/keyboard";
import musicStore from "./core/store/music";
import { Midi } from "tonal";

// The user's render callback
const renderCallback = (props: RenderProps) => {
  // Get latest input from MIDI devices stored in a global cache
  const input = musicStore.getState();

  // Loop over each mesh (aka piano key)
  props.meshes.forEach((pianoMesh) => {
    const name = pianoMesh.geometry.name;
    // Make sure we're only updating piano keys
    if (!name.includes("WhiteKey") && !name.includes("BlackKey")) return;
    const pianoKey = name.split(".")[1];

    const midiKey = Midi.toMidi(`${pianoKey}4`);
    const pressed = midiKey ? input[midiKey].pressed : false;

    // ⭐ The important part
    // Move mesh up and down
    pianoMesh.uniforms.uniforms.position.y = pressed ? -0.05 : 0;
    pianoMesh.uniforms.setUniforms();
  });
};

async function main() {
  const renderer = new WebGPURenderer();
  const input = new InputManager();

  // Setup keyboard input to trigger piano keys
  input.enableKeyboard(DEFAULT_KEYBOARD_MAP, MUSIC_KEY_MAP);

  await renderer.init();

  // Pass in the render callback here
  renderer.render(renderCallback);
}
Very cool, now we have an API that’s more like a standard renderer. You can see the full source code here for reference.
The next step would be to let the user pass in materials and meshes during the init() sequence — or ideally — using a separate method that could happen anytime after initialization. That’d allow the user to add and remove meshes (and materials) on demand, instead of loading everything up front.
But I’ll leave that for you to figure out! It’s a nice easy challenge to understand the architecture and expand on it.
ℹ️ If you’re interested in input management systems, check out my previous blogs that cover the topic, or my input-manger library.
Exploring other WebGPU renderers
The reason you won’t have many people get into renderer structure is because each renderer is bespoke to it’s purpose. In this article’s case we were making a standard 3D renderer with physical materials, but you might be creating a 2D vector based image editor or something - which would require a notably different architecture.
Here’s a few examples of other projects and a brief overview of the architecture they used:
- toji’s spookyball game
- The WebGPU code is considered “engine” code, and many functions are wrapped in similarly named classes.
- It uses an ECS system to run the “engine” (aka renderer), as well as combine it with logic and data (like meshes)
- It also abstracts to allow for other backends (even though it doesn’t include them), so it can be a little trickier to learn from.
- online wgsl editor
- Good example of “dynamic” code like for vertex buffers. I had a lot of hardcoded data structures, this assumes none of that
- GPU Curtains
- More advanced one comparable to ThreeJS or Babylon — but focused on WebGPU so less abstraction to wade through. There’s a nice article series that covers some of the development.
- Orillusion
- A renderer created specifically for WebGPU. Doesn’t fallback to WebGL, so there’s little abstraction in the API towards graphic backends, making it easier to grok and learn from.
Render the future
We’ve only tapped the surface of what’s possible here. You can imagine how you could start to apply these systems to make something like say — a particle system. You could create input systems that manage devices like keyboards or even gamepads and MIDI keyboards. Or you could make a 2D or 3D game that anyone can play on the web.
There’s a lot of places you can go (and fun to be had) with this kind of simple architecture.
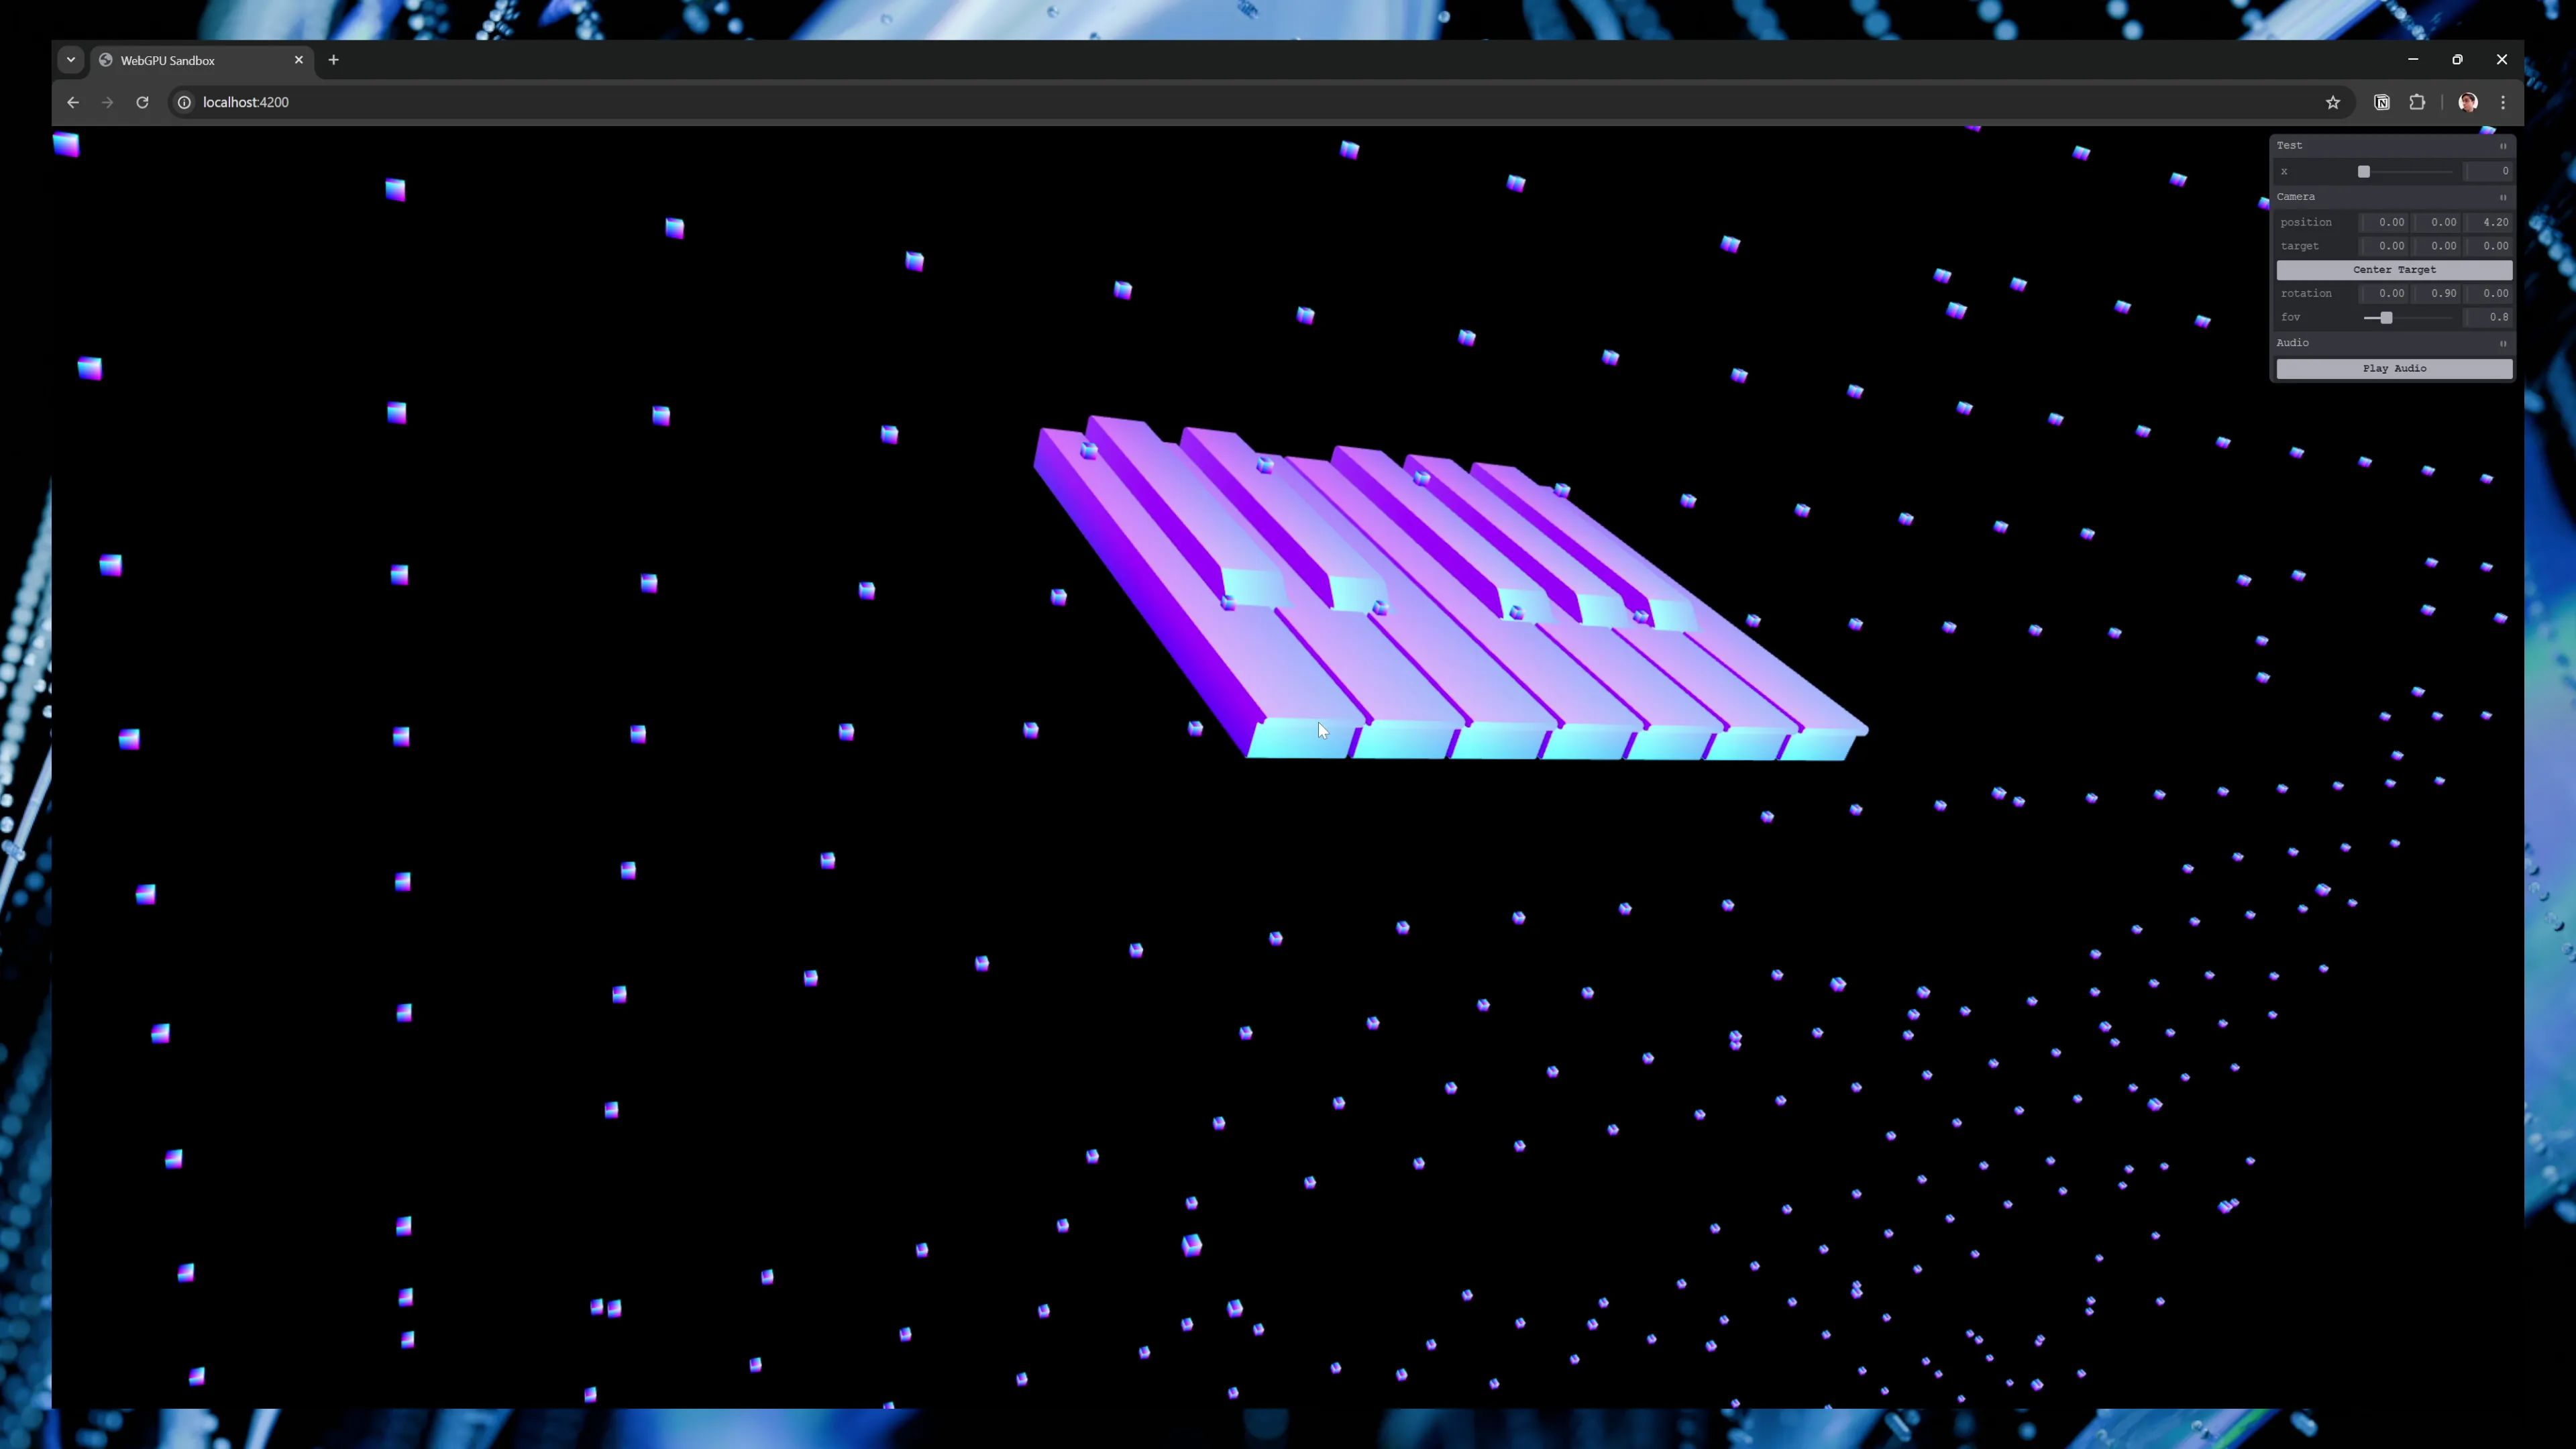
Personally I’ll be exploring topics that interest me: using compute shaders (for particles or crunching data like audio on the GPU), integrating new 3D standards like OpenUSD, MaterialX, and Open Shading Language, exploring new tech like gaussian splats. Maybe I’ll finally create a renderer for Blender’s Geometry Nodes — I already created a parser….

As always, if this inspires you to create something or you have any questions, hit me up on socials. Or if you’re interested in seeing more development of this renderer, or projects like this, check out my Instagram stories.
Stay curious,
Ryo
comments?
what's up?
