Posted on
February 26, 2024
I’ve been doing a lot more work in Blender lately and the thing I find myself doing most is fiddling with render output settings. I was constantly having to go in and change the resolution of the export for test renders - then again when I wanted to commit to a final render. Or just constantly setting sizes, like a 4k desktop vs a IG story.
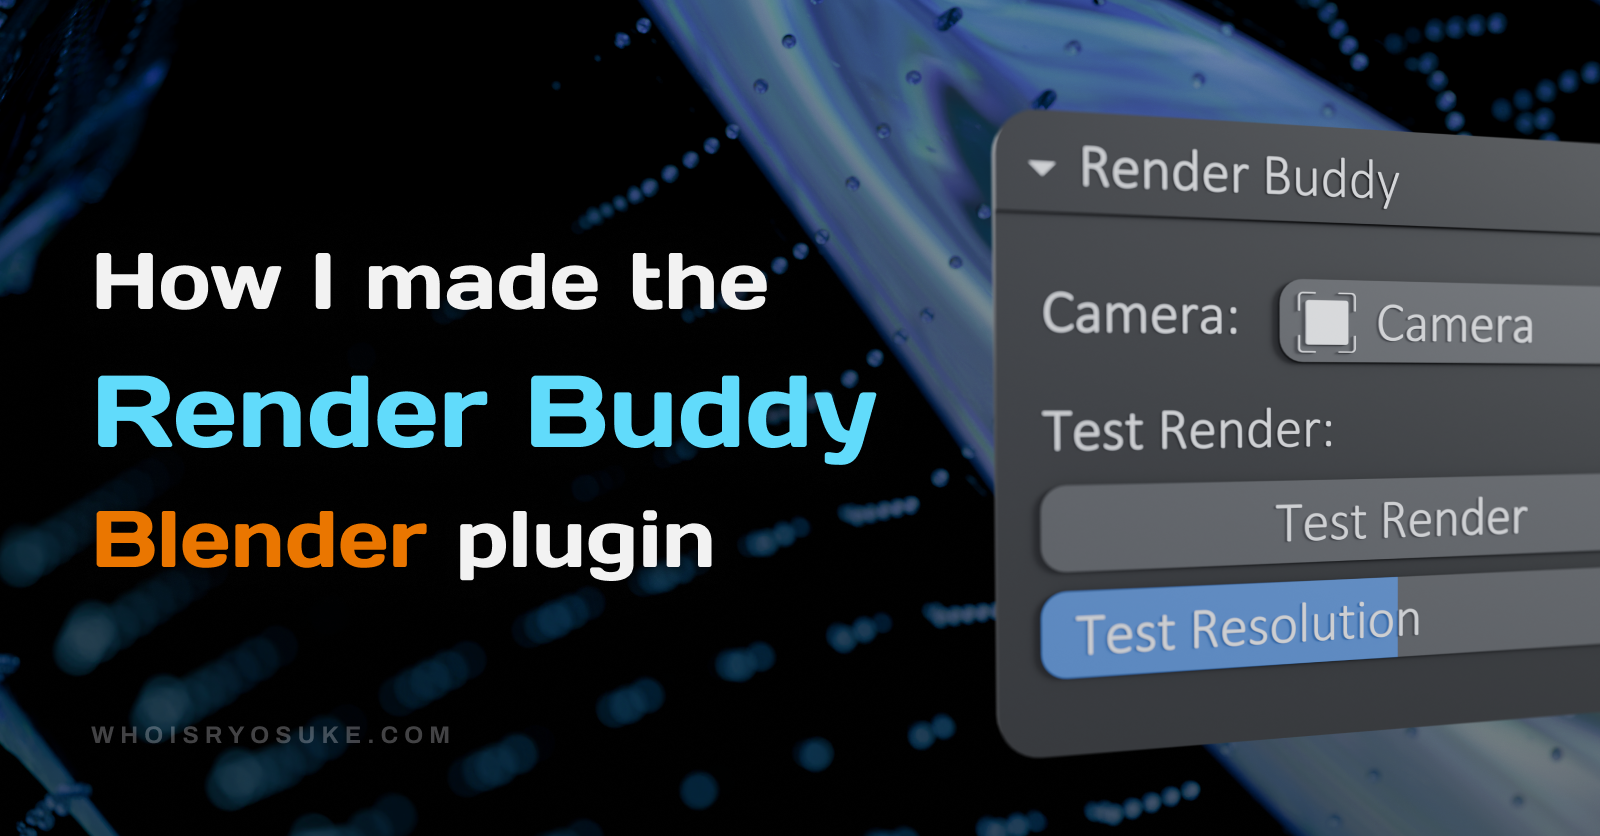
That’s why I developed Render Buddy. A plugin that lets you quickly change render settings and toggle between presets in a single window. I thought it’d be a great way to learn more about Blender plugin development, and improve my own productivity.
As always, I figured it’d be cool to go over my process developing this plugin and sharing tidbits I learned along the way.
Planning and Research
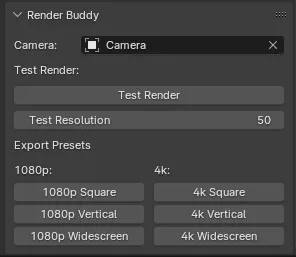
I won’t go into immense detail here (since my notes weren’t incredibly verbose either) - but this process basically involved me making a todo list of solutions the plugin needed to provide for me. This ranged from quickly swapping the camera, to having a way to quickly test render, and finally plenty of export presets for common device sizes.
I also looked into other existing Blender plugins that solve this issue. There were a couple that did similar what I wanted, like Quick Camera Resolution and Photographer. It was nice to see what kind of features they offered beyond what I initially imagined, as well as seeing what’s possible in the Blender UI.
Starting with Blender UI plugin development
Where to get started
I’ve made Blender plugins before, but I’ve never made a plugin that showed UI. I started my journey on the Blender documentation page for plugin development. This was a great starting point for understanding the basic architecture of a plugin, such as the register/unregister lifecycles and plugin classes with their necessary properties.
bl_info = {
    "name": "My Test Add-on",
    "blender": (2, 80, 0),
    "category": "Object",
}
def register():
    print("Hello World")
def unregister():
    print("Goodbye World")
💡 I also have some tips and tricks for plugin development in my previous article covering exporting geometry nodes from Blender.
UI panel development
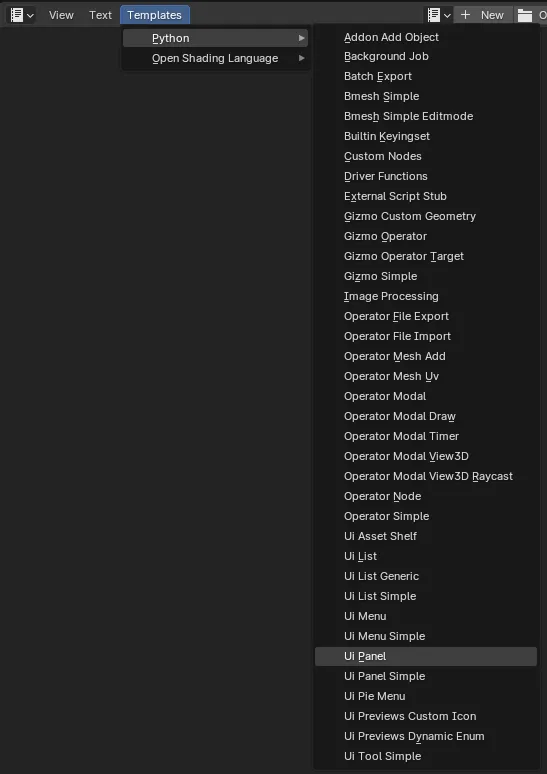
The best place to start with UI panel development is the official Blender template for it. You can find it under the Scripting tab (or just open the Scripting > Text Editor window). On the top of the Text Editor window is a menu bar with Templates item. Under Templates > Python > UI Panel you’ll find a basic template for how create a panel and draws a lot of the basic components.
I also looked into the Flamenco plugin source code, since I knew it targeted the same panel I wanted to add my UI to, and it also featured a lot of common UI elements. It was a nice reference to understand how to structure a larger scale plugin as well. You start in the __init__.py file here, then you can find the UI rendering logic in the gui.py here. From there I was able to see that they target a specific panel in the Blender UI.
class FLAMENCO_PT_job_submission(bpy.types.Panel):
    bl_space_type = "PROPERTIES"
    bl_region_type = "WINDOW"
    bl_context = "output"
    bl_label = "Flamenco 3"
It was also nice to see how they handled buttons and their click functions. You basically create a class based off the Operator type and use the execute() function there to run your code. The bl_idname property defines what your “function name” will be when you use it in your button, and the bl_label is the text of the button.
# Makes a button
col.operator("your_function")

class EXPORT_OPTIONS_set_1080p_square(bpy.types.Operator):
    bl_idname = "your_function"
    bl_label = "Run Function"
    bl_description = "Does cool stuff"
    bl_options = {"UNDO"}

    def execute(self, context: bpy.types.Context) -> set[str]:
        print("Hello World")
        return {"FINISHED"}

# Also make sure to register/unregister this class like you would any other!
def register():
    from bpy.utils import register_class
    register_class(EXPORT_OPTIONS_set_1080p_square)

def unregister():
    from bpy.utils import unregister_class
    unregister_class(EXPORT_OPTIONS_set_1080p_square)
    del bpy.types.Scene.my_tool
💡 There’s lots of little details I don’t cover here, but you can see in the
bl_optionsyou can pass flags likeUNDOto enable the user to undo the action. Pretty nifty.
UI Components
And finally, this was a fantastic resource - I found a gist with examples of each UI component and how to use them. This was excellent for seeing all the UI components in one place. And something the Blender template was missing — it helped understand how to setup dynamic elements like input elements that require you to store their state somewhere. It also had a nifty trick for calling multiple classes without having to explicitly call each one’s register/unregister methods.
UI components seem to target the property you provide and can update them as needed — even existing properties in the Blender UI and scene. It’s really handy being able to pass in a scene property and create your own UI to modify it. This was the secret behind half the UI in my plugin.
# Creates a dropdown for all the cameras in a scene
row.prop(scene, "camera")
Creating “properties”
Essentially for properties you need to create a class to contain them that extends the PropertyGroup class Blender provides. Then you can use their built-in type classes like StringProperty and create a new property on the class to hold it (my_string in this case). And then of course, you also register and unregister the class.
import bpy

from bpy.props import (BoolProperty,
                       IntProperty,
                       )
from bpy.types import (PropertyGroup,
                       )

# A class containing your scenes properties
class MY_PG_SceneProperties(PropertyGroup):

    my_bool: BoolProperty(
        name="Bool",
        description="Bool property",
        default = False
        )

    my_int: IntProperty(
        name = "Int",
        description="Integer property",
        default = 23,
        min = 10,
        max = 100
        )

# The standard plugin register/unregister lifecycles
def register():
    from bpy.utils import register_class
    register_class(MY_PG_SceneProperties)

		# Here is where you store properties to access globally
    bpy.types.Scene.my_tool = PointerProperty(type=MY_PG_SceneProperties)

def unregister():
    from bpy.utils import unregister_class
    unregister_class(MY_PG_SceneProperties)
    del bpy.types.Scene.my_tool

if __name__ == "__main__":
    register()
When the class is registered, you attach the pointer to the scene under a property named after your plugin (my_tool here, but could be anything). Then you can access that pointer anywhere in your plugin code by accessing the scene through the context when you execute() your class code:
class WM_OT_HelloWorld(Operator):
    bl_label = "Print Values to the Console"
    bl_idname = "wm.hello_world"

    def execute(self, context):
        scene = context.scene
        mytool = scene.my_tool

        # print the values to the console
        print("Hello World")
        print("bool state:", mytool.my_bool)
        print("int value:", mytool.my_int)

        return {'FINISHED'}
Uncovering scene properties and functions
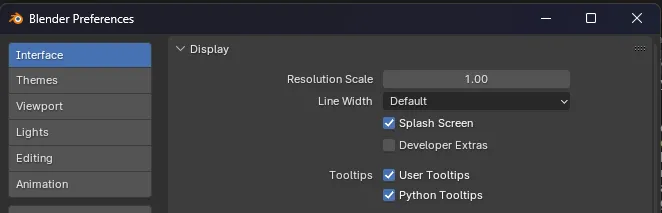
I mentioned earlier that UI components can just use existing scene properties, like the dropdown I create by passing in scene.cameras. You could spend time debugging in Python or looking through the documentation to figure out where a certain property is. Or you just hover over any element in the Blender UI and see the property name:
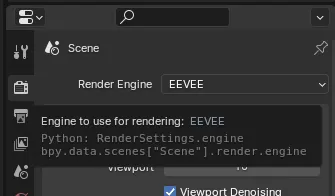
You can enable these Python tooltips in Blender’s settings under the Interface tab, in the Display accordion, under the Tooltips group.
You can hover over any input, button, and even windows and see how to reference them in Python. Great for targeting a certain panel with your plugin, or duplicating existing functionality (like the render button… 👀).
💡 Keep in mind that when you see
bpy.data.scenes["Scene"]as a prefix for something, you can just usecontext.sceneinside the Blender plugin. Both will work, but using thecontextwill work in every edge case.
Now that I had a good grasp of the basics of UI development, I set off to start my plugin development.
The process
I used a mix of all the resources above to start the project and I drew a couple basic elements just to get started. Most of the initial time was spent honestly just figuring out how Blender UI works with row() and column() layout methods.
The first buttons I created were the functions to set the export resolution. I started with a simple “1080p Square” format. I wanted to changed the render resolution, so I hovered over the input options in the render menu and saw they were under X and Y values (bpy.context.scene.render.resolution_x).
class EXPORT_OPTIONS_set_1080p_square(bpy.types.Operator):
    bl_idname = "export_options.set_1080p_square"
    bl_label = "1080p Square"
    bl_description = "Sets Resolution to 1080p"
    bl_options = {"UNDO"}

    def execute(self, context: bpy.types.Context) -> set[str]:
        bpy.context.scene.render.resolution_x = 1080;
        bpy.context.scene.render.resolution_y = 1080;
        return {"FINISHED"}
Then I moved on to the test render button. The test render button was created by hovering over the render button in the menu bar on top and seeing what the “operation” method for it was. Then I created my own function to wrap it, so I could encapsulate the logic of swapping the render settings back and forth.
The button needed to:
- Preserve previous render settings
- Set the render resolution to the user defined “test” number
- Render the file and save it to the disk
- Restore settings
Starting with preserving the settings, we create variables on the top of the function that keep track of them. I had to use the copy library to create a real copy of the data (instead of a reference to the property on whatever class/object it’s on).
# Preserve prev settings
# Make sure to copy any properties of classes
import copy
prev_reso_percent = copy.copy(bpy.context.scene.render.resolution_percentage)
prev_file_path = copy.copy(bpy.context.scene.render.filepath)
Setting the resolution percent was easy — I just hovered over it in the Blender UI and saw it was bpy.context.scene.render.resolution_percentage — so I just changed that value.
# Set to 50%
bpy.context.scene.render.resolution_percentage = 50
Now this was the tricky part, I had to render the file and save it to disk. But in order to save it to the disk, we need a place to save it. Blender gives us access to the current file path using bpy.data.filepath. This returns something like C:\MyBlenderProjects\test.blend.
If we use the os.path library in Python, we can break down the path and get the filename part using os.path.basename(). Then we can grab the user’s preferred image file type from the current settings using bpy.context.scene.render.image_settings.file_format - and then just append that to the name. So it goes from test.blend to test.png.
But - since we want to assume the user will be rendering more than one image, we want to make sure that the file names are unique. So we can add a %s to the filename and swap it out with a date in a minute. So it looks like test-%s.png
Then we can finally run the render process once the path to the render file is set.
This whole process looks like this altogether:
class EXPORT_OPTIONS_test_render(bpy.types.Operator):
    bl_idname = "export_options.test_render"
    bl_label = "Test Render"
    bl_description = "Renders at 50% then returns prev. settings"

    def execute(self, context: bpy.types.Context) -> set[str]:
        # Preserve prev settings
        # Make sure to copy any properties of classes
        import copy
        prev_reso_percent = copy.copy(bpy.context.scene.render.resolution_percentage)
        prev_file_path = copy.copy(bpy.context.scene.render.filepath)

        # Set to 50%
        bpy.context.scene.render.resolution_percentage = 50

        # Make a filename based on current `.blend` file
        import os
        output_dir = os.path.dirname(bpy.data.filepath)
        filename_dirty = os.path.basename(bpy.data.filepath)
        filename = filename_dirty.replace(".blend", "")
        file_type = bpy.context.scene.render.image_settings.file_format
        output_file_pattern_string = filename + "-%s." + file_type

        # Get the current time to append to filename
        from datetime import datetime
        now = datetime.now() # current date and time
        time = now.strftime("%H-%M-%S")

        # Render and save to file
        bpy.context.scene.render.filepath = os.path.join(output_dir, (output_file_pattern_string % time))
        bpy.ops.render.render(write_still = bpy.data.is_saved)

        # Return settings
        bpy.context.scene.render.resolution_percentage = prev_reso_percent
        bpy.context.scene.render.filepath = prev_file_path

        return {"FINISHED"}
I also needed to create a property to contain the percent we shrink the test render to.
 # Global plugin properties
class PluginProperties(PropertyGroup):

    test_resolution: IntProperty(
        name = "Test Resolution",
        description="Temporary resolution for test renders",
        default = 50,
        min = 10,
        max = 100
        )
But that’s about it! We’ve got a button that drops the image resolution down, renders, saves the image, and then resets render settings back.
No wheezin’ the juice buddy!
No joke this has been a great addition to my workflow to simplify the setup of files and lower friction while I’m running and rendering. I highly recommend creating small plugins to simplify your workflow, it’s surprisingly easy with Blender, and the only major limitation is maybe basic to mid Python knowledge (definitely required for some of the quirks).
As always I hope this helped get you started in plugin development, or just inspired you to make your own! If you do end up crafting up something - feel free to share it with me on Threads, Mastodon, or Twitter.
Stay curious, Ryo