Posted on
April 11, 2023
With another release of the Bevy comes another Bevy game jam. This is the third jam Bevy has hosted, the theme was “side effects” and was about 10 days long. I’ve been experimenting with Bevy recently and even wrote a little Galaga clone. I thought this would be a great chance to dive deeper and learn more about the game engine.
My goal was to create a clone of Katamari Damacy, a cult classic from the PS2 era about a small prince that rolls up objects into planet sized balls. The larger the ball, the more points the player gets. And the ball itself rolls with semi-realistic physics — with each item added contributing to how the ball rolls (like a telephone pole sticking out and creating a pole vault type situation).
.CKR_3LGc_hh17e.webp)
I didn’t get to use the whole jam time so I didn’t finish - but I thought I’d share my findings while making the game. From learning the basics of the physics library Rapier, to creating UI with egui - I cover all the features and tricks I discovered. This does assume you know a little bit of the Bevy basics (like how ECS works), if you’d like an intro to Bevy’s architecture check out my guide on making Galaga.
What is Bevy?
Bevy is a cross-platform and low level game engine written using Rust and WebGPU. You write your game using an ECS architecture (similar to Unity or Unreal) and various Bevy APIs (like a simple Timer, or PBR meshes and materials like a textured sphere).
Every “major” release Bevy hosts a game jam to encourage developers to use the latest version and learn about new features and changes. The game jam topic is voted on in the Bevy Discord, and the voting happens on Itch. You can see all the entries from this game jam here. This game jam commemorated version 0.1 of Bevy and the theme was “side effects”.
Setting up
I created a fresh Rust project using cargo new. Then I installed Bevy and the Rapier plugin for Bevy (as well as extra features like Rapier’s debug mode).
First I used the basic Bevy 3D physics example from Rapier docs - didn’t work because of old Bevy API. Once I changed the Bevy API around (like spawn_bundle becomes just spawn) I got it working kinda…? The ball never bounced, even when I moved the ball around - but it worked and printed out velocity.
From there I used the 3D boxes example from the Rapier repo. That worked without any changes. But it doesn’t have any actual 3D meshes? It’s only colliders that are only visible using debug mode.
Though I couldn’t find a good example of mixing Bevy’s PBR meshes and Rapier’s colliders in the Rapier examples. That was my next goal.
Understanding Rapier physics API
Now I had to wrap my head around Rapier and how it works. The examples do a great job of illustrating most of the common things you’d need (nested colliders, collision detection, etc). But there were a few things I was curious about how they exactly worked in regards to my game — like detecting the collision of the player’s ball and an item.
Combing meshes and colliders
This took me a bit of tinkering to find the best way to handle combining a mesh with a collider. There’s no clear example in the documentation for the best method — and I was getting some weird WebGPU errors about bind groups running out of memory in some cases (probably Bevy/PBR related).
Here’s the trick — Rapier checks for a Transform component on the entity. In the example code, they add a TransformBundle to each entity with a collider to provide it with a Transform component. This let’s Rapier have a “position” to change when physics happen (like moving when it’s bumped into).
When you add a PbrBundle to the app, Bevy adds a few components to your entity: the mesh, a Transform component, and other components (GlobalTransform, ComputedVisibility, etc).
We can use the bevy-inspector-egui to see a list of all the entities in the scene and their components and children. Here you can see we’ve expanded a “Pbr Mesh” entity and you can see components like Transform in the list.
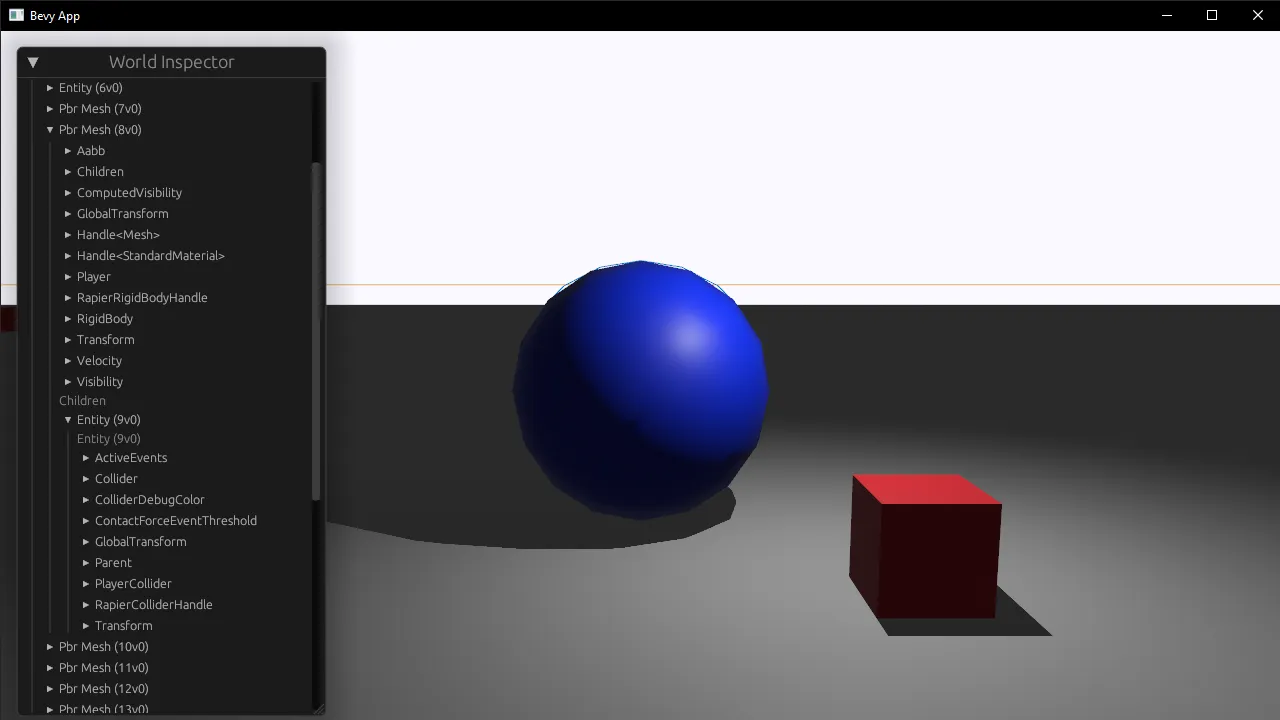
So to combine the mesh and collider, you need to remove the TransformBundle and replace that with the PbrBundle (which contains a Transform).
commands.spawn((
    // TransformBundle::from(Transform::from_xyz(0.0, -ground_height, 0.0)),
    Collider::cuboid(ground_size, ground_height, ground_size),
    PbrBundle {
        mesh: meshes.add(shape::Plane::from_size(ground_size).into()),
        material: materials.add(Color::rgb(0.3, 0.5, 0.3).into()),
        transform: Transform::from_xyz(0.0, -ground_height, 0.0),
        ..default()
    },
));
The reason we do this is because Bevy won’t allow for multiple Transform components on a single entity (unless it’s nested as a child entity). This ensures that every element can easily be “queried” for it’s global or local positions without having to discern between multiple components.
You can find the full example on Github.
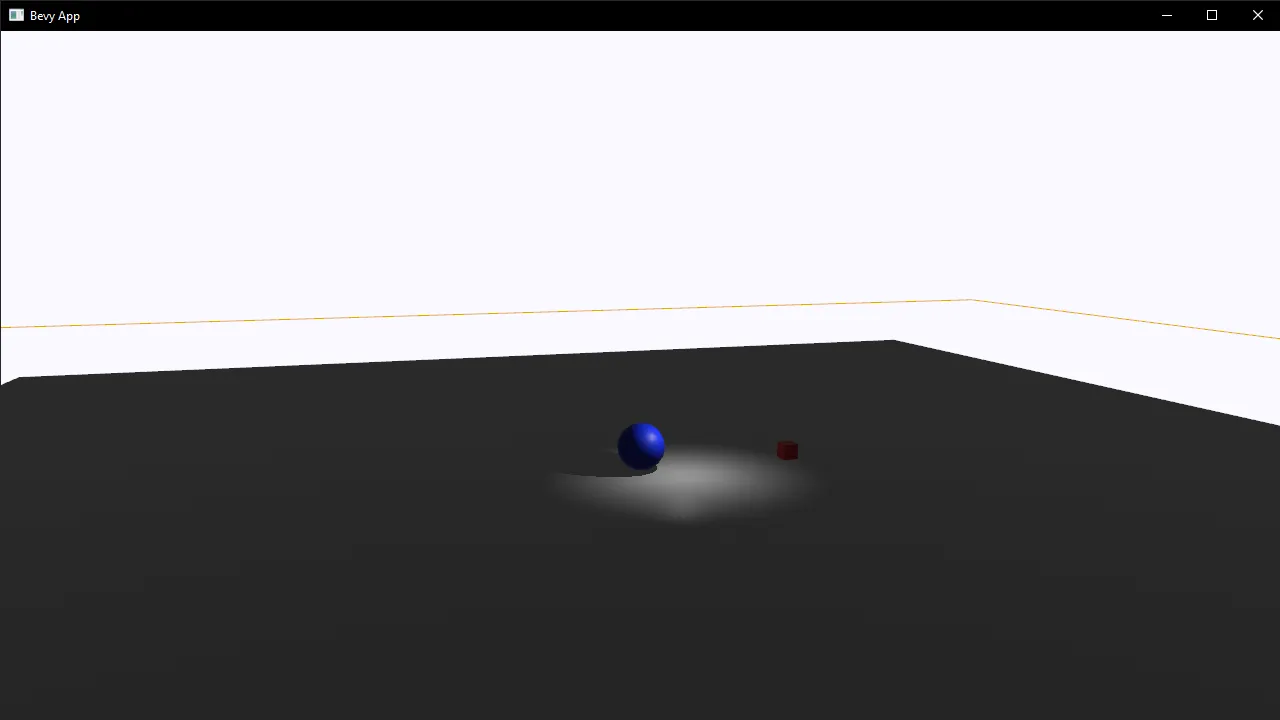
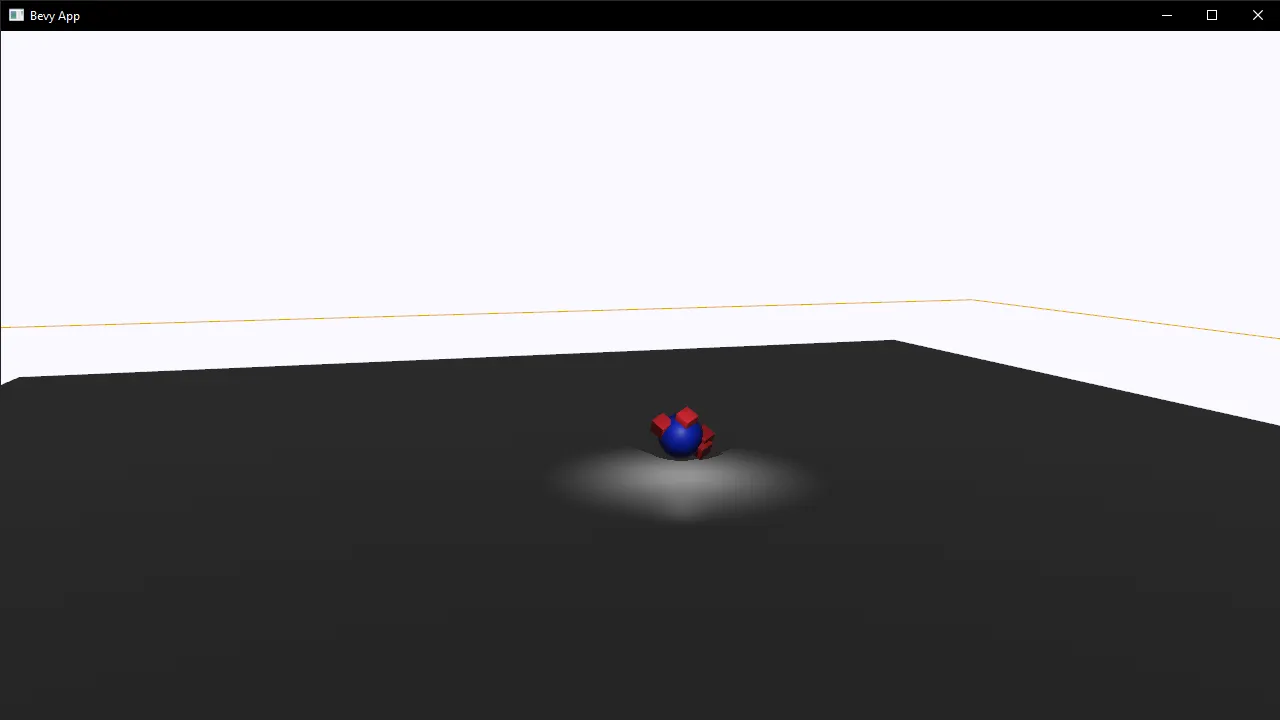
Now that I understood how this worked I was able to add meshes to each object in my scene. I had a “plane” for the floor, a sphere for the ball, and cubes for the “items” we’d be collecting — each with their own collider.
Moving the ball
The next step for the game was moving the ball based on player input. If the player presses up the ball should roll “up” on the floor (positive on the Z axis).
You can move objects declaratively with Rapier using the Rigidbody and Velocity components. Just like real physics, an object is moving when it’s velocity (or linvel in Rapier) is greater than 0. So when we want to move something we need to increase it’s velocity.
Rapier uses a 3 point vector for the velocity so you can change velocity in any 3D direction (like making the ball “bounce” up instead of rolling around). The current velocity of an entity is stored in the RigidBody or Velocity components.
First we need to add a Velocity component to our entity:
commands.spawn((
    RigidBody::Dynamic,
    Player,
    Collider::ball(2.0),
    ColliderDebugColor(Color::hsl(220.0, 1.0, 0.3)),
    Velocity::default(),
    PbrBundle {
        mesh: meshes.add(Mesh::from(shape::UVSphere {
            radius: 1.0,
            sectors: 16,
            stacks: 8,
        })),
        material: materials.add(Color::rgb(0.0, 0.15, 0.8).into()),
        transform: Transform::from_xyz(0.0, 10.0, 0.0),
        ..default()
    },
));
Now we can create a new system to handle input movement and mutate the velocity. In this example I created a Player component that we also query for, so I only grab the player’s collider. The ball rolls “left and right” on the X-axis, and “up and down” on the Z-axis. And I even added a jump on the Y-axis.
fn move_player(keyboard_input: Res<Input<KeyCode>>, mut query: Query<&mut Velocity, With<Player>>) {
    let mut player_velocity = query.single_mut();

    println!("Player velocity: {}", player_velocity.linvel);

    if keyboard_input.pressed(KeyCode::Left) {
        player_velocity.linvel -= Vec3::new(1.0, 0.0, 0.0);
    }

    if keyboard_input.pressed(KeyCode::Right) {
        player_velocity.linvel += Vec3::new(1.0, 0.0, 0.0);
    }

		if keyboard_input.pressed(KeyCode::Up) {
        player_velocity.linvel -= Vec3::new(0.0, 0.0, 1.0);
    }

    if keyboard_input.pressed(KeyCode::Down) {
        player_velocity.linvel += Vec3::new(0.0, 0.0, 1.0);
    }

    if keyboard_input.pressed(KeyCode::Space) {
        player_velocity.linvel += Vec3::new(0.0, 2.0, 0.0);
    }
}
You can see the full example on Github.
📘 Not sure if I needed to add the
Velocitycomponent here since theRigidBodycomponent that my entity has also has alinvelproperty. If I queried for theRigidBodyinstead of theVelocityit might work the same way. Using theVelocitycomponent would be useful if you wanted something moving but not with an entireRigidBodyattached.
Checking for Collisions
This is where we’d hit an object and “combine” it with player’s ball similar to Katamari. Basically what we want to do is check is when two objects touch — where exactly did they touch? We want to know the exact point on the ball it hit so we can attach the item there.
Normally we’d have to do a lot of math to figure this out, but thanks to Rapier they have a whole system we can tap into that handles all the heavy arithmetic.
Collision Events
Found a nice example in the Rapier repo called “events” that showed how to use Rapier’s event system to detect collisions.
You can use Bevy’s EventReader API to check for CollisionEvent events (aka “collisions” in your game). Then you loop over each event. The event itself is an enum with a “Started” and “Stopped” options, and the enum gets passed the 2 entities that collided and any event flags (e.g. if a sensor is attached to a collider, or if a collision was detected with a removed object).
bevy_rapier/events3.rs at master · dimforge/bevy_rapier
fn main() {
    App::new()
        .insert_resource(ClearColor(Color::rgb(
            0xF9 as f32 / 255.0,
            0xF9 as f32 / 255.0,
            0xFF as f32 / 255.0,
        )))
        .add_plugins(DefaultPlugins)
        .add_plugin(RapierPhysicsPlugin::<NoUserData>::default())
        .add_plugin(RapierDebugRenderPlugin::default())
        .add_startup_system(setup_graphics)
        .add_startup_system(setup_physics)
        .add_system(move_player)

				// ⭐ Add the collision event system here
				// and include it Bevy's core lifecycle system set
        .add_system(display_events.in_base_set(CoreSet::PostUpdate))
        .run();
}
fn display_events(
mut collision_events: EventReader<CollisionEvent>,
mut contact_force_events: EventReader<ContactForceEvent>,
) {
for collision_event in collision_events.iter() {
println!("Received collision event: {collision_event:?}");
match collision_event {
CollisionEvent::Started(first_entity, second_entity, event) => {
// @TODO: Destroy the non-player entity
// and trigger "merge" with player with destroyed entity's mesh
}
CollisionEvent::Stopped(first_entity, second_entity, event) => {}
}
}
for contact_force_event in contact_force_events.iter() {
println!("Received contact force event: {contact_force_event:?}");
}
}We can ignore the floor by querying for it’s entity, grabbing it’s “index” (Bevy increments from 0 for each entity spawned in the scene and associates it with the Entity struct). Then we can check each collider object and see if their index matches the floor we queried for. If we detect the floor, we cancel out early using a return to save on collision calculations.
📘 Ideally we’d create some system of “layers” like Unreal or Unity. That way we could tag entities like the floor in the “Static” layer. Then when we check for collisions we ignore any entity inside that “layer”.
We create a Floor component to make querying for it easier:
// The Floor object. Used to filter some collision events.
#[derive(Component)]
struct Floor;
Then we attach it to the floor mesh we spawned earlier:
commands.spawn((
    Floor,
    Collider::cuboid(ground_size, ground_height, ground_size),
    PbrBundle {
        mesh: meshes.add(shape::Plane::from_size(ground_size).into()),
        material: materials.add(Color::hex("#DDDDDD").unwrap().into()),
        transform: Transform::from_xyz(0.0, -ground_height, 0.0),
        ..default()
    },
));
Now we can check for the floor in the collision detection system:
fn display_events(
    mut commands: Commands,
    mut collision_events: EventReader<CollisionEvent>,
    mut contact_force_events: EventReader<ContactForceEvent>,
    player_entity: Query<Entity, With<Player>>,
    floor_entity: Query<Entity, With<Floor>>,
) {
    // Get the index of player and floor entities to check for later
    let player = player_entity
        .get_single()
        .expect("Player not found in scene");
    let floor = floor_entity
        .get_single()
        .expect("Player not found in scene");
    let floor_index = floor.index();

    // Check for collisions
    for collision_event in collision_events.iter() {
        match collision_event {
            CollisionEvent::Started(first_entity, second_entity, _) => {
                // If we collided with floor, don't care
                if first_entity.index() == floor_index || second_entity.index() == floor_index {
                    println!("Collided with floor");
                    return;
                }
Attaching the object
Created a new event for attaching objects called AttachObjectEvent. We’ll call it whenever the player collides with an object we want to attach. We pass the event the Entity we plan to attach and later destroy.
// Events
// Attach object to player's ball
#[derive(Default)]
struct AttachObjectEvent(Entity);

fn main() {
    App::new()
        .insert_resource(ClearColor(Color::rgb(
            0xF9 as f32 / 255.0,
            0xF9 as f32 / 255.0,
            0xFF as f32 / 255.0,
        )))
				// ⭐ Add our new event to the game
        .add_event::<AttachObjectEvent>()
        .add_plugins(DefaultPlugins)
        .add_plugin(RapierPhysicsPlugin::<NoUserData>::default())
        .add_plugin(RapierDebugRenderPlugin::default())
        .add_startup_system(setup_graphics)
        .add_startup_system(setup_physics)
        .add_system(move_player)
        .add_system(display_events.in_base_set(CoreSet::PostUpdate))
        .add_system(attach_event)
        .run();
}
We create a system to check for the new event. It loops through each event and grab the Entity from the event. Now we need access to the collided object’s transform (or position in world space). We get access to this by querying for all collidable objects (BallObject) and grab the Entity and Transform. Then we can use the get() method to find a specific entity (instead of looping over each one and comparing the entity index ourselves). This returns the tuple from our query, with the entity and transform respectively.
fn attach_event(
    mut attach_events: EventReader<AttachObjectEvent>,
    attachable_objects: Query<(Entity, &Transform), With<BallObject>>,
) {
    // Check for events
    if !attach_events.is_empty() {
        // We loop over all events and use the event's collider entity index
        attach_events.iter().for_each(|collider_event| {
            let AttachObjectEvent(mut collider_entity) = collider_event;
            println!("Attaching entity ID {}", collider_entity.index());

            // Filter all objects in the scene by the entity passed through the event
            let (collider_entity, collider_transform) = attachable_objects
                .get(collider_entity)
                .expect("Couldn't find collider object to attach. Might have been destroyed.");

            // Attach object to player
            // Raycast from player to this object's position to get point on player to attach
        });
    }
}
Now we have access to the object we’re colliding with, and it’s position, we need to figure out how to “attach” it to the player (and eventually destroy it).
I found the solution in the Rapier docs under the advanced collision detection section. They have a Rapier context stored as a Bevy Resource you can access. The context contains a “contact graph” of all the collisions in the app. You can use the method contact_pair() with the 2 entities that collided to get the latest collision data from that contact graph.
Then we can use the manifolds() method to access the local position of the collision on each entity. For example, I ran the game and collided with a block - here’s the 2 points on each object. This data basically represents a “local” point on a cube (the ”object”) and a sphere (the ”player”). It’s kinda like two people running into each other and each person telling you where they got hit.
Collectable Object: [0.4082479, -0.031690463, -0.9123208]
Player: [-1, 0, 0]
We can use this method inside our “attach” event we call and use the collision entity we pass as one of the properties for contact_pair(). We can also quickly grab the Player Entity using a Bevy Query.
fn attach_event(
mut commands: Commands,
mut attach_events: EventReader<AttachObjectEvent>,
mut attachable_objects: Query<(Entity, &mut Transform), With<BallObject>>,
player_entity: Query<Entity, With<Player>>,
// ⭐ Get the Rapier context
rapier_context: Res<RapierContext>,
) {
// Check for events
if !attach_events.is_empty() {
// We loop over all events and use the event's collider entity index
attach_events.iter().for_each(|collider_event| {
let AttachObjectEvent(collider_entity_result) = collider_event;
if let Some(mut collider_entity) = collider_entity_result {
println!("Attaching entity ID {}", collider_entity.index());
// Get the collided object's transform from query
// Filters all objects in the scene by the entity passed through the event
let (_, mut collider_transform) = attachable_objects
.get_mut(collider_entity)
.expect("Couldn't find collider object to attach. Might have been destroyed.");
println!("Object position {}", collider_transform.translation);
// Get player entity from query
let player_entity = player_entity.get_single().unwrap();
// Remove the collider from object (you can mutate transform with it gone)
commands.entity(collider_entity).remove::<Collider>();
// Check for the "contact point" between player and object
if let Some(contact_pair) =
rapier_context.contact_pair(collider_entity, player_entity)
{
// Get the "contact point" in local space
for manifold in contact_pair.manifolds() {
// Uses "contact point" local to object (not player)
let collision_point = manifold.local_n1();
// We pad it a bit by the size of object
// @TODO: Grab size of object and use as padding
let padding = Vec3::splat(3.0);
// Update objects position relative to player (so it "orbits" properly)
collider_transform.translation = collision_point * padding;
}
}
// Attach object to player as child
commands
.entity(player_entity)
.push_children(&[collider_entity]);
}
});
}
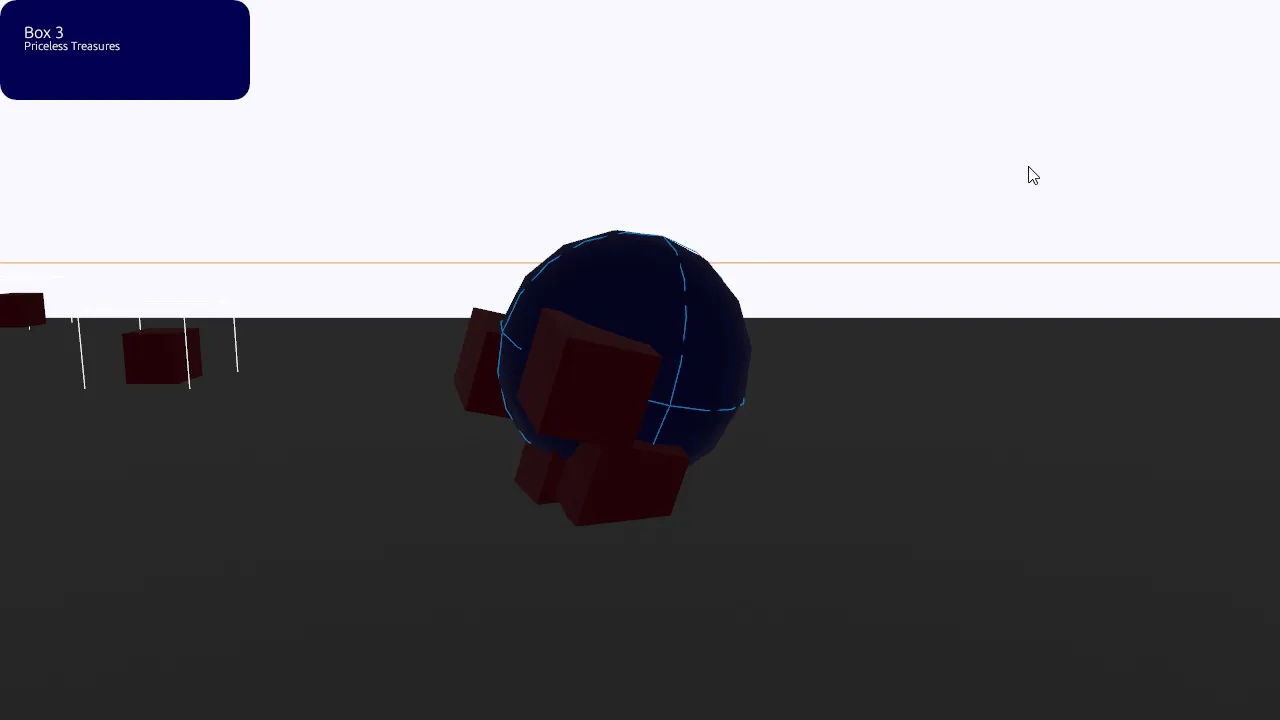
}When we roll the ball now the cubes should attach and “stick” to the ball.
You can find the full example on Github.
Now that we have some of the major physics features down we can move on to other features of the game.
Game features
Camera follow
How do you control the camera in Bevy? Create a component (FollowCamera) to differentiate the camera from other entities in our scene.
// Camera that follows the player
#[derive(Component)]
struct FollowCamera {
    // Distance away from player
    distance: Vec3,
}
impl Default for FollowCamera {
    fn default() -> Self {
        FollowCamera {
            distance: Vec3::new(0.0, 3.0, 20.0),
        }
    }
}
When we spawn the “camera bundle” into the scene, we attach our new component.
fn setup_graphics(mut commands: Commands) {
    // Camera
    commands
        .spawn(Camera3dBundle {
            transform: Transform::from_xyz(-30.0, 30.0, 100.0)
                .looking_at(Vec3::new(0.0, 10.0, 0.0), Vec3::Y),
            ..Default::default()
        })
        .insert(FollowCamera::default());
}
Then we can query the component along with the Transform that the CameraBundle has inside. This gives us access to the transformation, which we can also “mutate” (or update), which moves the camera. In this example we move the camera up (on the Y-axis) every frame.
fn camera_follow(
    mut camera_query: Query<(&FollowCamera, &mut Transform)>
) {
    let (camera_state, mut camera_transform) = camera_query
        .get_single_mut()
        .expect("Follow camera not found.");

    // Distance camera behind player
    camera_transform.translation.y += 4.20;
}
In my case, I also get the player position and use that to determine the camera position. And I use the look_at() method on the camera Transform to make the camera “point” at the target.
fn camera_follow(
    mut camera_query: Query<(&FollowCamera, &mut Transform), Without<Player>>,
    player_query: Query<&Transform, With<Player>>,
) {
    let (camera_state, mut camera_transform) = camera_query
        .get_single_mut()
        .expect("Follow camera not found.");

    let player_transform = player_query
        .get_single()
        .expect("Player not found for follow camera.");

    // Distance camera behind player
    camera_transform.translation = player_transform.translation + camera_state.distance;
    // "Point" the camera at the player so they're centered.
    camera_transform.look_at(player_transform.translation, Vec3::Y);
}
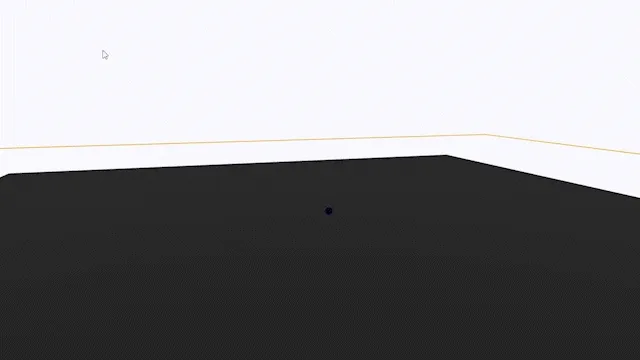
Cool now the camera follows our ball as it moves and our ball is fairly centered in the camera view.
UI time
Now we can focus on the UI of the app. We’ll use UI for a few parts of the app: a notification system, debug UI for development, and menus for our game (like main menu or settings).
Notification system
Adding notifications is a pretty involved multi step process. This is a list of things we’ll need to consider:
- Need state to store notifications
- Need an event to trigger notifications and create them
- Need UI to render the notification state
- Need to animate / fade out the notifications after they pop in and stay for a bit
- Can’t show more than 1 notification at a time
- Next notifications should show in order and take equal time for readability
First we’ll create a resource to store the notification data. It’s a Vec collection of Notification structs. The Notification will have a few properties like the text we need, a timer to handle animation, and a flag to let us know to delete it once it’s done.
// Notification data
struct Notification {
    title: String,
    message: String,
    timer: Timer,
    remove: bool,
}

// App state to store and manage notifications
#[derive(Resource)]
struct NotificationState {
    notifications: Vec<Notification>,
}
Now we need a Bevy “event” to trigger the notifications. I keep it simple and make it a tuple struct where the 2 properties are the text for the notification. We’ll use these properties to create our Notification later, and we can do the other properties automatically (aka the timer and flag).
// Event to trigger a notification
#[derive(Default)]
struct NotificationEvent(String, String);
We’ll add the resource and event to the app:
fn main() {
    App::new()
        .insert_resource(ClearColor(Color::rgb(
            0xF9 as f32 / 255.0,
            0xF9 as f32 / 255.0,
            0xFF as f32 / 255.0,
        )))
        .add_event::<AttachObjectEvent>()
        .add_event::<NotificationEvent>()
        .insert_resource(NotificationState {
            notifications: vec![],
        }
Now when we attach the object to our player, we can send a notification with the object data — just like Katamari when you roll over an item and they show you what it is.
// Send notification
notification_events.send(NotificationEvent(
    ball_data.name.clone(),
    ball_data.category.clone(),
))
We need a system to handle the notification events we send out. It’ll loop over all the events and create a Notification for them and insert it into our app state. You’ll notice we pause the timer when we create it, that way if we fire off multiple notifications, they don’t all start at the time time.
fn handle_notification_events(
    mut notifications_events: EventReader<NotificationEvent>,
    mut notification_state: ResMut<NotificationState>,
) {
    if !notifications_events.is_empty() {
        for notification in notifications_events.iter() {
            let NotificationEvent(title, message) = notification;
            println!("Creating notification: {} {}", title, message);
            let mut timer = Timer::from_seconds(3.0, TimerMode::Once);
            timer.pause();
            notification_state.notifications.push(Notification {
                title: title.clone(),
                message: message.clone(),
                timer: timer,
                remove: false,
            })
        }

        // Clear all events
        notifications_events.clear();
    }
}
Now we can render the notifications.
fn notification_ui(
    mut contexts: EguiContexts,
    mut notification_state: ResMut<NotificationState>,
    time: Res<Time>,
) {
    let ctx = contexts.ctx_mut();
    let painter = ctx.layer_painter(LayerId::new(Order::Foreground, Id::new("notifications")));
    let visuals = ctx.style().visuals.widgets.noninteractive;

    let (screen_width, screen_height) = (ctx.screen_rect().width(), ctx.screen_rect().height());
    let start_position = Pos2 {
        x: screen_width,
        y: screen_height,
    };

    if notification_state.notifications.len() <= 0 {
        return;
    }

    let mut notification = &mut notification_state.notifications[0];
    // Tick the timer
    notification.timer.tick(time.delta());
    // Calculate an opacity/alpha to fade out elements
    let percent_left = if notification.remove {
        notification.timer.percent_left()
    } else {
        1.0
    };
    let alpha = percent_left * 255.0;
    let alpha = alpha as u8;

    let text_color = Color32::from_rgba_unmultiplied(255, 255, 255, alpha);
    let bg_color = Color32::from_rgba_unmultiplied(2, 0, 86, alpha);
    let rounding = 16.0;
    let padding = 16.0 + 8.0;
    let bg_position_tl = Pos2 {
        x: start_position.x - 250.0 - padding,
        y: start_position.y - 100.0 - padding,
    };

    // Draw notification BG
    painter.add(Shape::Rect(egui::epaint::RectShape {
        rect: Rect {
            // The top left corner of rectangle
            min: bg_position_tl,
            // The bottom right corner of rectangle
            max: Pos2 {
                x: start_position.x - padding,
                y: start_position.y - padding,
            },
        },
        rounding: Rounding {
            nw: rounding,
            ne: rounding,
            sw: rounding,
            se: rounding,
        },
        fill: bg_color,
        stroke: Stroke {
            width: 0.0,
            color: Color32::WHITE,
        },
    }));

    // Text
    // Title text
    let caption_galley = ctx.fonts(|fonts| {
        fonts.layout(
            notification.title.clone(),
            FontId::proportional(16.),
            text_color,
            f32::INFINITY,
        )
    });

    painter.galley(
        Pos2 {
            x: bg_position_tl.x + padding,
            y: bg_position_tl.y + padding,
        },
        caption_galley,
    );

    // Message text
    let caption_galley = ctx.fonts(|fonts| {
        fonts.layout(
            notification.message.clone(),
            FontId::proportional(12.),
            text_color,
            f32::INFINITY,
        )
    });

    painter.galley(
        Pos2 {
            x: bg_position_tl.x + padding,
            y: bg_position_tl.y + 16.0 + padding,
        },
        caption_galley,
    );
}
But we have one problem! The notification stays around forever. We need to create another system to manage the notifications and remove them when they’re finished. That way the UI can just do it’s thing and the logic for managing notifications is contained in it’s own place.
This system is pretty simple. It loops over all the notifications and unpauses the first one. Then it checks if any are finished, marks them to be removed, then it deletes them from the vector collection in app state. We also have a remove flag we toggle, this lets the notification stay solid for the duration of the timer, and then fade out for the duration of the timer.
fn notification_manager(mut notification_state: ResMut<NotificationState>, time: Res<Time>) {
// List of notification indexes we want to remove
let mut remove_indexes = vec![];
// Loop through notifications and see if their time is up
for (index, notification) in notification_state.notifications.iter_mut().enumerate() {
if index == 0 {
if notification.timer.paused() {
notification.timer.unpause();
}
// Tick the timer
notification.timer.tick(time.delta());
}
// Did timer finish? Add notification to remove list
if notification.timer.finished() {
// Reset timer for use in animation
notification.timer.reset();
// Marked for removal? Add to remove list
if notification.remove {
remove_indexes.push(index);
}
// Mark notification to fade out (and eventually remove)
notification.remove = true;
}
}
// Remove completed notifications
for index in remove_indexes.iter() {
notification_state.notifications.remove(*index);
}
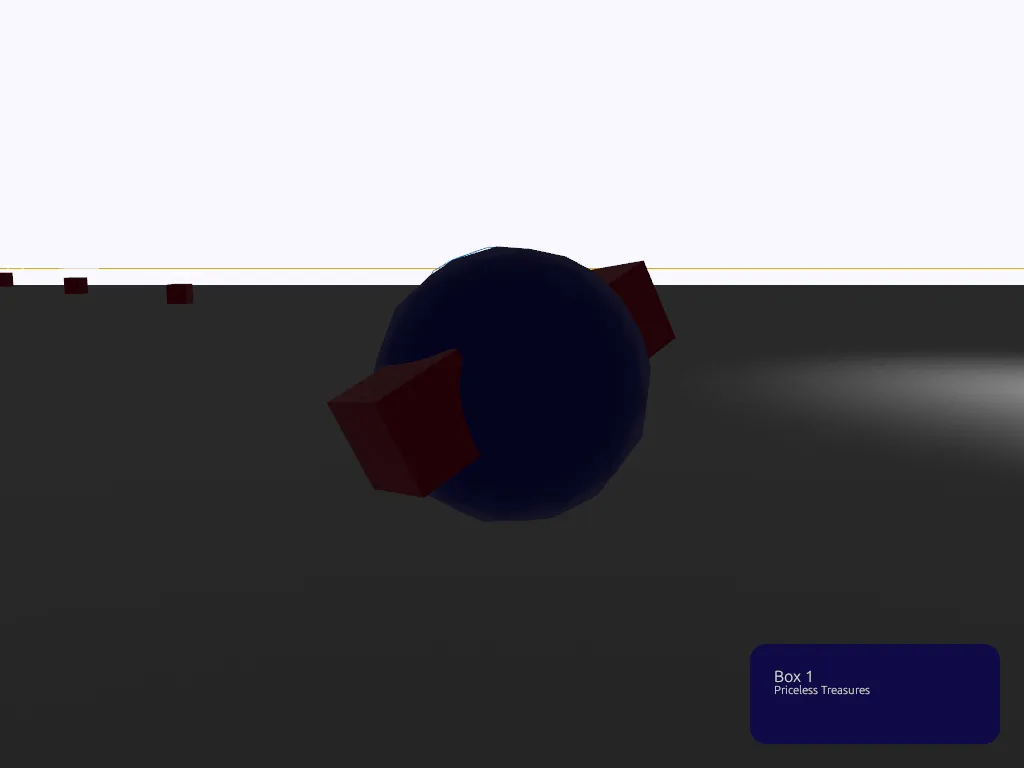
}Cool, we have multiple notifications queued up and they fade out when they disappear. But our notifications are in the top left of the screen. Normally they appear “anchored” to a different part of the screen. In this case I want them to be on the bottom right.
Position to bottom right
We can position things on different corners of the screen by using the screen size provided by the egui context.
For example, to position things in the bottom right we need to get the position of bottom right corner of the screen, then go from there!
// Get screen size from the egui context
let (screen_width, screen_height) = (ctx.screen_rect().width(), ctx.screen_rect().height());
// Store it as a position (optional)
let start_position = Pos2 {
    x: screen_width,
    y: screen_height,
};

// Define a padding (so it's not pressed against window edge)
let padding = 16.0 + 8.0;
// The top left of the notification.
// We take the position of the bottom right corner
// and subtract the size of box and padding
let bg_position_tl = Pos2 {
    x: start_position.x - 250.0 - padding,
    y: start_position.y - 100.0 - padding,
};

// Draw the BG
painter.add(Shape::Rect(egui::epaint::RectShape {
    rect: Rect {
        // The top left corner of rectangle
        min: bg_position_tl,
        // The bottom right corner of rectangle
        max: Pos2 {
            x: start_position.x - padding,
            y: start_position.y - padding,
        },
    },
You can find all the commits for the notifications here to step through the setup.
📘 Here’s a example in egui-notify. They have a
Anchorenum for each corner of screen and they do a similar technique with screen size calculations.
App States
Bevy has a concept of “app states”. It lets you define an enum of states your app — like a “start menu”, a “loading” screen, or the game itself. You can also see we define a “default” state that loads first using a macro (#[default]).
Here we make a plugin to encapsulate each of our app states (makes it easier to “plug and play” them). This is similar to making a file to contain all the routes in a web app (React Router anyone?). And we use the add_state() method on our App struct to add the states to our app. And we also add plugins that represent each state.
We’ll only have 2 states: StartMenu or the “main menu”, and our Game itself.
use bevy::prelude::*;

use self::{game::GamePlugin, start_menu::StartMenuPlugin};

mod game;
mod start_menu;

#[derive(Debug, Clone, Copy, Default, Eq, PartialEq, Hash, States)]
pub enum AppState {
    #[default]
    StartMenu,
    Game,
}

pub struct AppStatePlugin;

impl Plugin for AppStatePlugin {
    fn build(&self, app: &mut App) {
        app.add_state::<AppState>()
            .add_plugin(GamePlugin)
            .add_plugin(StartMenuPlugin);
    }
}
Each state has it’s own set of lifecycles like OnEnter (runs once on start) or OnUpdate (aka the game loop). We can use these when adding systems to our app using the in_schedule() and in_set() methods with the lifecycle struct (OnEnter()) and the app state (AppState::StartMenu in this case).
Here we encapsulate each app state in a plugin (aka StartMenuPlugin) — but you could use it in a single file app or mix states if needed.
use bevy::prelude::*;

use super::AppState;

pub struct StartMenuPlugin;

impl Plugin for StartMenuPlugin {
    fn build(&self, app: &mut App) {
        app.add_system(start_menu_setup.in_schedule(OnEnter(AppState::StartMenu)))
            .add_system(start_menu_system.in_set(OnUpdate(AppState::StartMenu)))
            .add_system(start_menu_cleanup.in_schedule(OnExit(AppState::StartMenu)));
    }
}

pub fn start_menu_setup() {
    println!("Start Menu setup");
}

pub fn start_menu_system() {

}

pub fn start_menu_cleanup() {
    println!("Start Menu cleanup");
}
When we load the app it should load the StartMenuPlugin first and run start_menu_setup() - then it’ll loop the update cycle infinitely (start_menu_system()).
So how do we change app states (like linking to another route on the web)? Bevy stores the app state as a Resource which we can access using the NextState. Using that we can check the current app state and even change it.
Here we render a button using egui and when it’s clicked we change the app state to our Game.
pub fn start_menu_system(mut contexts: EguiContexts, mut app_state: ResMut<NextState<AppState>>) {
    let context = contexts.ctx_mut();

    egui::Window::new("Start Menu").show(context, |ui| {
        if ui.button("Start Game").clicked() {
            // Changes app state to "Game"
            app_state.set(AppState::Game);
        }
    });
}
When you change the app state Bevy will run the cleanup method on the current app state, then “transition” to the next one. If your next state has any setup systems that load assets (like 3D models), your app will basically freeze on the previous state until the next one loads.
📘 The bevy_game_template has this app state architecture setup for you making it easier to start your project. You can learn more about App States in the Bevy Cheatbook.
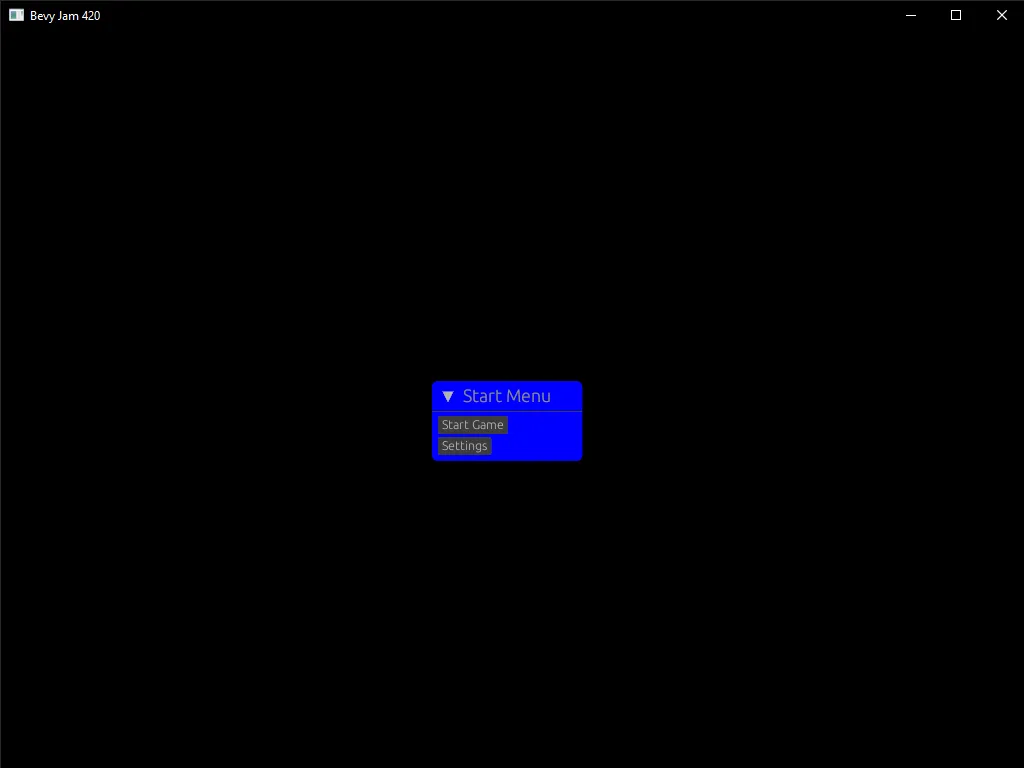
Using app states I was able to make this Start Menu scene and start the game when the user presses the “Start Game” button.
If I had to do it again…
The first thing I should have done is checked Bevy’s release post for 0.1 and see what APIs changed and features they added. I spent a lot of time in the beginning running old examples, having them crash, and translating them to the new API.
I’d also spend some time just going through the Bevy Cheatbook and learning about every example. It seems like whenever I wanted to do something I’d end up custom coding a solution that already existed in the Bevy API I didn’t know about (like app states).
I also really liked using the egui integration for Bevy. It made things like game and debug UI effortless to throw up and control. And with libraries like bevy-inspector-egui — it makes it even easier to quickly debug and analyze portions of your Bevy game. Namely the **ResourceInspectorPlugin** is a nice way to quickly configure sets of data (like game state).
Shoutout to the Bevy team for keeping the documentation up to date. If there were any API discrepancies I’d be able to quickly look up the docs.rs for Bevy and find the correct syntax.
Jam on!
I hope this helps you on your journey and encourages you to participate in a game jam.
As always, if you have any questions or want to share your own game dev work, feel free to share with me on Mastodon or Twitter.
Stay curious, Ryo