Posted on
January 30, 2025
As I’ve been making beats with DAWs like Ableton Live, I’ve been considering what it’d be like to generate music notes programmatically - instead of manually using the DAW’s UI. It’d be pretty useful to have an app that could generate any chord I need, or provide a full melody somehow.
This is actually very simple using the Web Audio API. But I was curious what I could accomplish natively using Rust. So I spun up a Tauri app and whipped up a quick prototype.
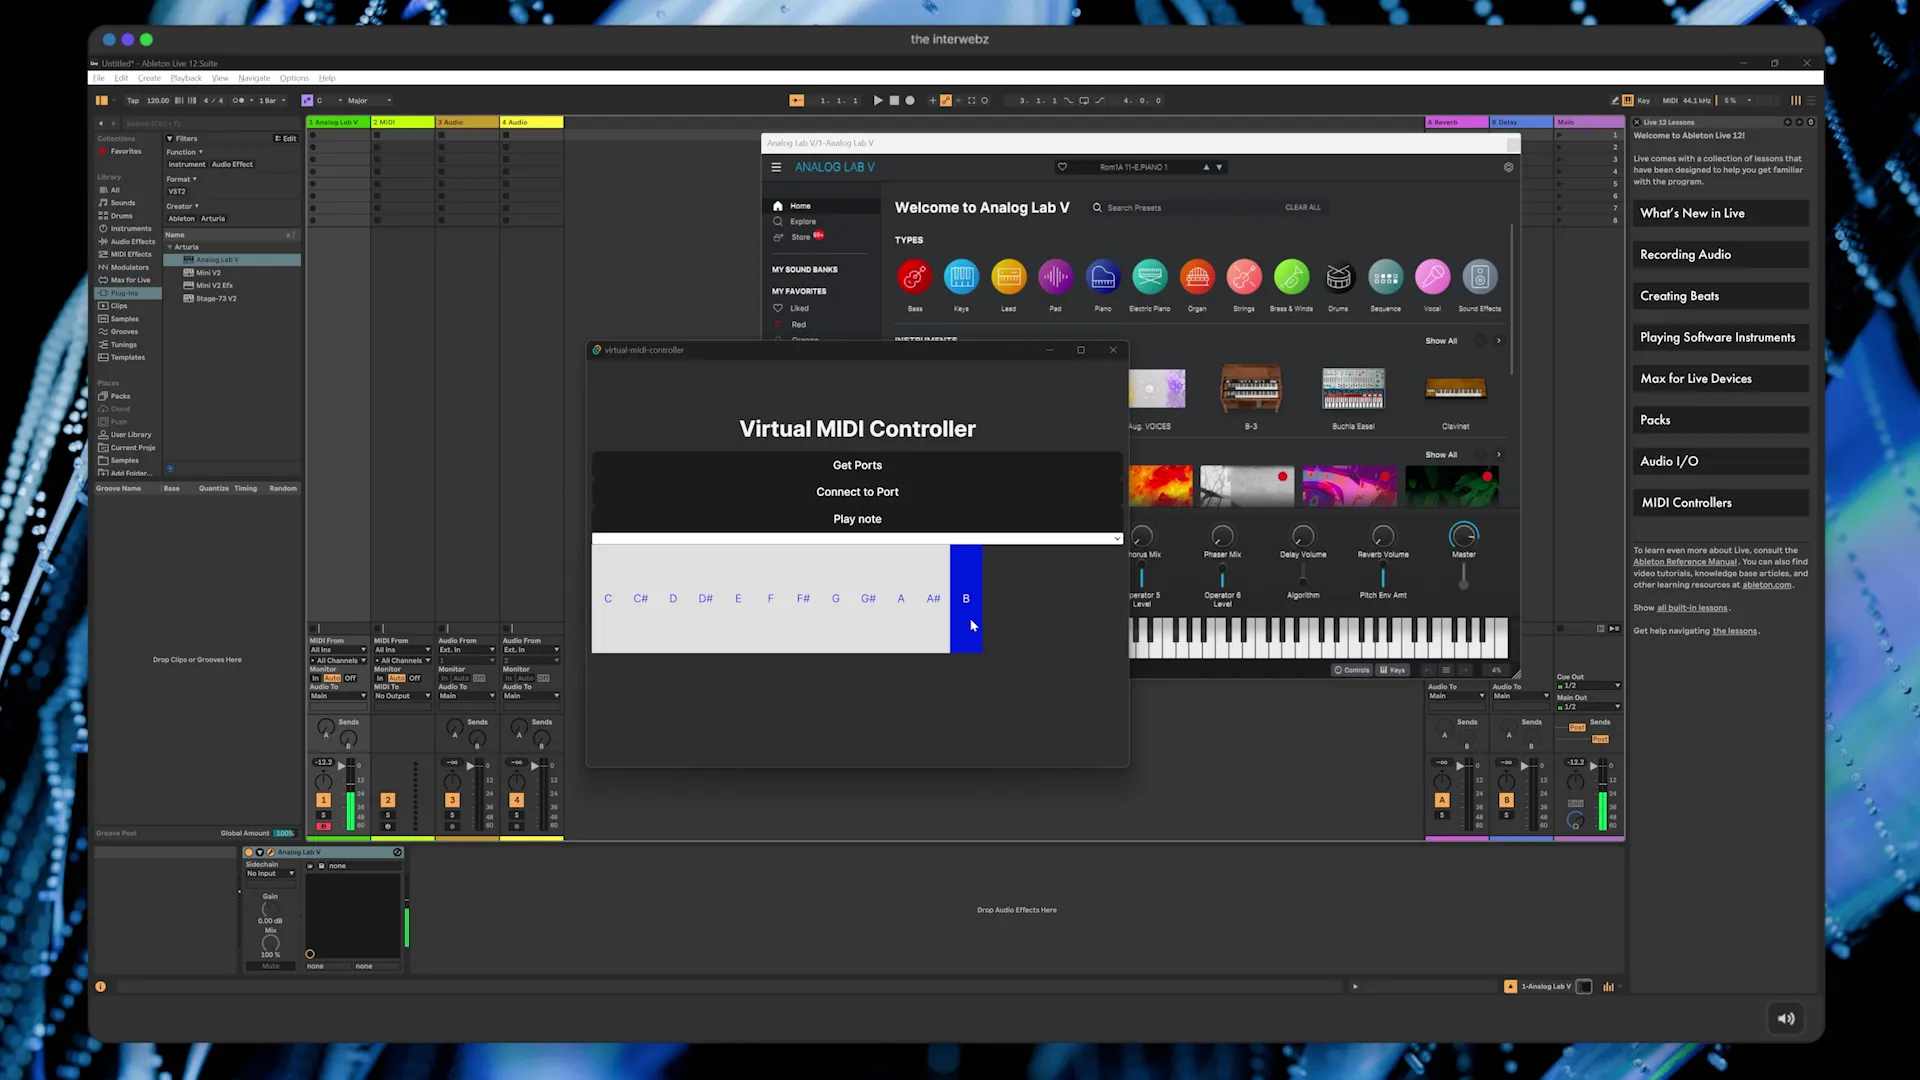
This app connects to a virtual MIDI device and sends notes to it, either played manually on the keyboard - or programmatically using a music theory library. As always, I thought I’d share some of the process to get this working.
The setup
Like I mentioned in the intro, I basically spun up a new Tauri app. And I used React and Typescript as my frontend to make things easier. Specifically I used v2 of Tauri - which was pretty new at the time of prototyping - so it was a little tricky jumping between their old and new docs.
Also - because I’m on Windows, I had to install a 3rd party driver to create a virtual MIDI device. More on that below.
Virtual MIDI
A virtual MIDI device is basically a program that runs on the computer that accepts MIDI input signals (just like a real MIDI device) and reflect those signals as MIDI output. Then using another app (like our DAW) we can connect to the MIDI output and receive the notes we’re sending.
I used LoopBe1. ****Much easier than having to write Windows driver code myself.
On Mac you can use the native Audio MIDI Setup app to add a virtual MIDI device. You can find a good guide on that here.
Using MIDI in Rust
To connect to MIDI devices in Rust, I’m using the midir library. I installed this on the Cargo side of my Tauri project (aka src-tauri).
I started with the most basic example of playing notes as a reference point. It seemed like the process was:
- Create a new “output” class
- Get the ports (aka devices, virtual or not, that we connect to)
- Connect to a port
- Send notes!
And since I’m using Tauri, if I want to run Rust code on the frontend in React-land, I need to put it in a “command”.
Getting the ports
So we need to get the ports. With the midir library, once we create the output class (MidiOutput), we can get the ports using the ports() method on it.
The only problem? This data is vital to our application - we need it to to be able to do anything. So we could create a Tauri “command” that runs this code and send the ports back to the frontend — but we still need to keep track of it on the Rust side.
We can do this using the setup() lifecycle of the Tauri Builder. Here we can keep track of “state” (any data we need globally across the app). You create a new struct to hold your data (and wrap it in a Mutex because it’s crossing threads in memory) - then use the manage() method on our app to add it as “state”.
We’ll also keep track of some critical state we’ll need later, like the actual MIDI connection or the current_port once we pick one.
use midir::{MidiOutput, MidiOutputConnection, MidiOutputPort, MidiOutputPorts};

struct AppData {
  midi_channel: MidiOutput,
  midi_ports: MidiOutputPorts,
  current_port: Option<MidiOutputPort>,
  connection: Option<MidiOutputConnection>,
}

#[cfg_attr(mobile, tauri::mobile_entry_point)]
pub fn run() {
    Builder::default()
        .setup(|app| {
            println!("[MIDI] Hydrating app with ports");
            // We create the MIDI class here to hydrate state with available ports
            let midi_out = MidiOutput::new("My Test Output").unwrap();
            let midi_ports = midi_out.ports();
            app.manage(Mutex::new(AppData {
                midi_channel: midi_out,
                midi_ports: midi_ports,
                current_port: None,
                connection: None,
            }));
            Ok(())
        })
Now when we want to access the ports, we can use a command to grab the “state” from the Tauri app and return that to our frontend.
#[tauri::command]
fn midi_get_ports(state: State<'_, Mutex<AppData>>) -> Vec<String> {
    println!("[MIDI] Getting port for UI");
    let state = state.lock().unwrap();
    let ports = state.midi_ports.clone();
    let port_names = ports.iter().map(|port| state.midi_channel.port_name(port).unwrap()).collect::<Vec<_>>();

    // tauri::ipc::Response::new(port_names)
    port_names
}
The process of getting Tauri app state is documented in the “State Management” section of their docs. But you essentially can access the state from any command as the first argument. Since it’s a Mutex type, we need to lock() it before we access the data (to ensure no other thread is using it).
Then we can just access the state as needed. In my case, I need to provide port names to the user, so I massage the data to return a Vec of only the names (which becomes an Array of strings on the JS side).
In our React app, we can now get the ports when the React app starts by using a useEffect - then use the invoke() function to call the Tauri command we created.
const [ports, setPorts] = useState([]);

async function getPorts() {
  // Learn more about Tauri commands at https://tauri.app/develop/calling-rust/
  const newPorts = await invoke("midi_get_ports");
  console.log("got ports", newPorts);
  //@ts-ignore
  setPorts(newPorts);
}

useEffect(() => {
  console.log("Getting MIDI ports");
  getPorts();
}, []);

return (
  <select value={currentPort} onChange={handlePortChange}>
    {ports.map((name, index) => (
      <option value={index}>{name}</option>
    ))}
  </select>
);
Since I knew I only wanted to connect to my virtual MIDI device, I hard-coded another useEffect that automatically connects to the virtual port (in my case the “LoopBe” one):
useEffect(() => {
  console.log("Setting virtual port as default");
  if (ports.length < 0) return;
  const virtualPort = ports.findIndex((name) => name == "LoopBe Internal MIDI");
  if (virtualPort < 0) return;
  changePort(virtualPort);
  setCurrentPort(virtualPort);
}, [ports]);
So what happens on the Rust backend? We just save the index (aka number the port is in the array) to the Tauri app state as the current_port. That way, when we need to use the port, we already have a list of ports in the app state - and we grab which one we want from that list.
#[tauri::command]
fn midi_set_port(state: State<'_, Mutex<AppData>>, index: usize) {
    println!("[MIDI] Setting port");
    let mut state = state.lock().unwrap();
    state.current_port = state.midi_ports
                .get(index).cloned();
}
💡I found I had to clone a lot of the date I wanted to store in the state or I’d get errors (I think about ownership…but I can’t recall), so you’ll notice that pattern throughout.
Connecting to a port
Cool. Now we have a list of ports. Let’s connect to one, and eventually play a note or two.
#[tauri::command]
fn midi_connect_to_port(state: State<'_, Mutex<AppData>>) {
    println!("[MIDI] Connecting to MIDI port");
    let midi_out = MidiOutput::new("My Test Output").unwrap();
    let mut state = state.lock().unwrap();
    println!("\nOpening connection");
    let current_port = state.current_port.clone();
    let conn_out = midi_out.connect(current_port.as_ref().unwrap(), "midir-test");
    let connection = conn_out.unwrap();
    state.connection = Some(connection);
    println!("Connection open. Listen!");
}
This creates a new MIDI output connection and then actually connects to the current_port we chose on the frontend. Then we store that connection in the app state so we can use it later to play notes inside another command. We wrap it in a Some() since there are times the connection won’t be around, that way we can check before using it and breaking the app.
Playing notes
We technically need 2 commands, one to start playing the note - and another to stop the note. Basically “pressing” the note down, and then “releasing” the note.
#[tauri::command]
fn midi_play_note_press(state: State<'_, Mutex<AppData>>, note: u8) {
    println!("[MIDI] Pressing note");
    let mut state = state.lock().unwrap();
    let check_connection = state.connection.as_mut();

    match check_connection {
        Some(connection) => {

    const NOTE_ON_MSG: u8 = 0x90;
    const VELOCITY: u8 = 0x64;
    // We're ignoring errors in here
    let _ = connection.send(&[NOTE_ON_MSG, note, VELOCITY]);
        },
        None => println!("[MIDI] Error! Need to select a port first!"),
    }

}

#[tauri::command]
fn midi_play_note_release(state: State<'_, Mutex<AppData>>, note: u8) {
    println!("[MIDI] Releasing note");
    let mut state = state.lock().unwrap();
    let check_connection = state.connection.as_mut();

    match check_connection {
        Some(connection) => {
            const NOTE_OFF_MSG: u8 = 0x80;
            const VELOCITY: u8 = 0x64;
            // We're ignoring errors in here
            let _ = connection.send(&[NOTE_OFF_MSG, note, VELOCITY]);
        },
        None => println!("[MIDI] Error! Need to select a port first!"),
    }

}
The connection we established earlier has a send() method we can use to transmit MIDI signals. We send the note we want to play, a velocity (aka how hard it was pressed), and if it the note is pressed or released (NOTE_ON or NOTE_OFF). You can see this in midir’s “play” example.
The note itself is just a single integer (aka number) representing the MIDI note. This is pretty basic MIDI stuff. If you go back to a few of my MIDI articles I break it down a bit. MIDI keys are numbered from 0 to 127. Each number represents a note on a piano, so it has a root note (C, D, E, F, etc) and an octave (0, 1, 2, etc). So if I play a C4, it’s technically 72. If you search for “midi numbers” online you’ll find some diagrams to visualize it better.
Now we have a couple of functions on the Rust backend to play music, let’s call them from the frontend to get some music going.
Playing notes with a piano
To handle this on the frontend, I created a piano component that renders <PianoKey> components. These have events attached that trigger the playback on the Rust backend using the command.
import { invoke } from "@tauri-apps/api/core";
import React from "react";

const PIANO_KEY_NOTES = [
  "C",
  "C#",
  "D",
  "D#",
  "E",
  "F",
  "F#",
  "G",
  "G#",
  "A",
  "A#",
  "B",
];

type Props = {
  octave: number;
  note: number;
};

const PianoKey = ({ note, octave }: Props) => {
  const midi_key = note + 12 * octave;
  async function handlePressed() {
    await invoke("midi_play_note_press", { note: midi_key });
  }
  async function handleReleased() {
    await invoke("midi_play_note_release", { note: midi_key });
  }

  const name = PIANO_KEY_NOTES[note];
  const isBlackKey = name.includes("#");
  return (
    <div
      className={`piano-key ${isBlackKey && "black"}`}
      onMouseEnter={handlePressed}
      onMouseLeave={handleReleased}
    >
      {name}
    </div>
  );
};

export default PianoKey;
Nothing too fancy here. The user can hover over the keyboard and play a note, and stop hovering to stop playing.
This is cool, but most DAWs come with pianos built-in. So this isn’t really too useful at the moment. But what if we could generate notes programmatically — instead of performing them?
Generating notes
When I say “generating notes”, I’m talking about using a music theory library to provide me the notes for things I prompt it for — say a chord like Cmaj7 and it’s corresponding notes C, E, G, and B.
💡I won’t go too deep into music theory here (because I’m far from an expert), but if you don’t understand some of these terms I’d recommend learning them if you’re interested in audio programming. There’s a lot of algorithms and math in music, and music theory explores all those systems.
There are a few music theory libraries out there for JavaScript specifically, but I used teoria. Though I will say I do prefer tonal now since it has Typescript definitions that make it easier to work with in a nice IDE.
I created a <Generator> component that lets the user select a root note, octave, and if they want either a scale or chord. Then in a useEffect whenever any form data changes it runs the teoria library to generate the actual music notes (like “C” or “A#”).
useEffect(() => {
  // Create note
  const fixedNote = rootNote.replace("#", "b");
  const note = teoria.note(`${fixedNote}${octave}`);
  let newNotes = [];
  switch (config.type) {
    case "scale":
      newNotes = note.scale(config.scale).notes();
      break;
    case "chord":
      newNotes = note.chord("sus2").notes();
      break;
  }
  console.log("new notes", newNotes);
  setNotes(newNotes);
}, [rootNote, octave]);
Then to play the notes, we have a button that runs another Rust backend function (aka Tauri command). I used teoria’s midi() method to convert each note into a MIDI number we need.
const handlePlayNotes = async () => {
  // await Promise.all([
  //   invoke("midi_play_note", { note: 54 }),
  //   wait(),
  //   invoke("midi_play_note", { note: 56 }),
  // ]);
  const noteMidiKeys = notes.map((note) => note.midi());
  await invoke("midi_play_notes", { notes: noteMidiKeys });
};

<button onClick={handlePlayNotes}>Play Notes</button>;
Initially I tried to use the press/release functions I created to play (and stop) the notes, along with a little wait() function in between to “hold” the note a desired duration. But this was a bit buggy? I ended up ditching it for a dedicated function in the Rust backend to play notes and wait between them.
#[tauri::command]
fn midi_play_notes(state: State<'_, Mutex<AppData>>, notes: Vec<u8>) {
    println!("[MIDI] Playing note");
    let mut state = state.lock().unwrap();
    let check_connection = state.connection.as_mut();

    match check_connection {
        Some(connection) => {
            // Define a new scope in which the closure `play_note` borrows conn_out, so it can be called easily
            let mut play_note = |note: u8, duration: u64| {
                const NOTE_ON_MSG: u8 = 0x90;
                const NOTE_OFF_MSG: u8 = 0x80;
                const VELOCITY: u8 = 0x64;
                // We're ignoring errors in here
                let _ = connection.send(&[NOTE_ON_MSG, note, VELOCITY]);
                sleep(Duration::from_millis(duration * 150));
                let _ = connection.send(&[NOTE_OFF_MSG, note, VELOCITY]);
            };

            let note_duration = 4;
            for i in 0..notes.len() {
                let note = notes[i];
                play_note(note, note_duration);
                sleep(Duration::from_millis(note_duration * 150));
            }

        },
        None => println!("[MIDI] Error! Need to select a port first!"),
    }
}
This function borrows heavily from the midir example code by using the play_note() closure (aka anonymous function - or inline callback in JS). Similar to the last functions too, we grab the MIDI connection we established earlier from the Tauri app state. And we use that to eventually send() notes to our virtual MIDI output.
But first we loop over the notes (aka MIDI numbers) that we sent over from the frontend and use the play_note() function combined with a little native Rust sleep() function to wait between notes. We “sleep” for the same duration as the playback because the play_note() function will run and immediately keep running the rest of the code - so we have to force the loop to wait each iteration.
Now if we press the “Play Note” button on the frontend, we should hear the notes in our DAW if it’s connected to the virtual MIDI channel.
💡Check out the full source code for this app here for reference.
DAW setup
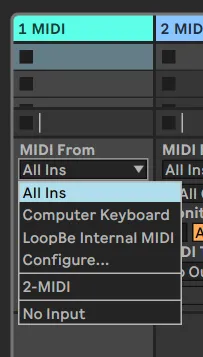
In Ableton by default, you should receive MIDI signals from all connected devices. So if you play the notes in the app and Ableton is open (and an instrument is assigned to the track) - you should hear music.
If you want to isolate the virtual MIDI channel, you can change the MIDI From dropdown to select your specific channel. In my case, it’s the LoopBe option.
What’s next?
This is a great accompaniment for looping in general. You can generate any chord you need (or maybe might not be thinking of) with less manual work.
Or you could create an arpeggio with this that constantly plays a certain scale repeatedly. Basically anything that cool MIDI hardware does, you can emulate with software.
This could also read from audio data (like a MIDI file) and playback that data — but at that point, I’m sure your DAW has that built-in as well. It’d be more interesting to use the MIDI data programmatically - like if you wanted to alter a pitch or key on demand or based on external input (like a gamepad).
I’m also considering using this for streaming. It’d be interesting to combine this with chat input to get them to contribute to a performance.
But I hope this helps you understand how to control MIDI devices using Rust and easy ways to render UI and generate music using JavaScript.
Stay curious, Ryo