Posted on
May 7, 2024
With Delta recently being approved and blowing up in the iOS App store as #1 for over a week — it’s easy to say everyone is enthused about emulation on their phone. And you can definitely see it on social media, every other post on every platform will be someone playing a classic game using the Delta app (or maybe that’s just my algorithm…).
What caught my attention was the variety of skins I saw people using. Some people had more modern styling, others emblazoned with Pokémon. I wondered: how did they do it, and how could I make my own.
I spent the day figuring out the process and I’ve returned with my own custom Delta skin that I modeled in 3D using Blender.
In this article I’ll go over how easy it is to make your own Delta skin (not in 3D!!), and how I made mine in 3D if you want to be extra like that. I’ll also go over some cool tips and tricks like how to add screen effects like a RGB-style backlight to your skin.
Download my skin here or check out the GitHub for source files to customize it more.
What is Delta
Delta is an app for iOS that runs several different emulator cores, consoles like the original NES, or handhelds like the Gameboy Advance or Nintendo DS. You can download game ROMs separately and play them using the emulators inside the app.
The app features a gameplay screen and on-screen controls, and it has nice features like save states or fast forwarding. And of course, it lets you apply custom skins that you can import into the app.
How do skins work in Delta?
As a Delta user, when you want a new skin you download a .deltaskin file, go to the Delta settings, and import it from there (see the official guide here).
Each emulator platform has it’s own skin applied, so the GBA has a GBA specific skin.
But what exactly is a .deltaskin? Let’s break it down 🔍
Decrypting the .deltaskin format
The .deltaskin file format is just a .zip file (similar to the Sketch app’s .sketch file format).
If you rename your file and replace .deltaskin with .zip you can extract all the files inside and see what makes up a skin.
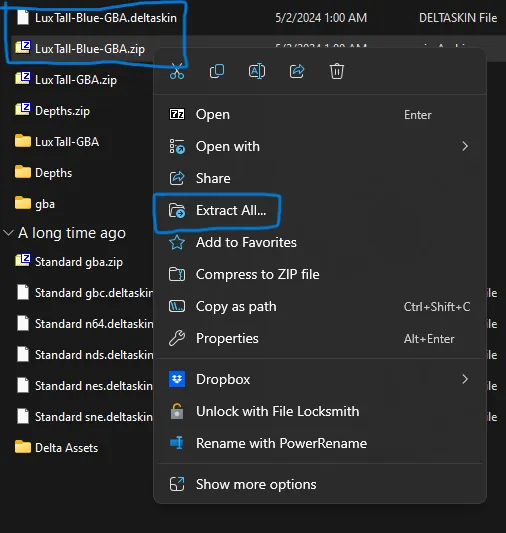
You’ll see a skin is made up of a bunch of images and a info.json.
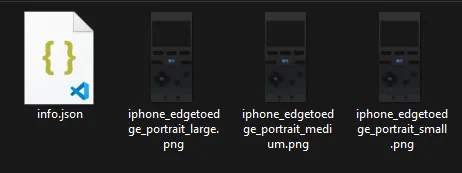
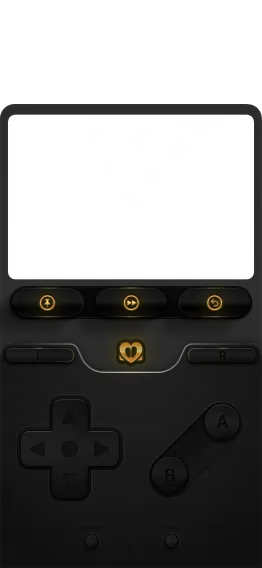
The “skin” is just a flat image (usually PNG or PDF). You leave an empty transparent spot where the screen goes, and everything else is visible to the user. All the buttons are baked into the image.
Each skin has 2 “orientations”, portrait or landscape, depending on device orientation. And it also has 2 “device type” for normal and “edge to edge” versions.
You have to combine the orientation and device size (e.g. “edge to edge landscape”). For sake of simplicity, let’s just call the combined orientation and device type a “mode”. So for a complete skin, it should include all of these modes:
- Edge to Edge Portrait
- Edge to Edge Landscape
- Standard Portrait
- Standard Landscape
💡 I personally just use Edge to Edge and it works fine so you don’t have to do extra work making “standard” variations 🤷🏼♂️
For each of these, you’ll have either 3 different image sizes (large, medium, and small) — or you can use a single PDF and set it to be “responsive”. So you’ll notice above I have 3 size variations for the “edge to edge + portrait” mode. The small image can be any size (ideally a ratio similar to an iPhone). The medium image is 100% larger than the small. And the large is 50% larger than the medium.
Then there’s the info.json. This is where the magic happens, so let’s break that down separate.
info.json
This is the file that the Delta app uses to get info about our skin. From the name of the skin, to what emulator is applies to (GBA, DS, etc), to what images to use — all the important data is stored in this file.
Here’s an abbreviated version for reference:
{
  "name": "Onyx v1 (whoisryosuke)",
  "identifier": "com.whoisryosuke.ds.onyx",
  "gameTypeIdentifier": "com.rileytestut.delta.game.ds",
  "debug": false,
  "representations": {
    "iphone": {
      "edgeToEdge": {
        "portrait": {
          "assets": {
            "small": "iphone_edgetoedge_portrait_small.png",
            "medium": "iphone_edgetoedge_portrait_medium.png",
            "large": "iphone_edgetoedge_portrait_large.png"
          },
          "items": [
            {
              "inputs": {
                "up": "up",
                "down": "down",
                "left": "left",
                "right": "right"
              },
              "frame": {
                "x": 20,
                "y": 654,
                "width": 150,
                "height": 150
              },
              "extendedEdges": {
                "top": 30,
                "bottom": 30,
                "left": 30,
                "right": 30
              }
            },
            {
              "inputs": ["start"],
              "frame": {
                "x": 12,
                "y": 819,
                "width": 24,
                "height": 24
              }
            }
          ],
          "mappingSize": {
            "width": 393,
            "height": 852
          },
          "extendedEdges": {
            "top": 7,
            "bottom": 7,
            "left": 7,
            "right": 7
          },
          "screens": [
            {
              "inputFrame": {
                "x": 0,
                "y": 0,
                "width": 256,
                "height": 192
              },
              "outputFrame": {
                "x": 12,
                "y": 12,
                "width": 369,
                "height": 277
              }
            },
            {
              "inputFrame": {
                "x": 0,
                "y": 192,
                "width": 256,
                "height": 192
              },
              "outputFrame": {
                "x": 12,
                "y": 301,
                "width": 369,
                "height": 277
              }
            }
          ]
        }
      }
    }
  }
}
There’s a lot going on here, so let’s take it step by step. Let’s start at the top level properties:
name- Name of the skinidentifier- A unique dot separated key for skin. It’s used so if you upload the skin again, it’ll update and replace the old with new skin. A good practice is to include the console/platform in the name, since each skin is platform specific.gameTypeIdentifier- The emulator core you’re targeting with this skin. This is a very specific dot separated code for each one (e.g.com.rileytestut.delta.game.ds).representations- This is where you define each mode (edge to edge portrait, standard landscape, etc) and it’s relevant data, like the images, hitboxes, and the screen position.debug- Sets to true or false. This visualizes the hitboxes in your app. It’s useful for checking alignment on buttons. We’ll get into those later.
Representations
The images and “hitboxes” are organized by the phone type, standard or edge to edge, and device orientation. You’ll have a iphone.edgeToEdge.portrait property with it’s own set of images and hitboxes — then a iphone.edgeToEdge.landscape property with it’s own set of images and hitboxes for “landscape” mode. This is because the buttons are in different places, and the screen orientation changes the way items are laid out.
You’ll find each representation nested under the iphone property (e.g. representations.iphone.edgeToEdge.portrait). They all share the same data structure, let’s take a look at it top level:
-
assets- The images for this specific mode. The images can be aPNGwithsmall,medium, andlargeproperties. Or you can make aPDFand use theresizableproperty.// Using 3 PNGs "assets": { "small": "iphone_edgetoedge_portrait_small.png", "medium": "iphone_edgetoedge_portrait_medium.png", "large": "iphone_edgetoedge_portrait_large.png" }, // Or 1 PDF "assets": { "resizable": "iphone_edgetoedge_portrait_responsive.pdf" }, -
items- This is where the “hitboxes” of the buttons are defined using X and Y coordinates. Theinputsis either an array of button names (likeaorstart) — or for d-pad input you provide an object withup,down,left,rightproperties. You can also defineextendedEdgesto provide a overflow for buttons (basically makes the surface area larger)."items": [ // The "Start" button, // sized at 24 x 24 and placed at 245 x 800 { "inputs": ["start"], "frame": { "x": 245, "y": 800, "width": 24, "height": 24 } } ] -
mappingSize- The size your skin as awidthandheight. If you’re using t-shirt sizing, use thesmallimage size. -
screens- This is an optional property that lets the emulator know where to put the gameplay and how big to make it. For theinputFrameit’s often best to stick to the standard resolution / sizing for each platform (e.g. GBA is 240x160) — but for theoutputFrameyou can make it any size you want (while still obeying the resolution restriction). Thescreensproperty is an array, so it supports multiple screens (handy for platforms like DS) — but also supports “filters” powered by Apple Swift UI effects likeCIGaussianBlur. This allows you to create cool effects like those Hue backlights for TVs that react using RGBs to the screen content.
Now that we understand the file format, let’s try making our own skin.
Making a Delta skin (easy way)
The easiest way to make a skin is to use another skin as the basis for your own. If there’s a skin you like but you don’t vibe with the colors, you could customize it to make it your own. Or you could just use their button placement and make your own skin from scratch underneath — and never have to touch too much “code” 👍🏼
-
Find a skin you where you like the button placements and download it. I recommend checking out Delta Skins.
-
Rename the
.deltaskinto.zip -
Unzip the files
-
Replace the images with your own images. Make sure you leave a cut out for the screen and save it as a transparent file format (like PNG or PDF). You could also just use the skin’s images and modify them (like changing the Hue / Saturation or throwing down a PNG “sticker” on top).
-
Open the
info.jsonand change thenameto anything (it’s the name that shows in settings under the preview), and change theidentifierto something unique, with spaces replaced with dots (.). It’s usually a good idea to include your name, the device (like GBA), and the skin name.{ "name": "Your Skin Name", "identifier": "com.yourusername.gba.yourskinname", -
Select all the files you extracted (images and the
info.jsonbasically) and zip them back up. -
Rename it back from
.zipto.deltaskin -
Transfer the skin over to Delta on your phone if necessary (I use Dropbox or Google Drive and download it from there)
-
On iOS you can download it directly from the browser or an app, then choose “Open In…”, then scroll down the app list until you hit the
...button to open the list of all apps, then select Delta from there. It should open the app — but you’ll get no confirmation message or anything. -
The skin should appear in Delta’s settings, under the device you assigned (e.g. GBA)
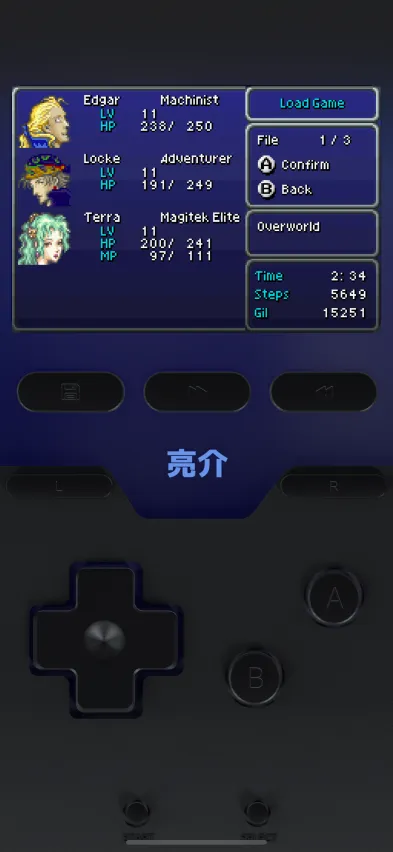
And that’s it! This is a great way to take an existing skin and recolor it to your preference. For example, I took the Lux skin by Broank and changed it from a gold hue to blue.
💡 If your skin doesn’t show up, there might be an issue with the way it was packaged. Make sure your zipping up the files - and not a folder containing the files. Also double check your
info.jsonand make sure thegameTypeIdentifieris the right one for the platform you’re targeting.
Making a Delta skin (the hard way)
So what if you don’t like the button placement of any skins? Or want bigger “hitboxes” for your buttons? Or maybe you want to play with screen filters to create cool effects like a backlit glow that syncs with the game?
Then you’ll probably want to create your own skin from scratch. It’s not too different from the simple process above, we just spend a lot more time on the design and JSON parts.
Overall we’ll walk through these steps:
- Start with a base skin
- Wireframe design that shows buttons and their hitbox placement
- Designing the skin! In my case, using Blender.
- Coding the skin (aka codifying the hitboxes)
- Cool stuff like screen filters
- Package up skin for release
From scratch?
When I say we make a skin from scratch, it’s never really from scratch. Ideally you should be using these unofficial skin templates recommended by Delta as your baseline. This provides you the info.json setup for each platform, along with little details like each screen’s resolution and all the standard buttons needed. You could also just use any community skin too. I used the Lux skin personally since it featured extra buttons like fast forward, and it had an example of using screen filters.
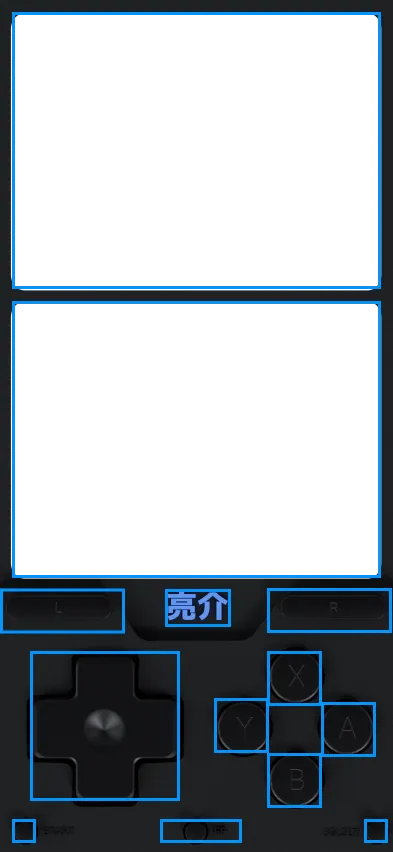
Wireframe design
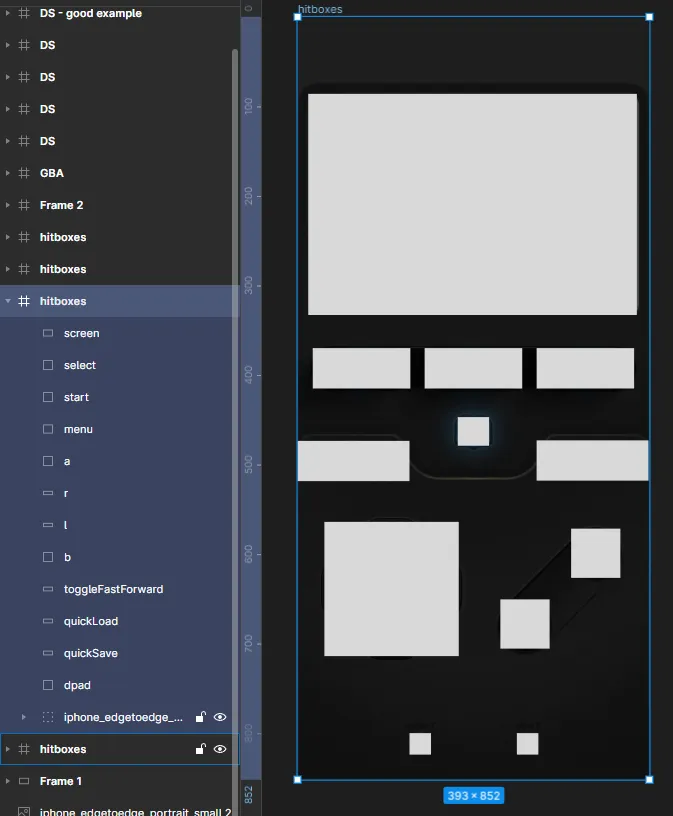
To help me later in Blender, I took the small sized skin to Figma and I outlined all the hitboxes from the Lux skin around the buttons to understand what I had to work with. In some cases the hitboxes were tight around the buttons, in others I had more room if I wanted. You could also obviously just adjust these as needed in the JSON too.
You could skip this step for now, but this helped me plan out the design and understand how the UX of app would be. If a hitbox is too close to a screen edge, it might not be accessible.
A couple things to note while designing a skin:
- Screen sizes differ between each device! A GBA screen is a different resolution/ size ratio than a single DS screen. Make sure to either use the ratios from the official templates (or search for the official device screen size and scale as needed).
- Consider the edges of the screen, especially the center bottom where Apple places the little bar you swipe up to switch apps. This will sit on top of your buttons on the bottom of screen, so make sure give them some padding. Same with sides, these can be harder to touch for users, especially with larger or thicker cases.
- Don’t let hitboxes overlap! If you want to have something like a classic cross button configuration, you need to make sure your buttons have their own space. Meaning if you draw a square around your button, it shouldn’t overlap with any other squares. This is why is might be good to do a wireframe in a design tool like Figma or Illustrator to outline the hitboxes first — then fill in with your fully rendered buttons.
💡 You don’t have to have a skin that supports every type of device orientation. If you just want one in portrait, that works fine, it defaults to the standard controller in landscape (and vice versa).
Here’s a link to my Figma file with the hitboxes for reference.
Making the skin
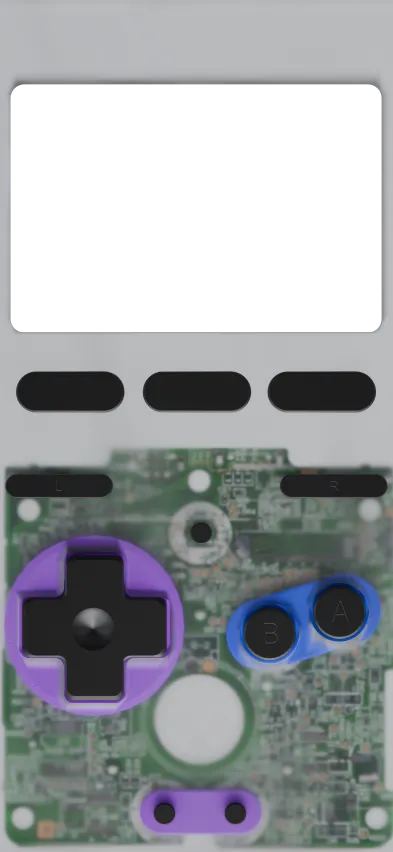
I personally wanted to create a skin in 3D. I had a few visual directions I wanted to approach. The simplest was recreating the Analog Pocket aesthetic, just a minimalistic black plastic that pops from how clean it is. I also experimented with a see-through plastic with visible internals (currently a popular “mod” for the handheld scene).

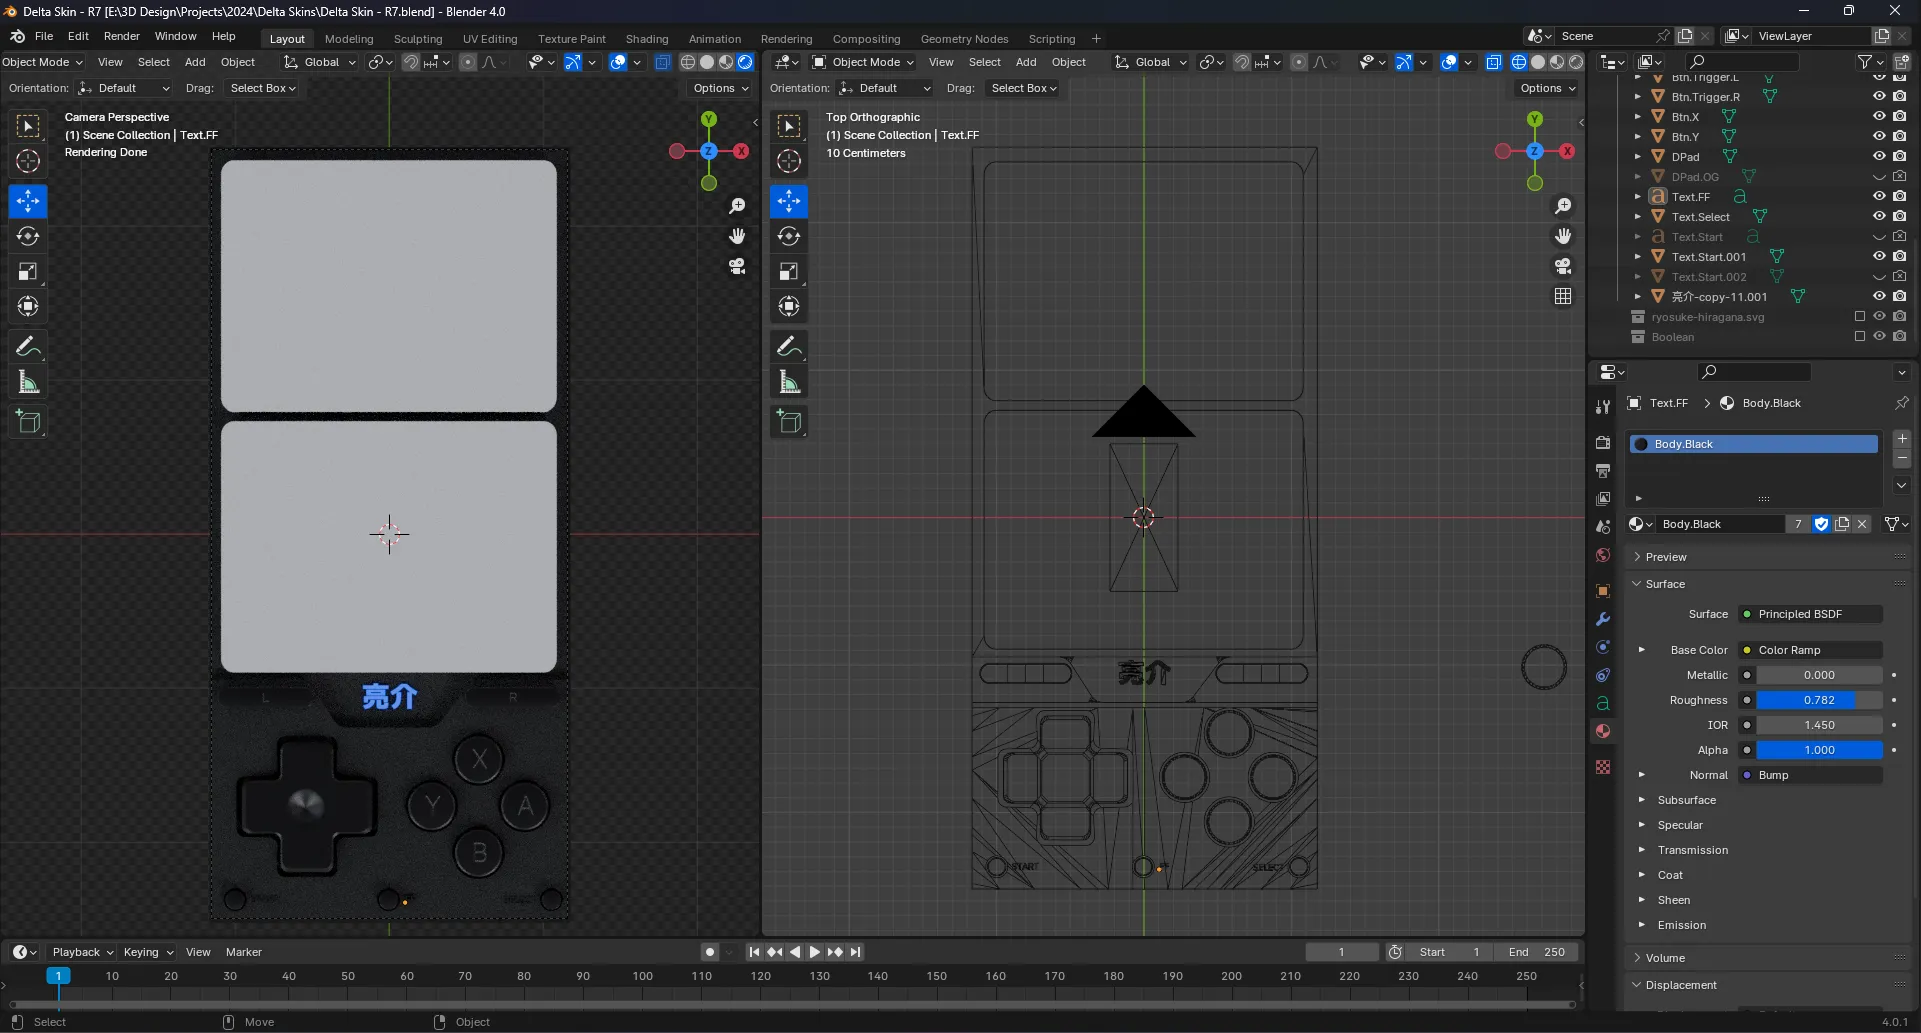
I took the wireframe with buttons outlined and imported it into Blender as a “Reference Image” in the top down view.
I setup a camera, changed the output settings to the largest resolution I needed, and then positioned and zoomed the camera so it framed the skin perfectly. I locked one of my viewports in this position so I could keep track of how things would look ultimately.
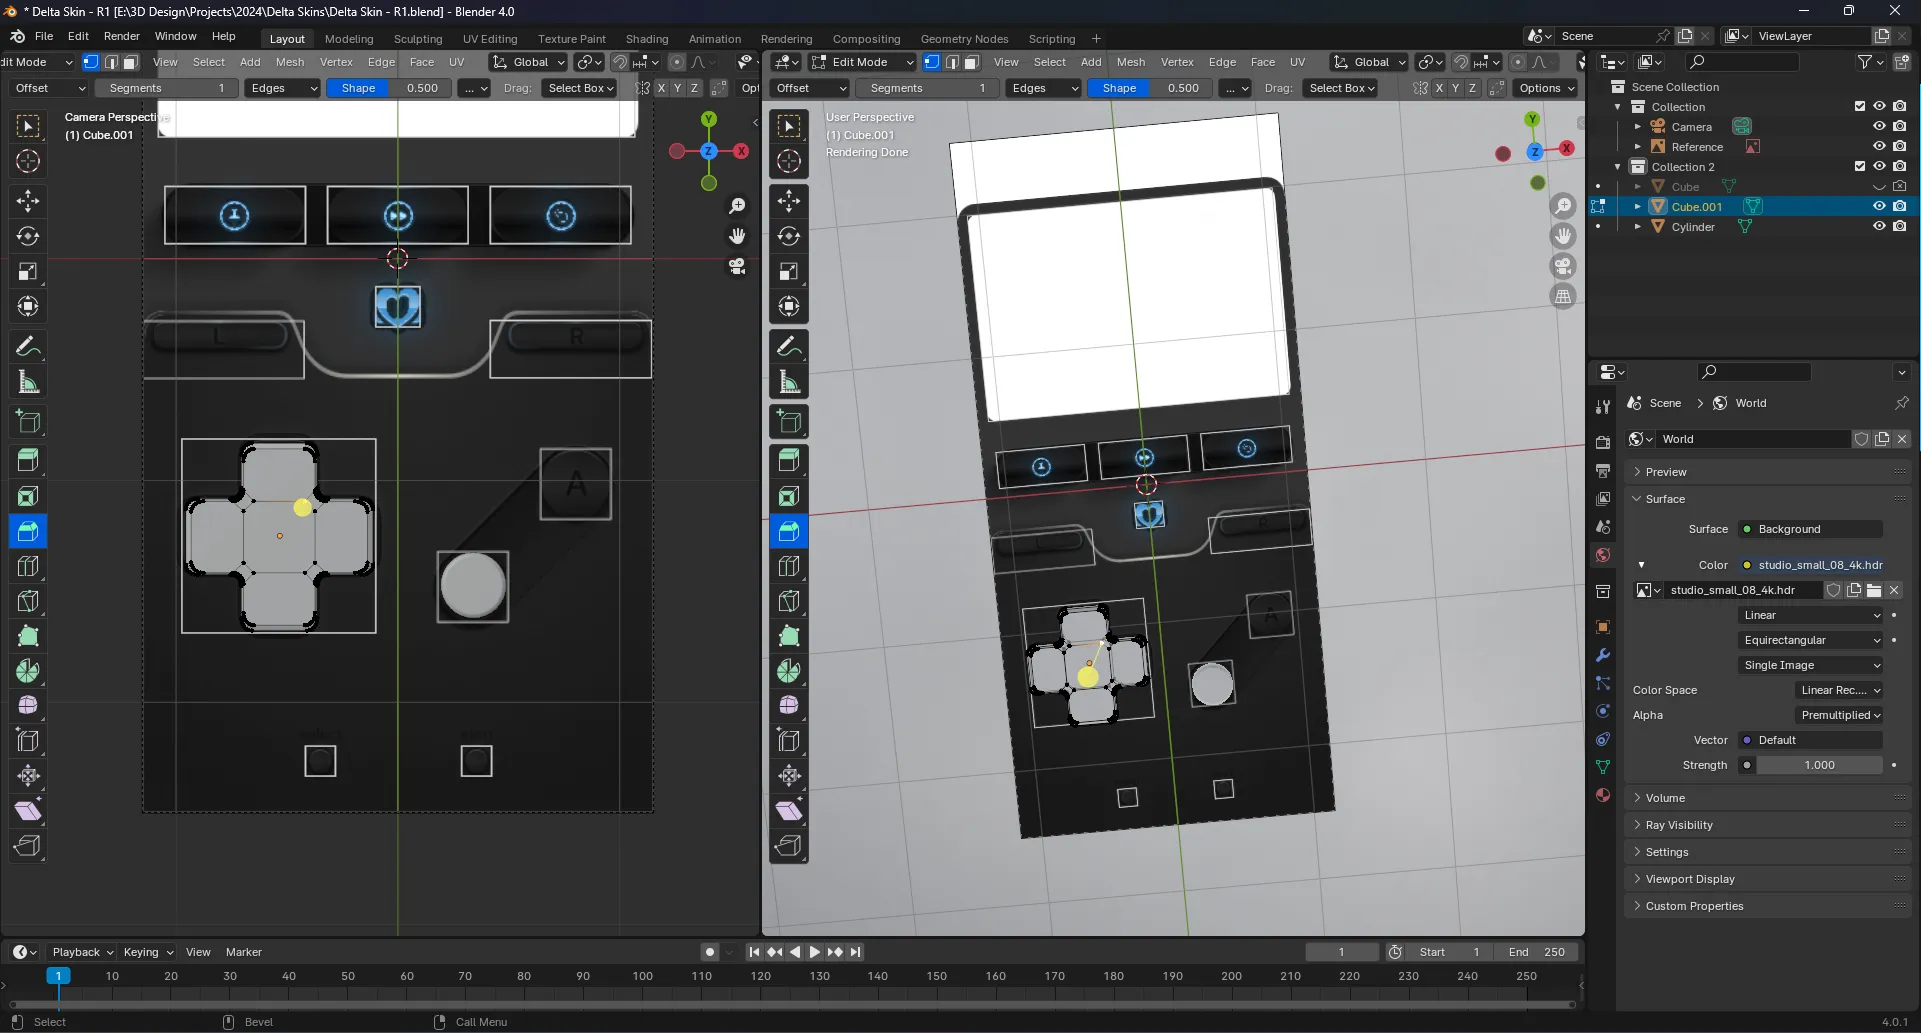
I started by making all the buttons. The d-pad was made from a cube and extruding 4 sides on the same axis, then beveling it a bit to smooth it out. And the buttons are cylinders that are also beveled. The triggers are the face buttons, but I knife a new edge down the middle and slide one half to the side.
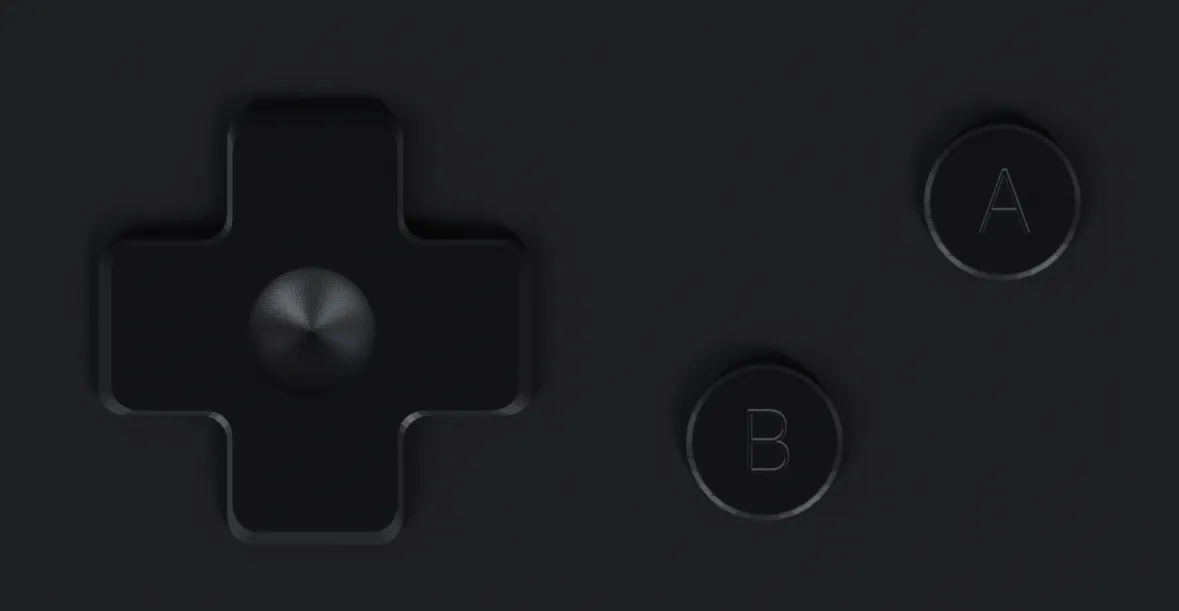
I added a bump map to the buttons to give the impression of the letters (like “A” and “B”). I exported the UV maps of each button into Photoshop, threw down a light version of the Inter font in the middle, and called it a day.

The d-pad uses a bump map with a radial gradient to create the circular “inset” effect. It all works surprisingly well despite how simple it is.
The body of the “device” was the most difficult part. Once I had the buttons, I tried making a plane and using Blender’s Boolean modifier with all 6+ buttons (so 6+ different modifiers) to cut out the shapes. This kinda worked, but produced low quality topology and in some cases didn’t work at all (with Blender refusing to cut some shapes out)
For the second round, I took a different approach, kind of similar to the “high poly / sub-d to low poly” workflow. I created a Plane again, but this time I manually loop cut to and knifed out areas around the buttons. The topology isn’t perfect either, but it achieved what I needed.
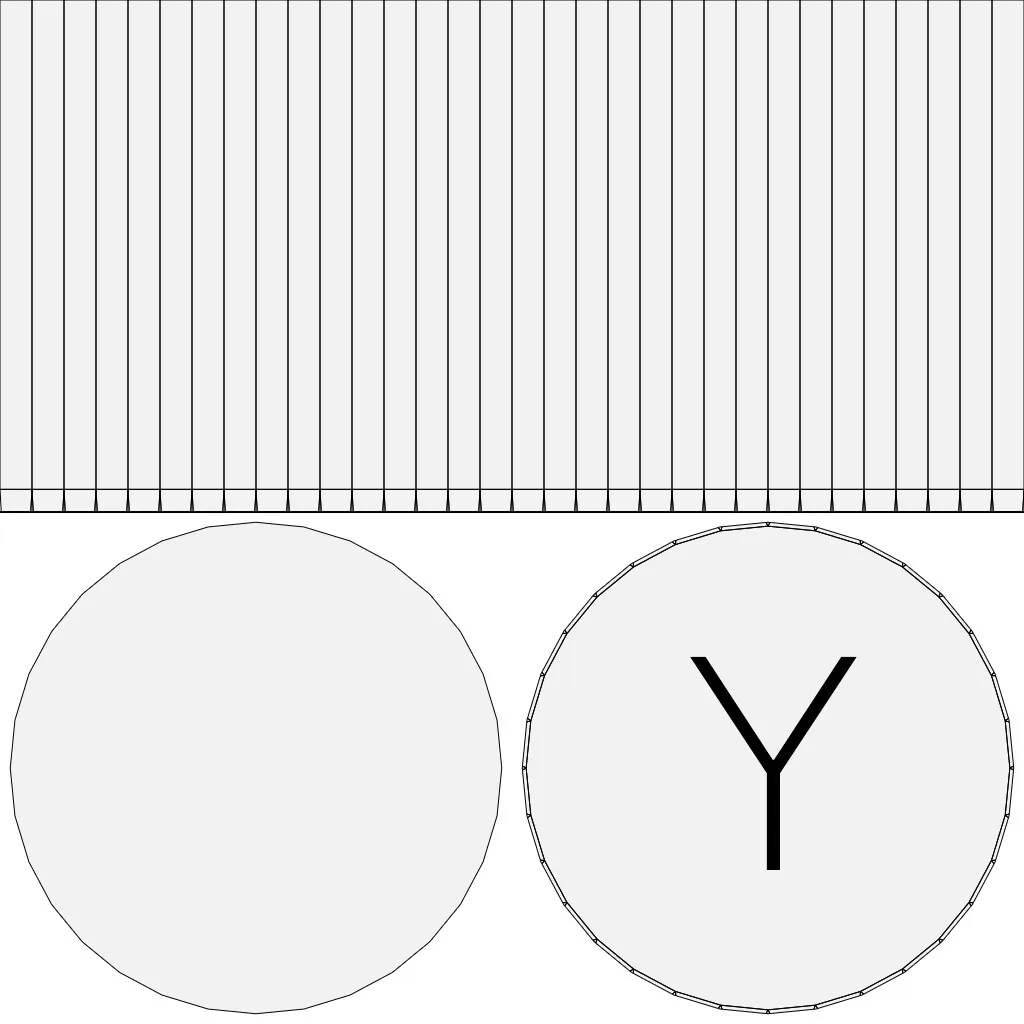
For the circular buttons I basically focused on creating a square (or 4-point polygon) around the button. You also want to make sure the area around is “braced” (e.g. you don’t want a circle directly next to a rounded edge with a “pinched” vertex supporting 4+ edges). Then I subdivide the face (aka polygon) 3-4 times - this ensures the circle is rounder. With all the faces selected, I right click, go to Loop Tools, and select Circle from the secondary dropdown. Depending on the surrounding geometry, this produces a pretty perfect circle that you can scale and move to adjust to your needs.
💡 Don’t have Loop Tools in your menu? Try enabling it in the Blender settings under the Addons tab. It’s installed with Blender, but disabled by default.
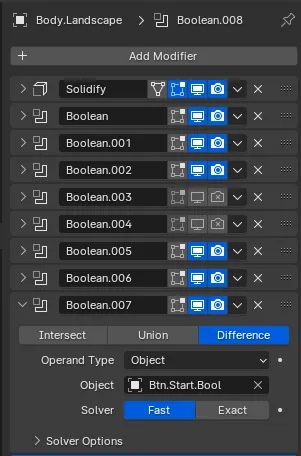
Ultimately though this ended up being overkill, and I ended up just remaking it using the Boolean modifier. I duplicated each button and scaled them up a bit (to represent the “hole” housing the button), then I applied about 10 Boolean modifiers (one for each button basically). I had issues at first where the mesh was disappearing when applying too many Boolean modifiers, but I fixed this by changing the setting from Exact to Fast.
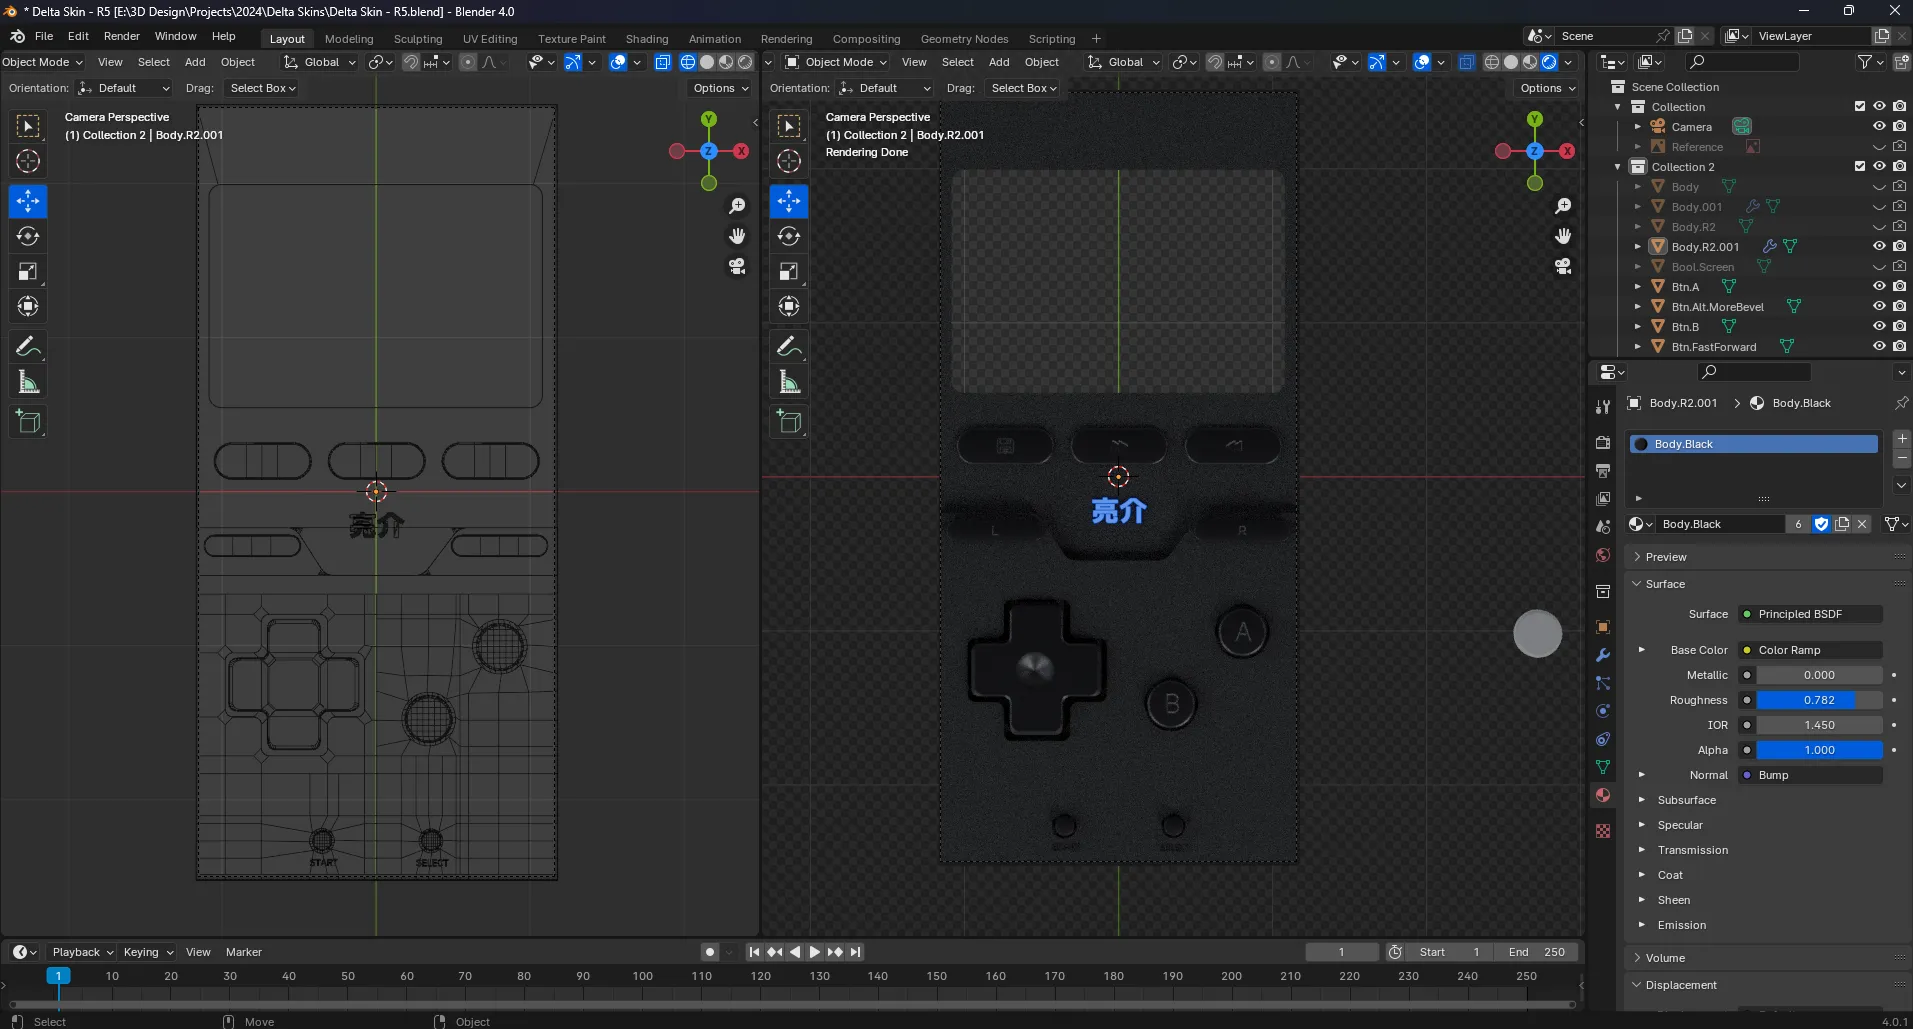
This setup was much better, and I was able to go from Portrait to Landscape really easily by just moving things around (instead of remodeling the body). Also was great for different emulator cores, where some have more buttons than others or different placement — which would require a custom body model for each with the previous method.
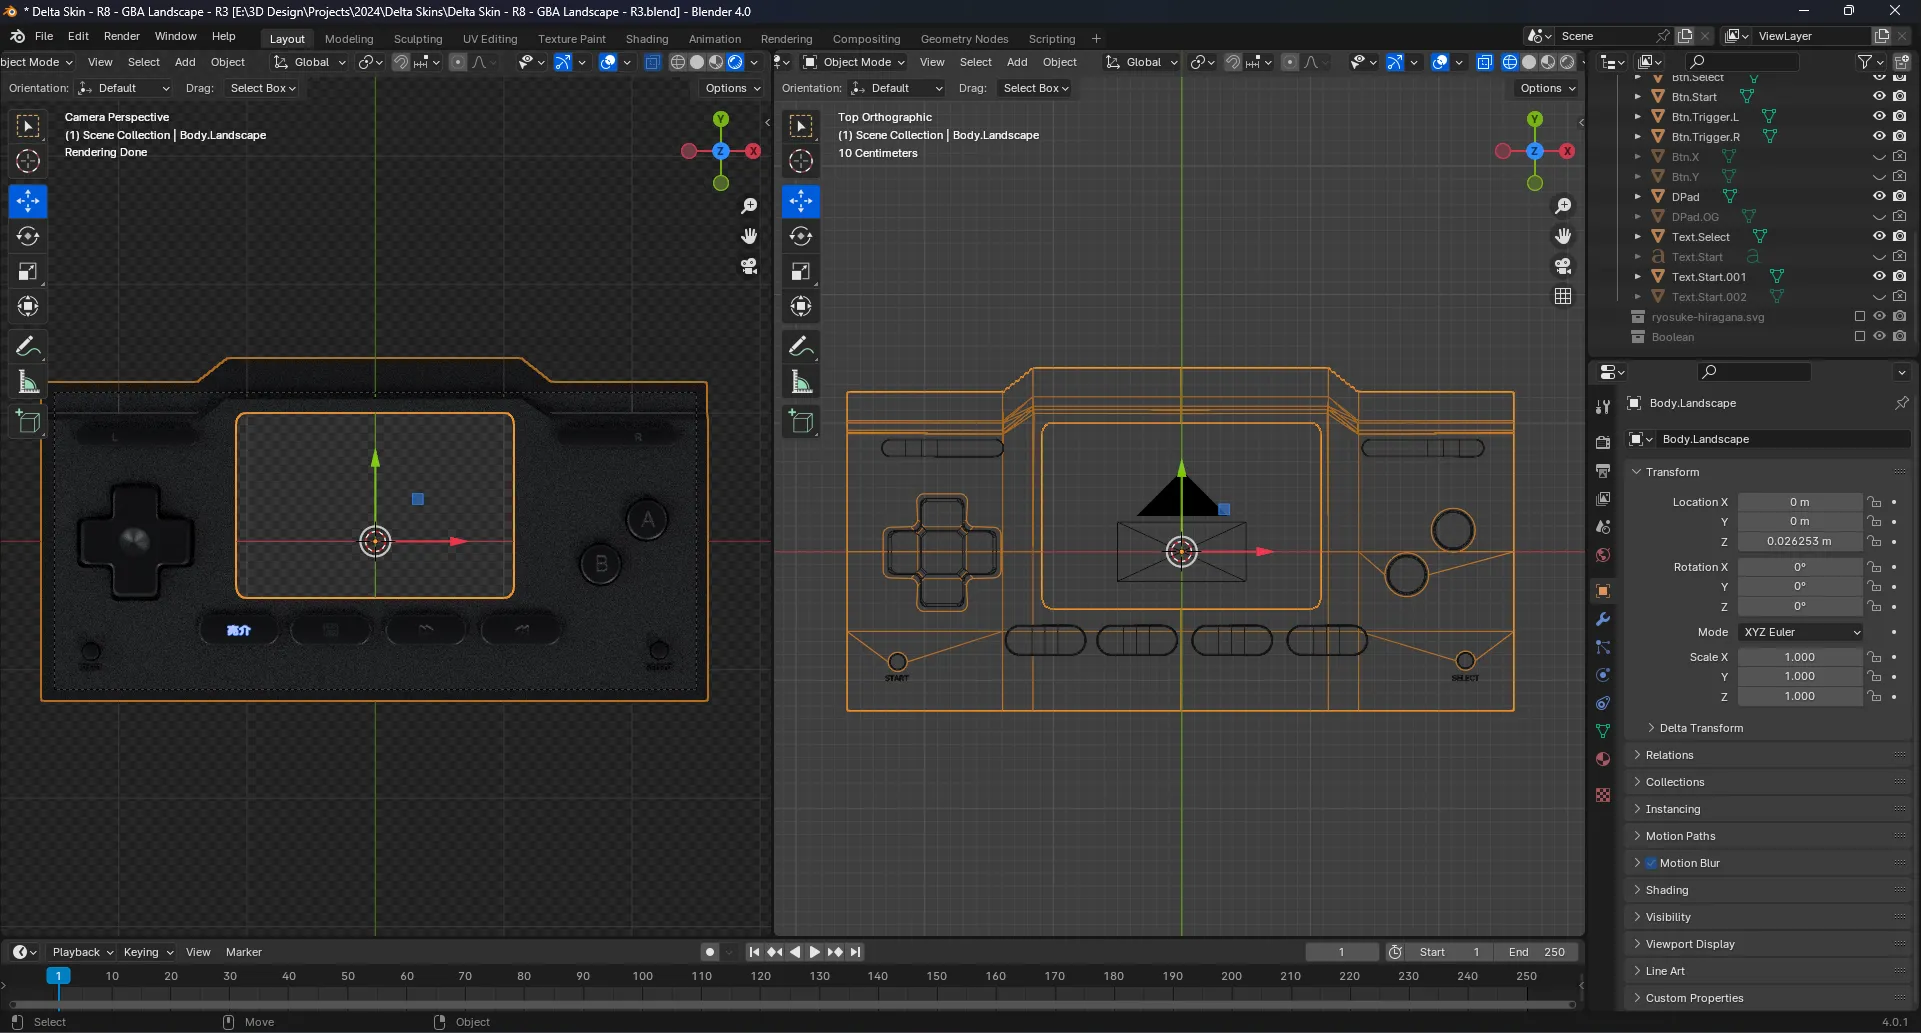
Here you can see the landscape version which took only a couple minutes to put together with the boolean setup.
I rendered these out at the max resolution (aka large at 1179 x 2256) and created smaller copies for each size using Windows’ Image Resizer app.
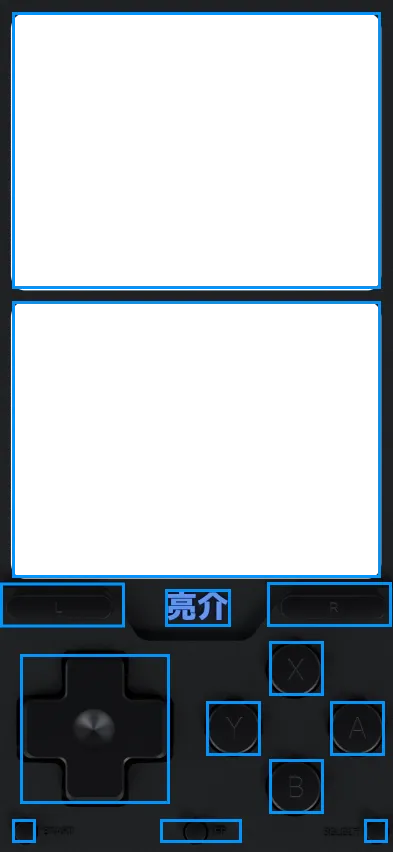
Mapping out buttons
Now that the skin’s designed and we have all the different modes, we can work on mapping out the buttons.
You’ll want to import the smallest resolution of each mode (portrait, landscape, etc) into Figma/Illustrator and start laying out the hitboxes.
Make sure to reference the sample template info.json for each platform to know what buttons to do (DS for example has X and Y buttons, which GBA doesn’t).
Besides the standard button set for each platform, you also have access to:
quickSave- Creates a new save state in the only Quick Save slot.quickLoad- Loads the last “Quick Save” save statetoggleFastForward- Toggles frame limiter on and off to increase or decrease gameplay speedmenu- Access Delta’s in-game menu that has save state, loading save, hold button, and exit game buttons.
Once you have things mapped out in a design software, you can just select each hitbox and copy the width, height, X, and Y properties of each button.
{
  "inputs": ["start"],
  "frame": {
    "x": 267,
    "y": 473.5,
    "width": 125,
    "height": 45
  }
},
Each button should be an “object” (JS-talk for the properties between a { and }) under the specific mode’s items property (for example representations.iphone.edgeToEdge.portrait.items).
You can verify you placed the buttons correctly by using the debug mode in the info.json. It looks like this:

Screen FX
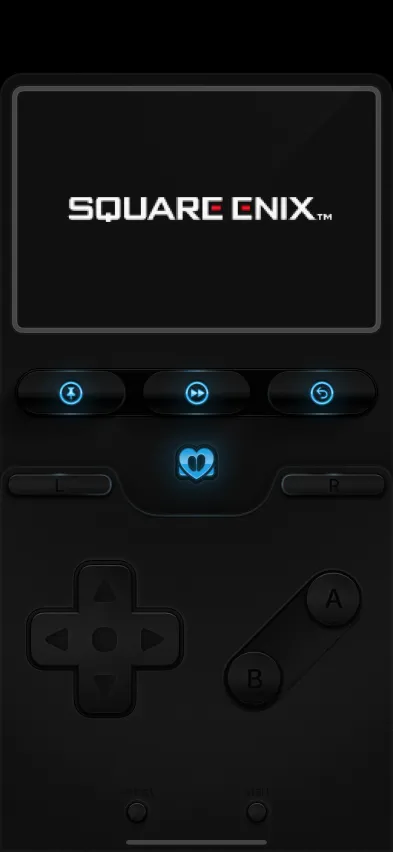
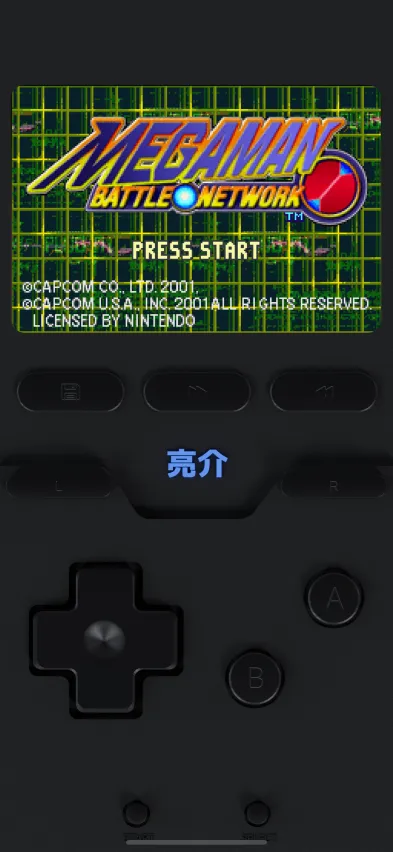
You can also apply cool effects using the screens property. I picked up this cool effect from the Lux skin. You basically duplicate the screen, blur it, and then stack the real screen on top — this way you get a nice blurred color outside of the screen that matches what’s actually happening.
// The backlit effect
"screens": [
	// The backlit screen (blurred and cropped)
  {
    "inputFrame": {
      "x": 0,
      "y": 0,
      "width": 256,
      "height": 224
    },
    "outputFrame": {
      "x": -397,
      "y": 0,
      "width": 983,
      "height": 852
    },
    "filters": [
      {
        "name": "CIColorControls",
        "parameters": {
          "inputBrightness": -0.15
        }
      },
      {
        "name": "CIGaussianBlur",
        "parameters": {
          "inputRadius": 12
        }
      },
      {
        "name": "CICrop",
        "parameters": {
          "inputRectangle": {
            "x": 10,
            "y": 10,
            "width": 256,
            "height": 214
          }
        }
      }
    ]
  },
  // The real gameplay screen stacked on top
  {
    "inputFrame": {
      "x": 0,
      "y": 0,
      "width": 240,
      "height": 160
    },
    "outputFrame": {
      "x": 12,
      "y": 86,
      "width": 369,
      "height": 247
    }
  }
]
The way this works, is your skin image is stacked on top of everything — even the screen. You’ll notice that if you accidentally export a JPG or non-transparent PNG, or maybe just fill in the screen space accidentally.
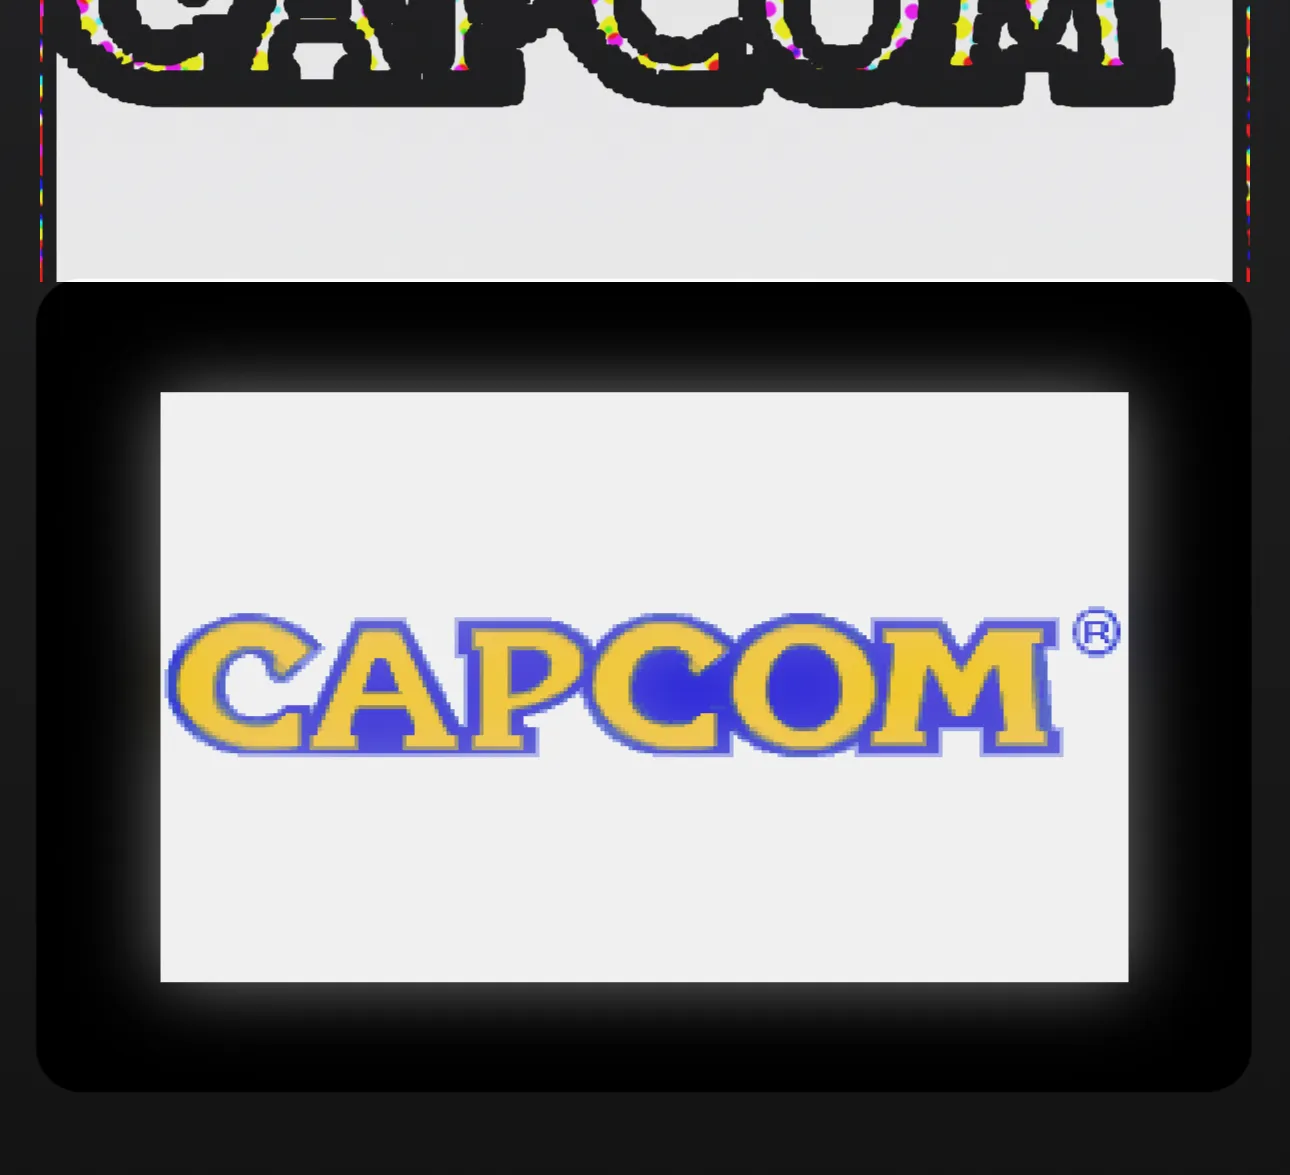
So to really take advantage of this effect, your skin should be fairly translucent around the screen, this way the colors underneath come through. You can see an example here side by side, left is opaque (filled in completely) and right is transparent.
What other screen effects are available?
Pick a filter from the Apple documentation, they’re all under Core Image > CIFilter. There’s a reference page here that you can see side by side examples of what each filter does. There’s also a list of parameters, these are what you’d include in the JSON to control the effect.
Here are some ideas using filters:
- You could make an “old-timey” skin that applies a sepia-tone filter over the screen using the
CISepiaToneproperty. - Or make a skin that looks like shattered glass and has a bokeh blurred screen underneath it using
CIBokehBlurfor a more surreal effect. - Not a fan of those hard edges on old games and miss the slightly blurred look of analog TVs? Try using the
CIBloomfilter to slightly blur and blow the image out. You could really get close to those shaders you see in retro game remasters and emulators that mimic old TVs and displays (besides maybe scanlines). - Maybe go wild and apply a comic book shader to your game using
CIComicEffect. It’d be cool if the game played alongside smaller panels in the background that were comic versions of what was happening.
Here’s an example of what the sepia filter (CISepiaTone) looks like applied to the gameplay screen at an intensity of 4.20:

The code for reference. You want to put your filters on the same “level” as your inputFrame and outputFrame . The filters array accepts an object with a name of the Apple filter, and a parameters object that you can place any of the filter’s input properties into.
"screens": [
  {
    "inputFrame": {
      "x": 0,
      "y": 0,
      "width": 240,
      "height": 160
    },
    "outputFrame": {
      "x": 12,
      "y": 86,
      "width": 369,
      "height": 247
    },
    "filters": [
      {
        "name": "CISepiaTone",
        "parameters": {
          "intensity": 4.2
        }
      }
    ]
  }
]
And here’s what the Comic Book filter looks like (on top), with the Bloom filter applied to the gameplay screen:
Figma plugin / Web app
There’s definitely room for a Figma plugin that analyzes a frame and gives the user a info.json with all the buttons mapped out (likely using layers/frames named correspondingly to buttons).
You could do it with a web app, but by the time you’ve written the logic for drag and drop and resizing — the Figma plugin writer has moved on with their life and is playing PS5 probably lol.
But this would definitely help the manual mapping part of the process, and help empower a lot of people who are intimidated by the JSON format (or code in general).
Download my skin
If you’re interested in using my skin, you can download the different versions on GitHub, where you can also check out the source code. There’s a normal version of the skin and a “FX” version that’s slightly transparent to see the backlighting. So far it’s GBA only, but I’ll try to post up a NES, GBC, and even DS one soon.
Have it your way
I hope this helps you understand how to make your own Delta skin, both the easy and hard way, and even outline some cool ways to step up your existing skins.
If you do make a skin make sure to send it my way! I’m always curious to see what people are working on. And of course, if you have any comments or questions feel free to reach out on Threads, Mastodon, or Twitter.
Stay curious, Ryo